







How Can I Make My Home More Energy Efficient With Ventilation?
Introduction
Making your home more energy efficient does not always mean adding more insulation or buying new heating equipment. Ventilation also plays an important role. A well-ventilated home can stay fresher, more comfortable, and easier to heat when the airflow is planned correctly.
Many homeowners worry that bringing fresh air into the house will waste heat. However, closing every window and blocking every air opening can create a different problem. Moisture, stale air, and indoor pollutants can build up. As a result, the home may feel damp and uncomfortable.
The key is to find the right balance between fresh air and heat retention.
In this guide, we will explain how Ventilation can improve energy efficiency. We will also look closely at trickle vents for windows, including how they work, where they should be used, and why they can be useful in modern homes.

Why Does Ventilation Matter for Energy Efficiency?
A home needs fresh air for several reasons. People breathe, cook, shower, clean, and dry clothes indoors. These everyday activities add moisture and pollutants to the air.
Without enough airflow, humid air can remain inside for long periods. Consequently, condensation may appear on windows, walls, and other cold surfaces.
At first, this may seem like a small issue. However, regular condensation can encourage mould and create a damp smell. It may also make rooms feel colder.
Good Ventilation helps move stale and humid air out while allowing fresh air to enter. Therefore, the heating system does not have to work against excessive dampness and poor indoor air quality.
Energy efficiency is not simply about keeping every door and window shut. Instead, it is about controlling how air enters and leaves your home.
What Is Energy-Efficient Ventilation?
Energy-efficient Ventilation means providing enough fresh air without creating unnecessary heat loss.
This balance can be achieved in several ways. For example, a home may use background vents, extractor fans, or a mechanical ventilation system.
The right solution depends on the property. A small flat will have different needs from a large detached house. Similarly, a modern airtight property may need a more controlled ventilation system than an older home.
Good planning is therefore important.
The aim is simple:
- Bring fresh air into living spaces.
- Remove stale and humid air.
- Reduce unnecessary draughts.
- Control indoor moisture.
- Maintain comfortable temperatures.
- Avoid wasting heating energy.
When these factors work together, your home can become healthier and more efficient.
How Do Trickle Vents for Windows Help?
Trickle vents for windows are small openings fitted into or around a window frame. They allow a controlled amount of fresh outdoor air to enter the room.
Unlike opening a full window, a trickle vent provides background airflow without creating a large opening.
This makes them useful during colder weather. You can keep the main window closed while still allowing some fresh air into the room.
Modern homes can be relatively airtight. While this helps reduce unwanted draughts, it also means that natural air movement may be reduced. As a result, planned airflow becomes even more important.
Why Are Trickle Vents Useful?
There are several reasons why homeowners choose trickle vents for windows.
First, they provide continuous background airflow. Therefore, you do not need to open the entire window every time a room feels stuffy.
Second, they can help control moisture. Bedrooms, kitchens, and other occupied spaces can collect moisture during normal daily activities.
Third, they can support better indoor air quality. Fresh air can enter while stale air leaves through suitable extraction points.
Finally, they can help reduce the need for frequent full-window opening. This can be useful during cold, windy, or rainy weather.
However, trickle vents are not a replacement for every other form of ventilation. Bathrooms and kitchens may still need effective extractor fans.
Where Should Trickle Vents for Windows Be Used?
The best location depends on the room and the window design.
Bedrooms
Bedrooms are a common location because people spend many hours sleeping in them. During the night, occupants release moisture and carbon dioxide into the air.
A background air supply can help keep the room fresher. As a result, the bedroom may feel more comfortable in the morning.
Living Rooms
Living rooms can also benefit from controlled airflow. Several people may spend time there, especially in the evening.
Furniture, carpets, and soft furnishings can also affect indoor air quality. Therefore, steady fresh-air flow can be helpful.
Home Offices
Working from home means many people now spend longer periods indoors. A closed office can quickly feel warm and stuffy.
A suitable trickle vent can provide background airflow without requiring the window to stay open.
Do Trickle Vents Waste Heating Energy?
This is one of the most common questions about trickle vents for windows.
A small amount of outdoor air does enter through the vent. However, this controlled airflow serves an important purpose.
If a home has too little airflow, moisture can build up. High humidity can make the air feel uncomfortable and may increase condensation.
At the same time, opening a large window for long periods can create a much larger exchange of indoor and outdoor air.
A trickle vent provides a more controlled approach.
Therefore, the goal is not to stop all air movement. Instead, it is to manage airflow so that the home receives the fresh air it needs without relying on large, uncontrolled openings.
Improve Energy Efficiency by Controlling Moisture
Moisture is a major part of indoor comfort.
Everyday activities create water vapour. Cooking, showering, washing clothes, and drying laundry can all increase humidity.
When humid air meets a cold surface, condensation can form. Over time, repeated condensation can cause problems.
Good Ventilation helps remove moisture before it spreads around the home.
For example, use an extractor fan when cooking. Likewise, run the bathroom extractor during showers and for the recommended period afterward.
Where possible, dry clothes outdoors. If you must dry them indoors, provide suitable airflow.
These small changes can make a big difference.
Use Extractor Fans in High-Moisture Areas
Kitchens and bathrooms usually produce more moisture than bedrooms and living rooms.
For this reason, these areas need effective extraction.
A kitchen extractor can remove steam, cooking smells, and airborne particles near the source. Meanwhile, a bathroom extractor can remove humid air after a shower.
Fresh air must also be able to enter the property. Otherwise, extraction may become less effective.
This is where background vents can work as part of a wider system.
For example, fresh air may enter through a window vent in a bedroom or living space. Stale air can then move through the property before being removed from a bathroom or kitchen.
Keep Your Home Warm Without Blocking Ventilation
It may seem logical to block vents when the weather becomes cold. However, this can cause unwanted problems.
Blocked vents can reduce fresh-air supply. Consequently, moisture may stay inside for longer.
Instead, focus on improving the home’s overall efficiency.
Check for gaps around doors and windows that create uncontrolled draughts. Seal suitable gaps where appropriate, while keeping designed ventilation openings clear.
Good insulation also matters. Insulated walls, roofs, floors, and windows can help reduce heat loss.
The important point is that insulation and Ventilation should work together.
Insulation helps keep heat inside. Ventilation helps control air quality and moisture.
Open Windows Carefully
Opening windows is a simple way to refresh indoor air. However, leaving windows wide open for long periods can allow heat to escape.
A better approach can be short periods of purposeful airing when appropriate.
For example, open a window for a short time when indoor air feels stale. Afterward, close it and allow your normal background ventilation system to continue working.
During very cold weather, use your home’s designed ventilation rather than leaving large windows open for extended periods.
This can help maintain a better balance between fresh air and heating efficiency.
Maintain Your Ventilation Products
Even a good ventilation system will work less effectively if it is dirty or blocked.
Dust can collect around vents. Extractor fans can also collect dirt and grease, especially in kitchens.
Therefore, check vents regularly and clean them according to the manufacturer’s instructions.
Do not cover or block a trickle vent because you feel a draught. Instead, check whether the vent has an adjustable setting.
If airflow seems unusually weak, inspect the system. A professional may be needed if there is a larger problem.
Regular maintenance can help keep airflow consistent and efficient.
Make Your Home More Airtight in the Right Places
A common mistake is to think that an energy-efficient home should have no airflow at all.
That is not the goal.
A well-performing home should limit uncontrolled air leakage while maintaining controlled ventilation.
For example, sealing gaps around suitable areas can reduce unwanted draughts. At the same time, designed vents should remain open and functional.
This approach helps separate useful airflow from accidental heat loss.
As a result, your heating system can operate more efficiently while the home still receives fresh air.
Consider a Mechanical Ventilation System
Some homes may benefit from a mechanical ventilation system.
Mechanical systems use fans to control the movement of air. Depending on the system, they can either extract stale air, supply fresh air, or do both.
One advanced option is Mechanical Ventilation with Heat Recovery, commonly known as MVHR.
An MVHR system removes stale indoor air while bringing in fresh outdoor air. Importantly, it can recover some heat from the outgoing air and transfer it to incoming air.
This can be useful in well-insulated and airtight homes.
However, installation costs and system design should be considered carefully. A professional assessment can help determine whether such a system is suitable for your property.
Simple Ways to Improve Home Energy Efficiency
You do not always need a major upgrade.
Instead, start with simple changes:
- Keep designed vents clear.
- Use extractor fans during cooking and showering.
- Avoid drying large amounts of laundry in closed rooms.
- Check windows and doors for unwanted draughts.
- Use suitable trickle vents for windows for background airflow.
- Clean ventilation openings regularly.
- Improve insulation where needed.
- Avoid leaving windows open for long periods during cold weather.
- Monitor condensation around windows.
- Get professional advice if rooms remain damp or stuffy.
Small improvements can add up over time.
How to Know If Your Home Needs Better Ventilation
Several signs can suggest that airflow needs attention.
Watch for:
- Regular condensation on windows
- Mould around window frames
- Musty smells
- Stuffy bedrooms
- High indoor humidity
- Slow-drying surfaces
- Persistent cooking smells
- Steam that remains after showers
These signs do not always mean the ventilation system is faulty. However, they are worth investigating.
A simple humidity monitor can also help you understand indoor conditions.
FAQs About Energy-Efficient Ventilation
Can ventilation make my home more energy efficient?
Yes, when it is correctly designed and controlled. Good airflow can reduce excess moisture and improve indoor comfort while avoiding unnecessary air loss.
Are trickle vents for windows energy efficient?
They can support energy efficiency by providing controlled background airflow. They also allow fresh air to enter without requiring the whole window to remain open.
Should I close trickle vents in winter?
Usually, you should follow the manufacturer’s guidance and the ventilation requirements of your property. Blocking designed ventilation can reduce airflow and increase moisture problems.
Do trickle vents stop condensation?
They can help reduce condensation when poor airflow and excess indoor moisture are contributing factors. However, they are only one part of a complete moisture-control strategy.
Can I use trickle vents instead of extractor fans?
Usually, no. Trickle vents provide background airflow, while extractor fans are designed to remove larger amounts of humid or polluted air from areas such as kitchens and bathrooms.
How Much Ventilation Does a Room Need?
Introduction
Good Ventilation helps keep a room fresh, comfortable, and healthy. It allows stale air to leave and lets fresh air enter. Without enough air movement, moisture, smells, dust, and indoor pollutants can build up.
However, many people ask an important question: how much ventilation does a room need? The answer depends on the room size, number of people, how the space is used, and how much moisture it produces.
A bedroom, kitchen, bathroom, and living room do not all need the same level of airflow. Therefore, it is important to understand the basic rules before choosing vents or other ventilation products.
Why Does a Room Need Ventilation?
Every home produces moisture and indoor pollutants during normal daily activities. Cooking creates steam. Showers add moisture to the air. Drying clothes indoors can also increase humidity. Even breathing adds a small amount of moisture.
At the same time, cleaning products, furniture, carpets, and some building materials can release particles or gases into indoor air.
Good Ventilation helps remove these unwanted elements. As a result, the room can feel fresher and more comfortable.
It can also help reduce condensation. When warm, moist air meets a cold surface, water can form. Over time, this may encourage mould growth and damage walls, ceilings, window frames, and other surfaces.
Fresh air also helps control unpleasant smells. Therefore, proper airflow is useful in almost every part of a home.
How Much Ventilation Does a Room Need?
There is no single airflow figure that suits every room. Instead, the required airflow depends on several factors.
Room size is one key factor. A large room normally needs more fresh air than a small room. Occupancy matters too. A room used by four people produces more moisture and carbon dioxide than the same room used by one person.
Room purpose is another important point. Kitchens and bathrooms often need stronger extraction because they create more moisture. Bedrooms and living rooms usually need a steady supply of fresh air.
For UK homes, ventilation should also follow the relevant building regulations and guidance. New or renovated homes may need specific ventilation systems based on the building design.
For simple home planning, however, a useful approach is to think about air changes per hour (ACH). This means how many times the air inside a room is replaced with fresh air during one hour.
For example, if a room contains 50 cubic metres of air and the system supplies 50 cubic metres of fresh air each hour, that equals one air change per hour.
The exact rate needed depends on the room and its use. Therefore, homeowners should not choose equipment based only on room size.
A Simple Way to Estimate Airflow
You can use a simple calculation to understand the basic airflow requirement:
Room volume = Length × Width × Height
For example, imagine a bedroom that is:
- 4 metres long
- 3 metres wide
- 2.4 metres high
The room volume is:
4 × 3 × 2.4 = 28.8 cubic metres
If you wanted one complete air change each hour, the basic airflow would be around 28.8 cubic metres per hour.
However, this does not mean that one air change per hour is always enough. Different rooms have different needs. Building regulations, occupancy, moisture levels, and the type of ventilation system should also be considered.
As a result, this calculation is best used as a simple guide rather than a complete design method.
Ventilation Needs by Room
Different rooms create different levels of moisture and pollutants. Consequently, they need different approaches to airflow.
Bedrooms
Bedrooms need fresh air because people spend several hours sleeping in them. During the night, occupants add carbon dioxide and moisture to the room.
A steady background airflow can help keep the air fresh without creating a strong draught. Window-based vents can be useful where suitable.
For example, window trickle vents can provide a small and continuous flow of fresh air while the window remains closed.
Living Rooms
Living rooms often have several occupants, furniture, carpets, and electronic equipment. Therefore, good background airflow can help maintain comfortable indoor air.
Opening windows for short periods can provide rapid air exchange. However, this method depends on weather, outdoor noise, security, and user habits.
A permanent ventilation solution can offer more consistent airflow.
Kitchens
Kitchens create a high level of moisture and heat. Cooking can quickly increase humidity, especially when boiling water or using a hob.
An effective extractor fan is often important in this area. It should remove moisture and cooking smells close to the source.
Fresh air must also enter the home to replace the air that the extractor removes. Otherwise, the extractor may not work as effectively.
Bathrooms
Bathrooms produce a lot of moisture in a short time. Showers and baths can fill the air with steam.
Therefore, bathrooms usually need effective extraction. A suitable extractor fan can remove humid air before it spreads through the house.
Keeping the bathroom door closed during and after a shower can also help control moisture. At the same time, allowing the extractor to run for the required period can improve results.
What Are Trickle Vents?
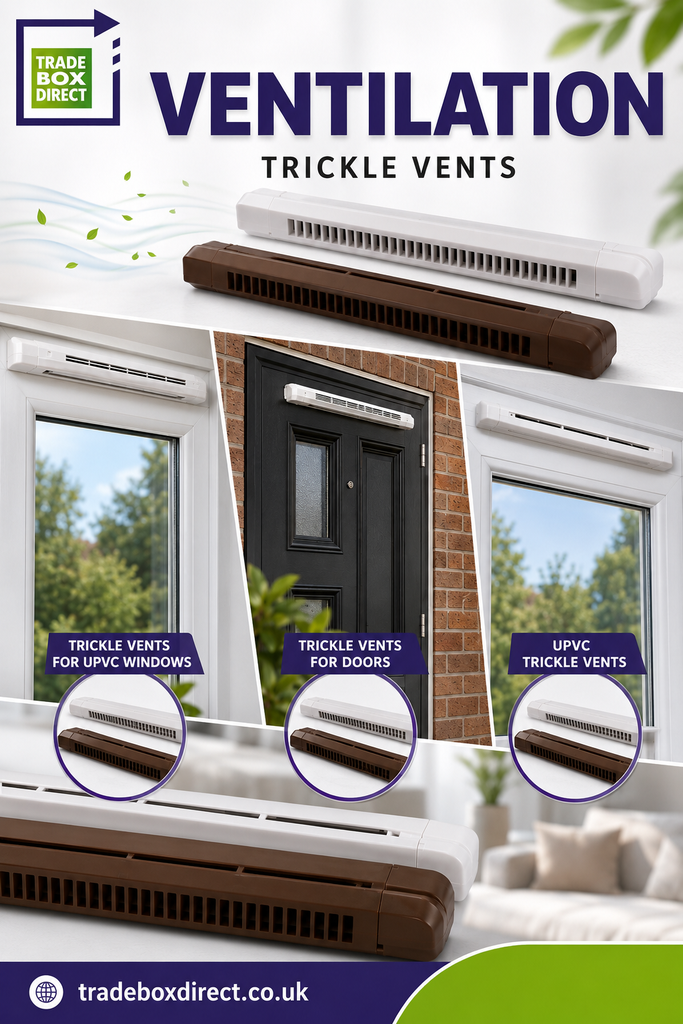
Trickle vents are small openings fitted into windows or doors. They allow a controlled amount of fresh air to enter a room.
Unlike opening a full window, these vents provide background airflow while the window stays closed. This can be useful during colder months when homeowners want fresh air without creating a large draught.
The design is simple. Outside air enters through the vent, while stale indoor air can leave through another ventilation route, such as an extractor fan or another opening.
There are several products available for different window and door types.
Trickle Vents for UPVC Windows
Trickle vents for UPVC windows are designed to provide background airflow through UPVC window systems.
They can be useful in bedrooms, living rooms, and other areas where steady fresh air is needed. However, the correct product should match the window design and installation requirements.
A suitable vent should also be fitted correctly. Poor installation can reduce airflow and may affect the performance of the window.
Trickle Vents for Doors
Trickle vents for doors can provide another way to introduce fresh air into a property.
They may be suitable for certain internal or external door applications, depending on the design. Before installation, check the product specifications and the requirements of the door.
In addition, the vent should not interfere with the door’s safety, security, or weather performance.
UPVC Trickle Vents
UPVC trickle vents are widely used with modern UPVC window systems.
These vents are available in different sizes, colours, and designs. Therefore, homeowners can often choose an option that matches the window frame.
The important point is not simply to select the smallest or cheapest product. Airflow capacity, compatibility, installation position, and room requirements all matter.
How Do Trickle Vents Help a Home?
Trickle vents can support background airflow throughout the day. This is especially useful when windows remain closed for security or comfort.
For instance, opening a window for ten minutes can quickly replace indoor air. Yet once the window closes, the airflow stops. A background vent can provide a more continuous supply.
That does not mean a trickle vent replaces every other ventilation method. Kitchens and bathrooms may still require mechanical extraction.
Instead, these vents can work as part of a wider ventilation strategy.
What Happens If a Room Has Too Little Ventilation?
Poor Ventilation can create several problems.
First, indoor air may become stale. People may notice a stuffy feeling, especially in bedrooms or rooms with several occupants.
Next, moisture can build up. This can lead to condensation on windows and cold surfaces.
Over time, repeated condensation may contribute to mould growth. Mould can leave marks on walls and ceilings and may create unpleasant smells.
Poor airflow can also allow cooking smells, cleaning fumes, and other indoor pollutants to remain in the room for longer.
Therefore, improving airflow can make a noticeable difference to indoor comfort.
Can a Room Have Too Much Ventilation?
Yes. Too much uncontrolled airflow can also cause problems.
Excessive airflow may create uncomfortable draughts. It can also make a home harder to heat, particularly during cold weather.
Furthermore, poorly planned openings may allow outdoor noise, dust, or pollution to enter.
The goal is not to create as much airflow as possible. Instead, the aim is to provide the right level of ventilation for the room and the people using it.
A balanced approach is usually more effective.
How Can You Improve Room Ventilation?
There are several simple ways to improve airflow.
1. Use Background Vents
Suitable window or door vents can provide a steady flow of fresh air.
2. Use Extractor Fans
Bathrooms and kitchens often benefit from mechanical extraction. These fans remove humid or polluted air close to the source.
3. Keep Air Paths Clear
Furniture should not block vents. Curtains, boxes, and other items can also restrict airflow.
4. Open Windows When Appropriate
Short periods of natural ventilation can refresh indoor air quickly. However, this should work alongside the home’s main ventilation system.
5. Control Moisture
Use lids while cooking and run bathroom extraction during showers. Dry clothes outdoors where possible.
6. Maintain Ventilation Products
Dust and dirt can reduce airflow. Therefore, vents and fans should be checked and cleaned according to the manufacturer’s instructions.
Choosing the Right Vent for Your Room
When choosing a vent, consider the room first. A bedroom may need background airflow, while a kitchen needs stronger moisture control.
Next, check the window or door material. UPVC, timber, and aluminium systems may require different products.
Then, check the airflow rate. A vent that is too small may not provide enough air. A product that is too large may create unwanted draughts.
Installation also matters. Follow the manufacturer’s instructions and relevant UK requirements.
If you are unsure about the correct airflow rate, speak with a qualified installer or ventilation professional.
Natural Ventilation vs Mechanical Ventilation
Natural Ventilation relies on windows, vents, air movement, and differences in indoor and outdoor pressure.
Mechanical ventilation uses fans or a dedicated system to move air.
Natural airflow can be simple and inexpensive. However, it depends on weather and user behaviour.
Mechanical systems offer more control. They can remove air from areas such as bathrooms and kitchens while supplying fresh air where required.
Some modern homes use mechanical ventilation with heat recovery, often called MVHR. These systems can exchange stale indoor air for fresh outdoor air while recovering heat from the outgoing air.
The best choice depends on the property, budget, building design, and ventilation needs.
Key Signs That a Room May Need Better Airflow
Look out for common warning signs:
- Regular condensation on windows
- Damp or musty smells
- Visible mould
- A stuffy feeling
- High indoor humidity
- Slow drying of wet surfaces
- Persistent cooking or bathroom smells
- Poor air quality when several people are in the room
One sign does not always mean there is a major problem. However, repeated issues should be investigated.
Frequently Asked Questions
How much ventilation does a bedroom need?
A bedroom needs enough fresh air to control carbon dioxide and moisture while people sleep. The exact airflow depends on room size, occupancy, and the home’s ventilation design.
Are trickle vents enough for a whole house?
Usually, trickle vents are part of a wider system. They provide background airflow, while kitchens and bathrooms may need mechanical extraction.
Should I leave window trickle vents open?
In most cases, these vents are designed to provide background airflow and can remain open when the room is occupied. Follow the manufacturer’s instructions and building requirements.
Do UPVC windows need trickle vents?
Some UPVC window installations require background ventilation. Whether a vent is needed depends on the property, window design, existing ventilation, and applicable building requirements.
Final Thoughts
The amount of air a room needs depends on its size, purpose, occupancy, and moisture level. Therefore, there is no single figure that works for every room.
A good Ventilation plan combines fresh-air supply with effective removal of stale and humid air. Bedrooms and living rooms can benefit from steady background airflow, while kitchens and bathrooms often need stronger extraction.
Products such as trickle vents for UPVC windows, trickle vents for doors, UPVC trickle vents, and window trickle vents can support this approach when they are correctly selected and installed.
Most importantly, do not focus only on airflow numbers. Consider comfort, moisture control, air quality, building design, and UK requirements together. With the right approach, a room can stay fresher, more comfortable, and less prone to condensation.
Can Wood Screws Be Used for Outdoor Projects?
Introduction
Outdoor projects need strong and reliable fasteners. Whether you are building a garden bench, fence, planter, shed, or timber frame, the right fastener can make a big difference. Many people ask, can wood screws be used for outdoor projects? The short answer is yes. However, the type of screw matters.
Standard wood screws can work well for some outdoor jobs. Yet, they may not last long when they face rain, moisture, or changing weather. For this reason, you should choose the right finish, material, size, and head type.
Good Screws should hold timber firmly and resist the conditions around them. In addition, they should be easy to drive and remove when needed. This guide explains how to choose wood screws for outdoor work. It also covers the benefits, limits, and best uses of different screw types.
Are Wood Screws Suitable for Outdoor Projects?
Yes, wood screws can be used outdoors. However, not every wood screw is suitable for outdoor use.
Outdoor timber faces rain, damp air, sunlight, frost, and temperature changes. As a result, a poor-quality screw can rust or lose strength over time. A screw with a suitable protective coating can offer much better protection.
For example, coated or corrosion-resistant screws are often a better choice for outdoor timber. They can handle moisture better than basic indoor screws. Therefore, always check the product details before using a screw outside.
The timber itself also matters. Softwood and hardwood can need different screw types. A long screw may work well for a heavy timber joint, while a smaller one may suit a light garden project.
Why Does Screw Material Matter Outdoors?
Moisture is one of the biggest problems for outdoor fasteners. When untreated metal meets water and air, rust can form. Over time, rust can weaken the screw and stain the wood around it.
That is why many outdoor fasteners use a protective coating. Some also use stainless steel or other materials that offer strong corrosion resistance.
A coated screw can be a good choice for many garden and construction jobs. However, the coating must suit the environment. A screw used in a dry garden project may face less stress than one used near the coast.
In coastal areas, salty air can speed up corrosion. Therefore, a higher level of corrosion resistance may be needed.
What Are Countersunk Screws?
Countersunk screws have a head that sits flush with, or slightly below, the surface of the timber. This creates a neat finish. It also reduces the chance of the screw head catching on clothing or tools.
They are useful for many outdoor timber projects. For example, you can use them on decking, fencing, garden furniture, wooden frames, and planters.
A countersunk head also gives the finished project a clean look. However, you should avoid driving the screw too deep. If the head goes too far into the timber, water can collect around the hole.
For a neat timber finish, countersunk wood screws are a popular option. They combine a practical fixing with a tidy appearance.
What Are Construction Screws?
Construction screws are made for demanding fixing jobs. They often have a strong body and a sharp point. This design helps them enter timber with less effort.
They can work well for outdoor structures such as sheds, fences, pergolas, timber frames, and garden structures.
The correct construction screw should have suitable corrosion protection for outdoor use. Always check the product information before using it in wet or exposed areas.
Another benefit is speed. Many construction screws are designed for fast installation. Therefore, they can save time on larger projects.
Still, a strong screw does not replace good construction methods. You must also choose the correct length and diameter for the timber.
What Are Pozi Screws?
Pozi screws have a cross-shaped drive that works with a Pozidriv bit. They are common in woodworking and general construction.
The drive can provide a good grip between the bit and screw head. As a result, the screw can be easier to drive when you use the correct bit.
Using the right bit is important. A poor fit can cause the bit to slip. It may also damage the screw head.
For outdoor woodworking, Pozi screws can be useful when they have a finish made for outdoor conditions. Therefore, do not choose a screw only because it has a Pozi drive.
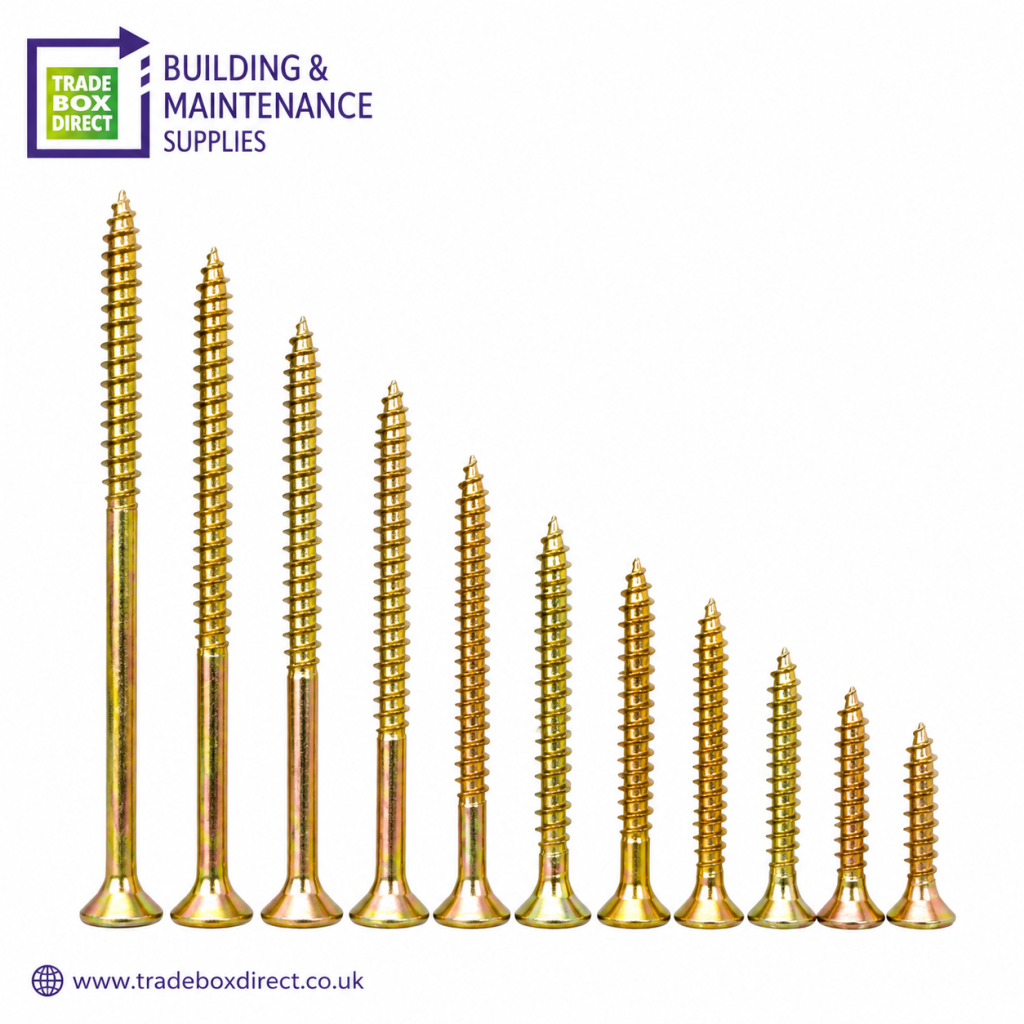
Why Choose MULTI-PURPOSE GOLDEN POZI COUNTERSUNK WOOD SCREWS?
The MULTI-PURPOSE GOLDEN POZI COUNTERSUNK WOOD SCREWS are a useful choice for a wide range of timber jobs. Their golden finish gives them a clean and professional look. The countersunk head helps create a neat surface, while the Pozi drive supports easy installation with the correct driver bit.
These screws are suitable for many general woodworking and construction tasks. They can be useful for furniture, timber frames, shelving, fencing, cabinets, garden projects, and other woodwork.
The multi-purpose design also makes them practical for people who handle different jobs. Instead of keeping many types of fasteners for simple timber work, one versatile option can cover several common needs.
However, you should still check the product specification before using them in a very wet or highly exposed location. Outdoor use requires suitable corrosion protection. Always match the product to the project.
Where Can You Use Wood Screws Outdoors?
There are many outdoor projects where suitable wood screws can work well.
Garden Furniture
Wooden benches, chairs, tables, and small garden structures often need reliable timber fixings. A suitable screw can create a strong joint and help keep the parts together.
However, garden furniture can face rain and moisture. So, choose a screw with good corrosion protection.
Fencing
Fence panels and timber posts need strong connections. Suitable construction screws can provide a firm fixing between timber parts.
For larger fence structures, choose a screw with enough length and strength for the joint.
Garden Planters
Wooden planters are another common use. Since planters often stay wet, corrosion resistance becomes especially important.
A suitable screw can help hold the timber together while resisting the damp conditions around the planter.
Sheds and Timber Frames
Sheds can face wind, rain, and temperature changes. Therefore, the fixing system should suit the structure.
For heavier work, construction screws may offer a strong and practical solution. Always consider the timber thickness and joint design.
Pergolas and Garden Structures
Pergolas and other timber structures need secure joints. The screws should provide enough holding power for the materials being joined.
For exposed structures, use fasteners designed for outdoor conditions.
What Size Wood Screw Should You Use?
There is no single screw size for every outdoor project. The correct size depends on the thickness and type of timber.
A screw that is too short may not create enough grip. On the other hand, one that is too long may pass through the timber or damage another part of the structure.
As a simple rule, the screw should provide enough thread engagement in the second piece of timber. The exact choice depends on the joint and the load.
For heavy projects, follow the manufacturer’s guidance. If the structure carries a lot of weight, use a suitable construction method rather than relying on guesswork.
Should You Pre-Drill Outdoor Timber?
Pre-drilling can help in many situations. It creates a pilot hole that guides the screw into the timber.
This can reduce the risk of splitting, especially when working close to the edge of a board. It can also make installation easier in hardwood.
Softwood may sometimes accept a screw without a pilot hole. However, pre-drilling can still provide better control.
When using Screws near the edge of timber, a pilot hole can be especially useful. It helps the fastener enter the wood smoothly and reduces stress around the fixing point.
Can Outdoor Screws Be Removed?
Yes. Most outdoor wood screws can be removed with the correct driver bit.
However, corrosion can make removal harder. A rusty screw may have a damaged head or may have bonded to the timber.
For this reason, choosing corrosion-resistant fasteners from the start can save trouble later. Good-quality Screws can also make repairs and maintenance easier.
Always use the correct bit. A good fit reduces damage to the drive head.
Common Mistakes to Avoid
Outdoor timber projects often fail because of simple mistakes. Fortunately, most can be avoided.
First, do not use basic indoor fasteners for a wet outdoor project without checking their suitability.
Second, avoid choosing a screw only by its appearance. A golden finish may look attractive, but the product specification is more important.
Third, do not use a screw that is too short for the joint.
Also, avoid over-tightening. Excess force can damage the timber and push the head too deep.
Finally, use the correct driver bit. This is especially important with pozi screws, as the right bit helps reduce slipping and head damage.
Wood Screws vs Construction Screws
Both types can be useful, but they serve different needs.
Traditional wood screws are often suited to general woodworking. They can work well for furniture, cabinets, small garden projects, and basic timber joints.
Construction screws are often designed for stronger and faster fixing. They can suit larger timber structures and demanding building tasks.
The best choice depends on the job. For a small planter, a suitable wood screw may be enough. For a larger timber frame, a construction screw may be more suitable.
Therefore, always consider the load, timber type, location, and weather conditions before choosing.
How to Make Outdoor Screw Fixings Last Longer
Start with the right fastener. Choose a product with suitable corrosion protection for the environment.
Next, store unused screws in a dry place. Moisture can affect some finishes before the screws even reach the project.
When installing, make sure the screw sits correctly. A countersunk head should create a clean finish without being driven too deep.
You should also inspect outdoor timber from time to time. Look for rust, loose joints, cracks, or movement.
Early maintenance can prevent a small problem from becoming a larger repair.
Using suitable Screws from the start can also improve the long-term result.
Are Countersunk Wood Screws Good for Outdoor Work?
Yes, countersunk wood screws can be a good option for outdoor work when the product has suitable corrosion protection.
Their flat head gives the timber a smooth finish. This makes them useful where appearance matters.
They are also practical for many woodworking tasks. For example, you can use them on wooden boxes, benches, frames, planters, and other projects.
Still, the screw must match the environment. A countersunk design alone does not make a screw weatherproof.
Final Thoughts
So, can wood screws be used for outdoor projects? Yes, but you need to choose them carefully.
Outdoor projects face moisture, weather, and temperature changes. Therefore, corrosion resistance should be a key part of your choice. The size, length, drive type, and head design also matter.
For general timber work, wood screws can be a useful option. For larger structures, construction screws may provide stronger fixing. Meanwhile, countersunk screws offer a neat finish for many applications.
The MULTI-PURPOSE GOLDEN POZI COUNTERSUNK WOOD SCREWS can be a practical choice for many woodworking and construction tasks. Their multi-purpose design makes them useful across different projects.
Most importantly, always check the product specifications before using any fastener outdoors. The right choice can help your project stay strong, neat, and reliable for longer.
FAQs
1. Can normal wood screws be used outside?
Yes, but only when they have suitable protection for outdoor conditions. Basic indoor screws may rust when exposed to moisture.
2. Are countersunk screws good for outdoor timber?
Yes. Countersunk screws provide a neat finish and work well for many outdoor timber projects when they have suitable corrosion protection.
3. Are construction screws better than wood screws?
Not always. Construction screws can be better for heavy timber work, while standard wood screws can suit smaller woodworking tasks.
4. What are Pozi screws used for?
Pozi screws are used for many woodworking and construction jobs. Their drive works with a Pozidriv bit, which can provide a good grip during installation.
5. Can golden Pozi countersunk screws be used outdoors?
They can be used outdoors when their product specification confirms suitable protection for outdoor conditions. Always check the manufacturer’s guidance.
What Are Countersunk Screws Used For?
Introduction
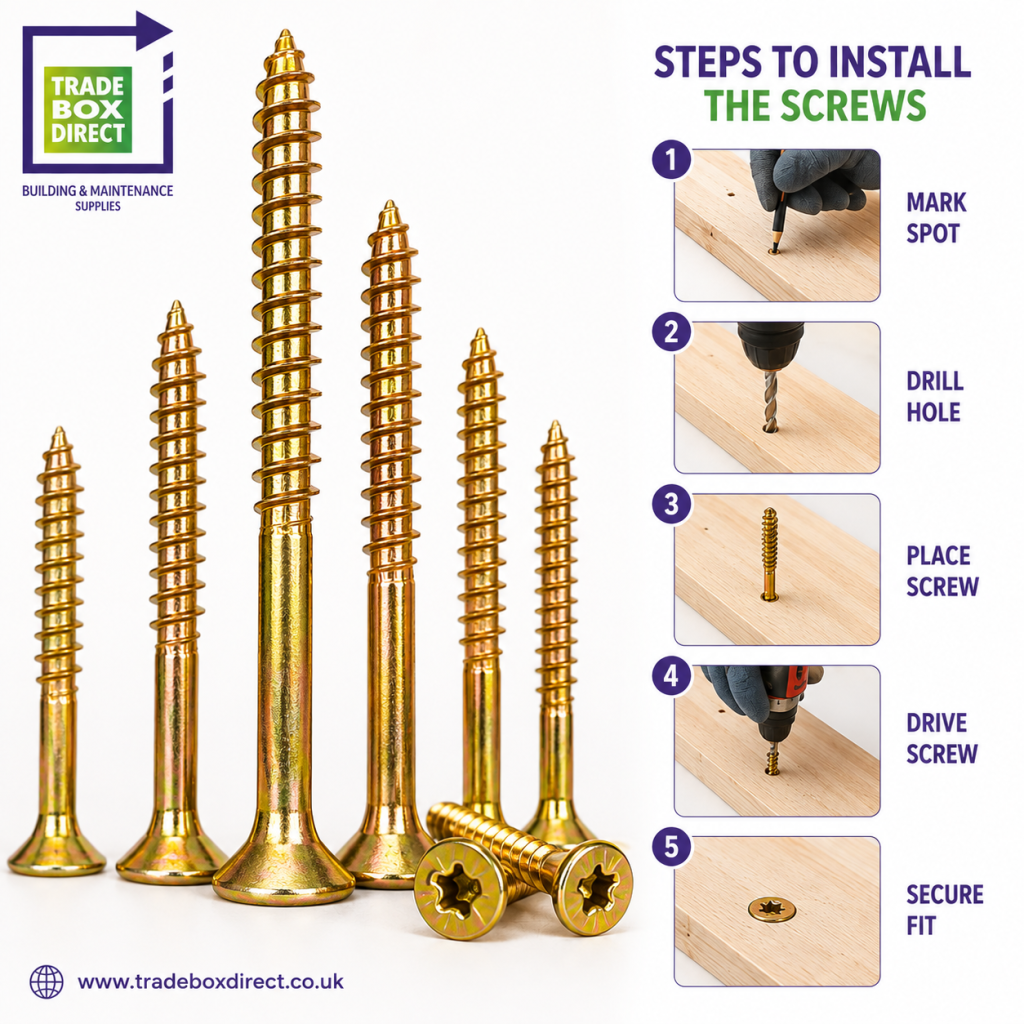
Countersunk screws are a common choice when a smooth, neat finish matters. Their heads sit level with, or slightly below, the surface of the material. These Screws help prevent bumps, snags, and rough edges. As a result, they work well for woodwork, furniture, home repairs, and many building jobs.
The main product featured in this guide is MULTI-PURPOSE GOLDEN POZI COUNTERSUNK WOOD SCREWS. These fasteners offer a useful mix of grip, clean looks, and easy driving. They suit many everyday tasks, especially when you want the fixing point to look tidy.
What Is a Countersunk Screw?
A countersunk screw has a head with a sloped underside. When you drive it into a matching hole, the head moves into the surface. The top then becomes flush with the material.
This shape is useful for jobs where a flat finish is important. For example, a screw head that sticks out can catch on clothing or tools. It can also spoil the look of a finished panel. Countersunk screws solve this issue by sitting neatly within the surface.
You can find this style in several forms. Common choices include countersunk wood screws, construction screws, and pozi screws. Each type can suit a different task, so it helps to match the fastener to the material and job.
What Are Countersunk Screws Used For?
Screws with countersunk heads are mainly used to join materials while keeping the surface smooth. Woodworkers often use them on doors, frames, cabinets, shelves, and timber panels. DIY users may also choose them for small repairs around the home.
In construction, the same design can help create a clean finish on timber work. It is especially useful when another part must sit over the fixed surface. A flush head leaves less to catch or rub against.
Furniture is another key use. A neat head can make a finished item look more professional. Therefore, countersunk wood screws are popular for tables, cabinets, storage units, and wooden frames.
Why Is the Countersunk Head Useful?
The biggest benefit is the low-profile finish. Once fitted correctly, the head does not stand proud of the surface. This can make the finished job safer and cleaner.
Another benefit is appearance. A flat fixing point looks less distracting than a raised metal head. That matters when the screw will remain visible.
There is also a practical benefit. A flush head can reduce the chance of snagging. For example, a loose sleeve or cloth is less likely to catch on a well-fitted fixing.
However, the hole must suit the head shape. If the hole is too small, the head may remain above the surface. If it is too deep, the fixing may sit too far below the surface. A pilot hole and countersink can help create a better result.
Benefits of Screws
A good fixing can make a project easier to build and maintain. These Screws can offer a neat finish while keeping two pieces of material firmly joined. They are also available in many sizes, so users can choose an option that suits the task.
Main Uses in Woodwork
Woodwork is one of the most common areas for this fastener style. Countersunk wood screws suit timber jobs such as shelves, cabinets, frames, doors, trim, and furniture.
For softwood, the correct size can provide a strong grip. For hardwood, drilling a pilot hole is often a smart step.
The golden finish of MULTI-PURPOSE GOLDEN POZI COUNTERSUNK WOOD SCREWS can suit projects where the fixing remains visible. It gives the timber a warm, tidy look.
Countersunk Screws for Construction
Building work often needs strong and reliable fasteners. Construction screws can help join timber parts and secure wood-based materials.
A countersunk design is useful when the surface needs to stay fairly flat. Before choosing one, check the material, thickness, load, and environment. Outdoor work may need a finish that can handle moisture.
Construction screws can also help with general timber work where a clean surface is needed. Always check the product details before using a fastener for a heavy-duty job.
Why Choose Pozi Screws?
Pozi screws use a cross-shaped drive with extra features that help the bit stay in place. They are designed for use with a matching pozi driver bit.
This can make fitting easier, especially when the driver is held straight. A good bit fit also helps reduce slipping and damage to the screw head.
Pozi screws are popular in woodworking and general DIY. They work well with many power drills and screwdrivers. Even so, the driver size must match the screw head.
How to Choose the Right Size
Choosing the right size is important for a strong joint. A screw that is too short may not hold the materials well. One that is too long may come through the other side.
Start by checking the thickness of the materials. Then consider how much grip you need. The screw should have enough length to hold the joint without causing unwanted damage.
Diameter also matters. A thicker fastener can offer more strength, but it may need a larger pilot hole. Thin timber can split if the fixing is too large.
For this reason, match Screws to the job rather than choosing by appearance alone.
How to Install a Countersunk Screw
Good installation does not need to be hard. Follow these simple steps:
- Mark the fixing point.
- Choose the correct drill bit and driver bit.
- Drill a pilot hole when the material needs it.
- Make a countersink if the surface requires one.
- Place the screw into the hole.
- Drive it straight into the material.
- Stop when the head sits flush with the surface.
Avoid forcing the screw too far into soft timber. Excess pressure can damage the wood or strip the drive.
A power drill can speed up the job, but a hand screwdriver can also work well for small repairs. In either case, use steady pressure and keep the tool aligned with the head.
Common Mistakes to Avoid
Even simple fixing jobs can go wrong. One common mistake is using the wrong driver bit. A poor fit can damage the head and make removal difficult.
Another issue is skipping the pilot hole when the timber needs one. This can increase the risk of splitting. Driving too fast can also cause the head to sink too deeply.
Using the wrong length is another problem. A short fixing may give weak grip, while an overly long one can damage the material.
Finally, do not assume every fastener suits every surface. Check the product details before starting the job.
Are Countersunk Screws Good for DIY?
Yes, they are a practical choice for many DIY projects. Their simple shape makes them useful for furniture, shelves, frames, cabinets, repairs, and timber projects.
They are also easy to use with common screwdrivers and drills. With the correct size and bit, most basic jobs can be completed without special equipment.
Beginners should still take care with drilling and tool use. Eye protection is a good idea when drilling. Keep hands away from the drill bit and work on a stable surface.
Final Thoughts
Countersunk fasteners are useful because they combine strong fixing with a clean finish. They work especially well in timber, furniture, cabinets, frames, and general DIY tasks.
MULTI-PURPOSE GOLDEN POZI COUNTERSUNK WOOD SCREWS are a strong product choice when you want a versatile fixing for wood-based work. Their countersunk shape helps the head sit neatly, while the pozi drive supports easy installation with the right bit.
Before starting a project, check the screw size, material, length, and finish. With the right choice and careful fitting, you can create a joint that looks clean and holds well.
FAQs
1. What are countersunk screws used for?
They are used to join materials while keeping the head level with the surface. They are common in woodwork, furniture, cabinets, frames, and DIY projects.
2. Can I use countersunk screws in wood?
Yes. Countersunk wood screws are made for many timber jobs. The right size depends on the thickness and type of wood.
3. What are construction screws used for?
Construction screws are made for building and repair tasks where strong fixing is needed. Some are designed for timber and wood-based materials.
4. What does Pozi mean?
Pozi refers to the shape of the screw drive. It works with a matching pozi driver bit and is common in DIY and woodworking.
5. Do I need a pilot hole?
A pilot hole is often useful, especially in hardwood or near the edge of timber. It can reduce splitting and make driving easier.
How Do I Choose the Right Screws for a DIY Project?
Introduction
Choosing the right fastener can make a DIY project much easier. The correct screws can give your project a strong hold, a neat finish, and a longer life. However, many types are available, so it can be hard to know which one to use.
The good news is that choosing the right screws does not need to be difficult. You only need to check a few key points. These include the material, length, thickness, head type, thread, drive type, and location of the project.
Whether you are fixing a shelf, building furniture, repairing a door, or working on a garden project, the right choice can make a big difference. This guide explains each point in simple terms.
Why Is Choosing the Right Screw Important?
Every DIY project has different needs. A small screw may work well for a light cabinet handle. On the other hand, a heavy timber shelf may need a longer and stronger fastener.
Using the wrong type can cause several problems. The joint may become loose. Wood can split. The screw head may stick out. In some cases, the fastener can even break.
Therefore, start by thinking about the job rather than the appearance of the fastener. Ask yourself what you are joining, how much weight the joint will carry, and where the project will be used.
Once you know these details, selecting the right option becomes much easier.
Start With the Material
The first thing to check is the material you are joining. Wood, metal, plastic, and masonry all have different needs.
For timber projects, wood screws are usually a good starting point. They have threads that are designed to grip wood effectively.
Metal projects may require machine screws, self-tapping screws, or self-drilling options. Masonry work normally needs specialist masonry fixings rather than standard wood fasteners.
Plastic also needs care. A very aggressive thread or excessive tightening can damage the material.
Therefore, always match the fastener to the material first. This simple step can prevent many problems later.
Consider the Screw Length
Length is one of the most important factors when choosing screws. The fastener needs enough length to create a secure grip without passing too far through the material.
For example, imagine joining two wooden boards. A very short screw may not enter the second board deeply enough. As a result, the joint may feel weak.
However, a screw that is too long can come through the other side. It may also damage cables, pipes, or other materials hidden behind the surface.
A useful approach is to measure the thickness of the materials before you start. Then select a suitable length based on the manufacturer’s recommendations.
Remember that head design can also affect the useful length, especially with countersunk designs.
Choose the Correct Diameter
Length is not the only size that matters. Diameter also affects performance.
A thicker screw can provide strong holding power. However, it may require more force to install. In wood, a large diameter can also increase the risk of splitting.
A thinner option may be better for small or delicate projects. Nevertheless, it may not provide enough strength for heavy loads.
Therefore, choose a diameter that suits both the material and the job. When in doubt, check the manufacturer’s size guide.
Countersunk Screws for a Neat Finish
Countersunk screws are useful when you want a smooth surface. Their angled head allows them to sit level with, or slightly below, the material.
This design is popular for furniture, cabinets, doors, shelves, and woodworking projects. Once installed, the head is less likely to catch on clothing or objects.
For a clean result, you may need to create a countersunk recess before installation. Some tools can create this recess at the same time as the pilot hole.
Countersunk screws are especially useful when appearance matters. However, they should still be matched to the correct material and load.
When Should You Use Construction Screws?
Construction screws are made for demanding building tasks. They are often used for timber framing, building repairs, structural woodwork, and other heavy-duty applications.
These fasteners are generally designed to offer strong holding power. Some also have protective coatings for improved resistance to corrosion.
However, not every construction screw is suitable for every job. Always check its intended application and load rating.
If you are working on a structural project, follow the relevant building guidance. A DIY project should never rely on guesswork when safety is involved.
Countersunk Wood Screws for Furniture and Joinery
Countersunk wood screws are a popular choice for woodworking. They combine a wood-friendly thread with a head that can sit neatly inside the surface.
These fasteners are useful for cabinets, furniture, timber panels, shelves, and many home projects.
When using them in hardwood, drilling a pilot hole can help. The hole gives the fastener a clear path and can lower the risk of splitting.
Softwood may not always need a pilot hole, but it can still help in some situations. In either case, avoid forcing the fastener into the material.
Why Are Wood Screws So Useful?
Wood screws are designed to grip timber. Their sharp tips and suitable threads help them enter wood and create a strong connection.
They are available in many lengths, diameters, head styles, and finishes. Therefore, you can find options for both small repairs and larger woodworking jobs.
For example, a small wood screw may be suitable for attaching a light fitting. A larger option can be used to join thick timber.
The important point is to select the size based on the project. Bigger does not always mean better.
Check the Screw Head
The head controls how the fastener sits on the surface. Different head shapes are designed for different jobs.
A countersunk head is useful when you want a flush finish. A pan head remains above the surface and can spread pressure over a wider area.
Other designs may be available for specialist applications. Therefore, consider both function and appearance.
If the fastener will remain visible, the head style can also affect the final look of your project.
Select the Correct Drive Type
The drive is the part of the head that accepts your screwdriver or drill bit. Common options include Phillips, Pozi, slotted, hex, and Torx designs.
Pozi screws are common in furniture and general DIY work. They have a cross-shaped drive that looks similar to Phillips, but the designs are different.
Using the correct bit is important. A poor fit can cause the bit to slip. It may also damage the screw head.
For the best result, place the bit straight into the drive and apply steady pressure while turning.
Pozi Screws for Everyday DIY
Pozi screws are widely used for furniture, cabinets, timber work, and general repairs. Their drive design gives good engagement with a matching Pozi bit.
They are particularly useful when working with power tools. Still, speed should not replace control.
Start at a low speed and increase it when needed. This approach can help prevent slipping and over-tightening.
If the head becomes damaged, replacing the fastener is usually better than trying to force it further into the material.
Think About the Environment
Where will your DIY project be used? This question is important because moisture can affect fastener performance.
Indoor projects in dry rooms have different needs from outdoor furniture, fencing, sheds, and garden structures.
For outdoor work, choose a fastener with suitable corrosion resistance. Stainless steel and coated options may be available for different environments.
Bathrooms and other damp areas also need careful selection. A standard steel fastener may not provide the same service life as a corrosion-resistant option.
Therefore, consider moisture before making your final choice.
Do You Need a Pilot Hole?
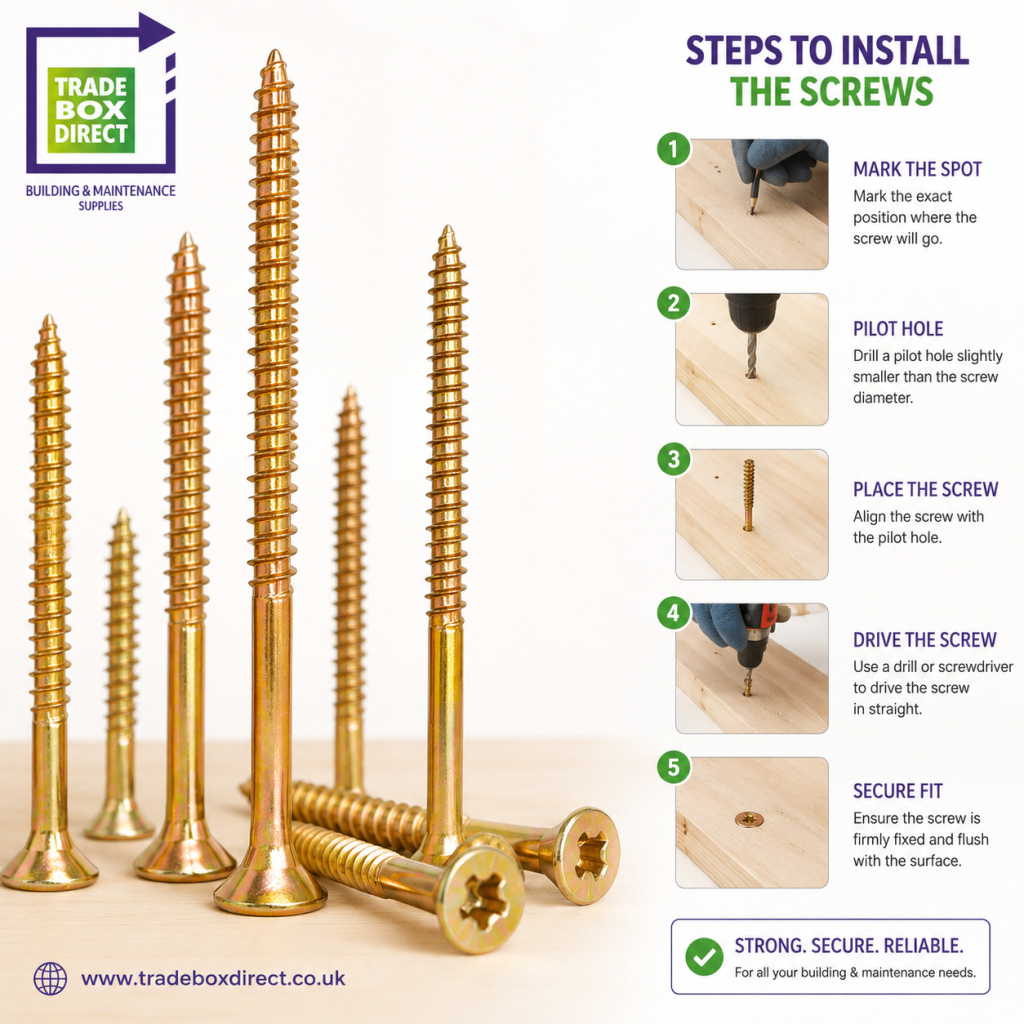
A pilot hole is a small hole drilled before installing the fastener. It can make installation easier and help guide the fastener.
Pilot holes are especially useful in hardwood. They can also help when working near the edge of a board.
The hole should not be too large. Otherwise, the thread may not grip the material properly.
On the other hand, a very small hole can make installation difficult. Always use the recommended pilot-hole size for the fastener and material.
Think About the Load
Weight is another major factor. A decorative project may need very little holding power. A shelf carrying books needs much more.
Consider both the weight of the item and the force placed on the joint. Movement, vibration, and repeated use can also affect the connection.
For heavier projects, use fasteners designed for the expected load. You may also need wall plugs, anchors, or other support systems.
Never assume that one fastener type can handle every situation.
Avoid Over-Tightening
More force does not always create a stronger joint. Over-tightening can damage both the fastener and the material.
In wood, excessive force can strip the thread or crush the surface. It can also damage the screw head.
When using a drill or driver, use a suitable torque setting. Start gently and increase the force only when needed.
A secure joint should feel firm without being forced.
Common DIY Screw Mistakes
Several simple mistakes can reduce the quality of a project.
First, avoid choosing a fastener only because it looks strong. Instead, check its intended use.
Next, do not ignore the material. Wood, metal, plastic, and masonry need different solutions.
Also, avoid using the wrong driver bit. A poor fit can quickly damage the head.
Another common mistake is choosing the wrong length. Measure the material first.
Finally, do not ignore corrosion. Outdoor and damp projects require suitable protection.
By avoiding these mistakes, you can make your DIY work safer and more reliable.
FAQs
1. What are the best screws for a DIY project?
There is no single best type. The right choice depends on the material, load, length, diameter, head style, and environment.
2. Can I use wood screws for all DIY jobs?
No. Wood screws are designed mainly for timber and wood-based materials. Other materials may need different fasteners.
3. When should I use countersunk screws?
Use them when you want the head to sit level with or below the surface. They are especially useful for furniture and woodworking.
4. Are construction screws stronger than standard wood screws?
Construction screws are designed for demanding building tasks, but strength depends on the exact product. Always check the manufacturer’s specifications.
5. What are Pozi screws used for?
Pozi screws are common in furniture, cabinets, woodworking, and general DIY projects. Use a matching Pozi bit for the best results.
Final Thoughts
Choosing the right fastener is an important part of any DIY project. Start with the material, then consider the length, diameter, thread, head, drive, load, and environment.
For timber work, wood screws and countersunk wood screws are common choices. For demanding building tasks, construction screws may be more suitable. When you need a neat finish, countersunk screws can help. Meanwhile, Pozi screws are a practical option for many everyday jobs.
Most importantly, take your time before installation. A few minutes spent checking the correct fastener can save you from loose joints, damaged materials, and unnecessary repairs. With the right choice and careful installation, your DIY project can look better, stay stronger, and last much longer.
How Do Screws Work?
Introduction
Screws are one of the simplest and most useful fasteners in everyday life. You can find them in furniture, doors, cabinets, roofs, machines, toys, and many building projects. Although a screws look like a small metal part, its shape helps it hold materials together with surprising strength.
The main idea is simple. A screw changes turning force into a strong pulling force. As it turns, its threaded body moves into a material or a prepared hole. The thread then grips the material and helps keep the screw in place.
This basic design makes screws useful for both small home repairs and large construction jobs. However, different jobs need different types of screws. The right choice depends on the material, load, screw size, head shape, and type of drive.
What Is a Screw?
A screw is a fastener with a threaded shaft and a head. The threaded section contains a raised spiral ridge called a thread. When the screw turns, this thread moves through the material.
Most screws have several main parts:
- Head: The top part that accepts a driver or bit.
- Drive: The shaped area in the head where the tool fits.
- Shank: The main body of the fastener.
- Thread: The spiral ridge that grips the material.
- Tip: The end that enters the material first.
Together, these parts allow a screw to join two or more materials.
For example, imagine joining two wooden boards. You place the screw over the first board and turn it with a screwdriver. The tip enters the wood, while the thread pulls the screw deeper. As a result, the two boards are pulled together.
How Do Screws Work?
The working principle is based on a simple machine called an inclined plane. A thread is, in effect, an inclined plane wrapped around a cylinder.
When you turn the screw, the thread moves forward. This means a small turning force can create a larger force along the length of the screw. Therefore, you can join materials without using excessive force.
The thread also creates friction between the screw and the material. This friction helps stop the fastener from moving backward.
The pitch of the thread matters too. Pitch means the distance between one thread and the next. A fine thread has smaller spaces between its threads. A coarse thread has larger spaces.
Fine threads can provide strong grip in some materials, especially when the material is dense. Coarse threads often work well in softer materials because they can remove material more easily while creating a firm grip.
Why Do Screws Hold Materials Together?
The holding power comes from several forces working together.
First, the thread grips the material around the hole. Next, the turning action pulls the screw into the material. Finally, friction between the threads and material helps resist movement.
When a screw joins two boards, it can also create a clamping force. This force pulls the boards together. A tight joint can therefore stay stable even when the materials experience movement or vibration.
However, too much force can cause problems. Over-tightening can damage the material, strip the drive, or break the screw. Therefore, the screw should be tightened firmly without using unnecessary force.
Different Types of Screw Threads
Threads are designed for different materials and tasks.
Coarse threads have a larger distance between each thread. They are common in wood and other soft materials. The deeper thread can provide a strong grip.
Fine threads have smaller gaps. They are often used in metal applications or materials where a more controlled grip is needed.
Self-tapping threads can create their own path in some materials. This feature can make installation faster because a separate tapping process may not always be required.
Self-drilling screws have a drill-like point. The point can cut through certain materials while the screw is installed.
Choosing the correct thread can make a major difference. A screw that works well in wood may not perform properly in metal or masonry.
Countersunk Screws and Their Uses
Countersunk screws have a special head shape. The underside of the head slopes toward the shaft. This design allows the head to sit level with, or slightly below, the surface when installed correctly.
They are useful when you want a smooth finish. For example, they are often used in cabinets, furniture, doors, and timber projects.
A countersunk hole may be created before installation. The wider upper section gives the head enough space to sit neatly inside the material.
This design also reduces the chance of the screw head sticking out and catching on clothing or other objects.
Construction Screws
Construction screws are designed for demanding building tasks. They are commonly made from strong steel and may have coatings that help protect them from corrosion.
Their shape can vary based on the intended application. Some have deep threads for timber, while others are designed for structural work.
When using construction screws, always check the manufacturer’s recommendations. Material type, screw length, load, and installation method can all affect performance.
A longer screw is not automatically a better screw. It needs to be long enough to create a secure connection without causing unnecessary damage.
Countersunk Wood Screws
Countersunk wood screws are made for timber and wood-based materials. Their heads are designed to sit neatly below or level with the surface.
They are popular in furniture assembly, joinery, cabinets, shelves, and general DIY work.
The thread is especially important when working with wood. A suitable thread can create a firm grip without requiring excessive force.
For hardwood, drilling a pilot hole can often help. The pilot hole gives the screw a clear path and may reduce the risk of splitting.
Wood Screws
Wood screws come in many sizes and designs. Some have sharp points that enter timber easily, while others are designed for specific woodworking tasks.
The length should match the materials being joined. If the screw is too short, it may not provide enough grip. If it is too long, it may pass through the material or damage something behind it.
The diameter also matters. A thicker screw can offer greater strength, but it can also require more force to install.
Before installation, consider the wood type, board thickness, expected load, and screw design. This simple check can prevent many common mistakes.
Pozi Screws
Pozi screws have a cross-shaped drive that looks similar to a Phillips drive. However, the Pozi design includes additional features that help improve bit engagement.
A correct Pozi bit should be used with a Pozi screw. Using the wrong bit can cause slipping or damage to the drive.
The right bit should fit snugly into the head. Keep the tool straight while turning. This approach helps transfer force more effectively and reduces the chance of damaging the screw.
Pozi screws are widely used in furniture, woodworking, construction, and general assembly.
Why Does Screw Size Matter?
Size affects both strength and installation.
A screw’s length determines how deeply it enters the material. Its diameter affects how much material surrounds the thread and how much load it can handle.
For example, a small screw may be suitable for a lightweight cabinet handle. A heavier timber joint may need a much larger fastener.
The head size also matters. A wide head can spread pressure over a larger area. A smaller head may be better when a less visible finish is required.
Therefore, never choose a screw based only on appearance. Always consider the job and material first.
Do You Need a Pilot Hole?
A pilot hole is a small hole drilled before the screw is installed. It can be useful for many woodworking projects.
The hole gives the screw a guide and can reduce the risk of splitting. It can also make installation easier, especially when working with hardwood.
However, the correct pilot-hole size depends on the screw and material. A hole that is too large may reduce grip. A hole that is too small may make installation difficult.
For this reason, check the manufacturer’s guidance when possible.
What Happens When a Screw Is Tightened?
As the screw turns, it moves deeper into the material. The thread pushes against the surrounding material. At the same time, the screw head presses against the surface.
This creates clamping force. The joined materials are pulled together, which helps form a stable connection.
The amount of force should be controlled. Too little tightening can leave the joint loose. Too much tightening can strip the thread, damage the surface, or break the fastener.
Power tools can make installation faster. However, they should be used with care. A low torque setting can help prevent over-tightening.
Common Mistakes to Avoid
Even a simple fastening job can go wrong. Fortunately, most mistakes are easy to prevent.
Using the wrong screw: Always select a fastener designed for the material.
Choosing the wrong length: Check the thickness of the materials before installation.
Using the wrong driver bit: A poor fit can damage the drive.
Over-tightening: Stop when the joint is secure.
Skipping a pilot hole: For some wood projects, drilling first can help prevent splitting.
Ignoring corrosion: Outdoor or damp areas may require corrosion-resistant fasteners.
A few minutes of preparation can therefore improve the strength and appearance of the finished project.
How to Choose the Right Screw
Start by identifying the material. Wood, metal, plastic, and masonry may require different fasteners.
Next, consider the load. A light decorative item needs less holding power than a structural connection.
Then check the length and diameter. The screw should provide enough grip without causing damage.
After that, select the correct head and drive style. If you want a smooth surface, a countersunk design may be suitable.
Finally, think about the environment. Outdoor projects may need a protective coating or corrosion-resistant material.
These simple steps make screw selection much easier.
FAQs About Screws
1. How does a screw create holding power?
The thread grips the surrounding material while the screw moves inward. Friction and clamping force then help keep the joint secure.
2. Are wood screws suitable for construction?
Some wood screws are suitable for building work, but not every type is designed for heavy loads. Construction-specific fasteners should be selected for demanding jobs.
3. What are countersunk screws used for?
They are used when you want the head to sit level with or below the material surface. They are common in furniture, joinery, cabinets, and timber projects.
4. Why do screws have different threads?
Different threads are designed to work better with different materials. Coarse threads often suit soft materials, while fine threads can work well in harder or metal applications.
5. Should I drill a pilot hole for wood screws?
A pilot hole is often useful, especially in hardwood or near the edge of a board. It can reduce splitting and make installation easier.
6. What is the difference between Pozi and Phillips screws?
Both have cross-shaped drives, but their shapes are different. A matching driver bit should always be used to reduce slipping and drive damage.
7. Can screws rust?
Yes. Standard steel can corrode when exposed to moisture. For outdoor or damp areas, choose a suitable corrosion-resistant fastener.
8. How tight should a screw be?
It should be tight enough to hold the joint securely. However, excessive force can damage the material or fastener.
Final Thoughts
Understanding how Screws work makes DIY and construction tasks much easier. Their threaded design turns simple rotation into strong forward and clamping force. As a result, they can create reliable joints in many materials.
Still, the best results depend on choosing the right type. Consider the material, thread, length, diameter, head, drive, and environment before installation.
Whether you are building furniture, repairing timber, installing cabinets, or completing a construction project, the correct fastener can make the job safer and more reliable. With the right selection and careful installation, a small fastener can provide a strong and lasting connection.
Why Do Professional Installers Still Use Tile Spacers for Modern Tile Work?
Introduction
Modern tile leveling system work has changed a lot. Large porcelain tiles, slim grout lines, new adhesives, and advanced tools are now common. Even so, professional installers still use one simple product on many jobs: tile spacers.
Why are these small pieces still important? The answer is simple. Good tile work needs accurate spacing, clean grout lines, and steady tile placement. Modern tools can make the job faster, but they do not remove the need for correct spacing.
In fact, many installers now combine traditional spacers with a tile leveling system. This approach gives them better control over both the gap between tiles and the height of each tile.
The Tile Spacer Levelling System 2mm Floor Twister Spacer Screws + Red Twister Nuts is one example. It combines a 2 mm spacer with a twister-style levelling setup. Therefore, it can help installers maintain a neat joint while also reducing small height differences.
This guide explains why professional tilers still use spacers, how they work with modern systems, and why they remain useful for both large and small tile projects.

Why Are Tile Spacers Still Important?
Tile spacers have one main job: they help maintain a consistent gap between tiles.
Without spacers, it can be difficult to keep every joint the same by eye. Even experienced installers can find it hard to maintain perfect spacing across a large floor or wall.
A consistent gap creates a cleaner pattern. It also gives grout enough space to fill the joint properly.
Furthermore, spacers help installers work faster. Instead of measuring every gap, they can use the same spacer size throughout the installation.
This simple tool provides a reliable reference point.
What Do Professional Installers Look For?
Professional tilers usually care about three things: accuracy, speed, and finish quality.
Spacing affects all three.
If the gaps are uneven, the finished surface may look untidy. If tiles move while the adhesive dries, the pattern can also become distorted.
Professionals therefore choose tools that reduce these risks. A spacer gives them control over the grout joint. A tile leveling system can then provide additional control over tile height.
This combination is especially useful for larger tiles, where small differences can be easy to see.
Tile Spacers Control the Grout Joint
The joint size can affect both the appearance and practical performance of the installation.
For example, a narrow joint can create a clean and modern appearance. A wider joint may suit certain tile leveling system styles or installation requirements.
Professional installers do not simply choose a gap based on appearance. They also consider the tile type, size, surface, and manufacturer’s recommendations.
Once the correct joint has been selected, tile spacers help maintain it.
A 2 mm spacer, for example, can help create a consistent 2 mm gap when the installation method allows that joint size.
How Tile Leveling Systems Add More Control
Spacing and levelling are related, but they are not exactly the same.
Spacers control the distance between tiles. Levelling systems help reduce height differences between neighbouring tiles.
This is where a tile leveling system becomes useful.
Most systems use clips and wedges, straps and caps, or screw-based parts. These components apply pressure to the tile edges while the adhesive cures.
The aim is to reduce lippage. Lippage occurs when one tile edge sits higher than the edge next to it.
A professional installer may therefore use a levelling system alongside spacers. The spacer controls the joint, while the levelling part helps keep the tile surfaces aligned.
Tile Leveling Spacers Combine Two Jobs
Modern products can combine spacing and levelling in one setup.
Tile leveling spacers are designed to help maintain the grout gap while also providing support between adjacent tiles.
This can save time because the installer does not need to manage separate components for every part of the process.
The Tile Spacer Levelling System 2mm Floor Twister Spacer Screws + Red Twister Nuts is an example of this approach.
The 2 mm spacer helps maintain the joint. The twister screw and red twister nut provide pressure to help align the tile edges.
For suitable floor tile projects, this can provide a simple and practical installation method.
Why Professionals Like 2 mm Spacing
A 2 mm joint is popular for many modern tile designs. It can create a neat and clean appearance when the tile and installation method allow it.
However, professionals know that 2 mm is not suitable for every tile.
Tile manufacturers may specify a minimum joint size. Some tiles also have natural size variations. Therefore, installers always check the tile instructions before selecting a spacer.
If a 2 mm joint is suitable, a dedicated 2 mm spacer can make the installation easier.
The key is consistency. A joint that stays the same width across the room usually produces a much better result.
Floor Tile Spacers for Large Areas
Large floors can be difficult to space accurately. Even a small error near the start of a project can become noticeable further across the room.
Floor tile spacers help reduce this problem. They provide a fixed reference between each tile.
Professional installers can work row by row while keeping the same joint width. They can also check the layout against reference lines as they move forward.
Large tiles may have slight variations or curves. Levelling components can help keep neighbouring edges closer to the same height.
Large Tiles Need More Care
Large-format tiles are popular because they create fewer grout lines and a modern look. However, they can also be harder to install.
A large tile covers more surface area. Therefore, even a small uneven area below it can affect the tile position.
The adhesive layer must be consistent. The base must also be suitable.
Professionals may use a tile leveling system to help manage tile edges during installation. However, they do not expect the system to fix an uneven floor.
Good preparation still comes first.
Why Spacers Do Not Become Outdated
Technology improves every year. New tools can make tile installation faster, but basic spacing still matters.
The purpose of a spacer has not changed. Tiles still need a controlled joint.
Even with advanced tile leveling system, the correct gap must be maintained. Therefore, spacers remain relevant.
Think of them as a simple measuring tool. They provide a physical reference that helps keep the tile pattern consistent.
Simple tools often remain popular because they solve a basic problem very well.
Using the Right Tiling Tools
Professional results also depend on having the right tiling tools.
A good installation may require:
- Tile cutter
- Notched trowel
- Spirit level
- Straight edge
- Measuring tape
- Rubber mallet
- Tile spacers
- Levelling components
- Grout float
- Mixing bucket
- Cleaning sponge
- Tile nippers
Each tool has a different purpose.
A spirit level checks alignment. A notched trowel helps spread adhesive. A tile cutter creates accurate cuts. Spacers control the grout joint, while a levelling system helps control tile height.
Using the right tools together makes the job more efficient.
How Professionals Use Spacers Correctly
Professional installers do not simply place spacers and forget about them. They use them as part of a wider installation process.
First, the surface is checked. Next, the layout is planned. Then, suitable adhesive is applied.
The first tile leveling system is placed carefully. Spacers are then positioned before the next tile is installed.
The installer checks the joint and tile position as work continues. If a tile moves, it can be corrected while the adhesive remains workable.
This approach helps prevent small errors from spreading across the installation.
Do Spacers Replace a Levelling System?
No. Standard spacers and levelling systems have different jobs.
Spacers mainly control the gap. A tile levelling system mainly helps reduce height differences between adjacent tiles.
Therefore, one does not always replace the other.
For some small tiles, standard spacers may be enough. For large-format tiles, using both spacing and levelling support may provide better control.
The best choice depends on the tile, surface, joint size, and installation method.
When Should You Use a Tile Levelling System?
A tile levelling system can be useful when installing large tiles or when a very flat finish is required.
It may also help when working with tiles that have slight surface variations.
However, the system should not be used as a substitute for proper preparation. A badly uneven surface should be corrected first.
Likewise, the adhesive should be applied correctly. The levelling system works best when the tiles already have good support underneath.
Common Mistakes With Tile Spacers
Even a simple spacer can be used incorrectly.
Choosing the Wrong Size
Always check the required joint width before choosing your spacers.
Mixing Different Sizes
Using different spacer sizes can create uneven grout lines.
Ignoring Tile Instructions
Some tiles require a minimum joint width. Always check the manufacturer’s guidance.
Removing Spacers Too Early
If the spacer is removed while the adhesive is still moving, the tile can shift.
Relying Only on Spacers
Spacers do not automatically correct height differences. A suitable levelling method may be needed.
Benefits of the Tile Spacer Levelling System
The Tile Spacer Levelling System 2mm Floor Twister Spacer Screws + Red Twister Nuts offers several useful features for suitable projects.
First, the 2 mm spacer helps maintain a consistent joint.
Second, the twister mechanism provides controlled pressure. This can help bring nearby tile edges into better alignment.
Third, the system can reduce the need to use separate spacing and levelling parts.
It can be useful for DIY users as well as experienced installers. However, the product should always be used according to its instructions and within its recommended tile thickness range.
Tips for a Better Professional Finish
Start with a clean and properly prepared surface. Then plan the layout before spreading adhesive.
Choose the correct spacer size. Next, use suitable adhesive and the correct trowel.
Place each tile carefully and check its position. Use spacers consistently across the entire installation.
For larger tiles, consider using a tile leveling system to reduce height differences.
Do not rush the process. Allow the adhesive to cure for the recommended time before removing the levelling parts or applying grout.
Finally, clean the joints before the adhesive becomes difficult to remove.
Frequently Asked Questions
1. Why do professional installers still use tile spacers?
Professionals use them because they provide a simple and reliable way to maintain consistent grout joints. They also make large installations easier to control.
2. Are tile spacers still needed with a levelling system?
It depends on the system. Some levelling products include spacing features. Others require separate spacers.
3. What are tile leveling spacers?
Tile leveling spacers combine spacing with levelling support. They can help maintain the grout joint while reducing small height differences.
4. Is a 2 mm spacer suitable for every tile?
No. The correct joint size depends on the tile and manufacturer’s recommendations. Always check before installation.
5. Can floor tile spacers be reused?
Many basic spacers are inexpensive and designed for single use, while some products may be reusable. Check the product details before reuse.
Final Thoughts
Professional installers still use tile spacers because accurate spacing remains essential in modern tile work. New materials and advanced tools have changed the way tiles are installed, but the need for consistent grout joints has not changed.
For suitable projects, combining spacers with a tile leveling system can provide even more control. This is especially useful when working with large-format floor tiles.
The Tile Spacer Levelling System 2mm Floor Twister Spacer Screws + Red Twister Nuts combines a 2 mm spacing function with a twister-style levelling method. As a result, it can help installers maintain both joint width and tile alignment.
Ultimately, professional results come from using the right combination of preparation, adhesive, spacing, levelling, and tiling tools. Simple tools still matter because they solve simple problems well. With careful planning and consistent technique, modern tile work can achieve a clean, flat, and professional finish.
How Do You Make Sure Tiles Are Levelled?
Introduction
Installing tiles looks simple, but getting every tile leveling system to the same height can take care and patience. Even a small difference between two tiles can create an uneven surface. This problem is often called tile lippage. It can affect both the look and feel of a finished floor or wall.
Fortunately, there are several ways to keep tiles level. Good surface preparation, the right adhesive, careful placement, and suitable tools all play an important role. In addition, a tile leveling system can make it easier to keep nearby tiles at a similar height while the adhesive dries.
One useful option for floor projects is the Tile Spacer Levelling System 2mm Floor Twister Spacer Screws + Red Twister Nuts. This type of system combines spacing and levelling in one setup. It can help maintain a consistent 2 mm joint while the twister parts apply pressure to the tile edges.
This guide explains how to make sure tiles are level, how levelling systems work, what tools you need, and how to avoid common mistakes.
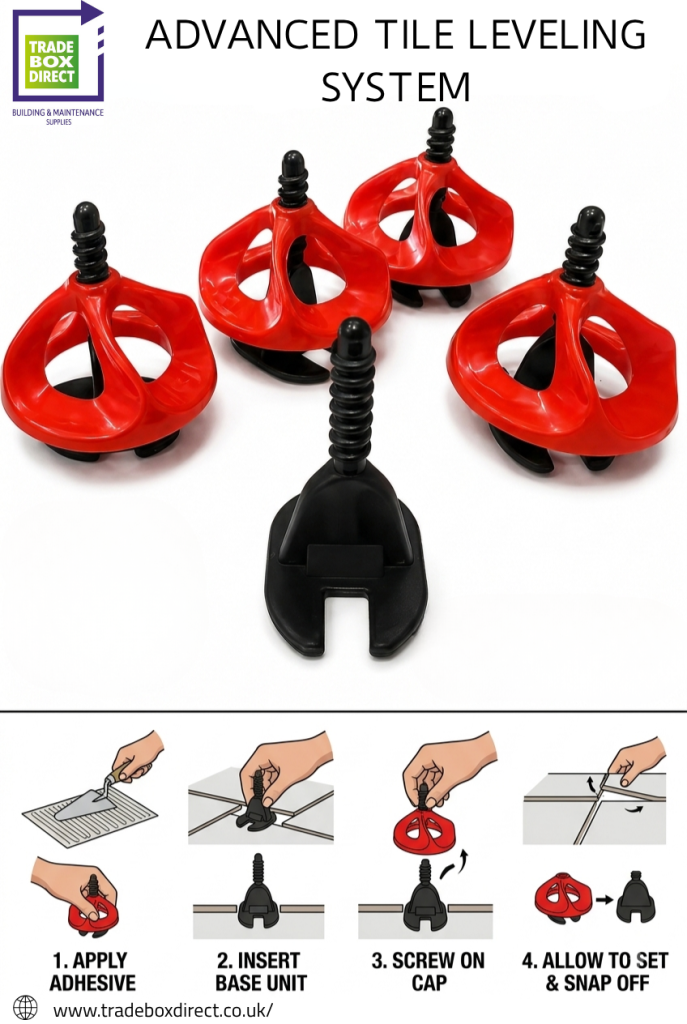
Why Is Tile Levelling Important?
A level tile surface looks cleaner and feels better underfoot. When tiles sit at different heights, one edge may stick up above another. This can create a trip point and may also make cleaning harder.
Uneven tiles can also affect the grout lines. If the tiles move during installation, the gaps may become inconsistent. As a result, the finished surface may look untidy.
Therefore, levelling should be considered from the start of the project. It is much easier to prevent uneven tiles than to correct them after the adhesive has dried.
Start With a Flat Surface
The first step is to prepare the surface properly. A tile leveling system can help align tiles, but it cannot repair a badly uneven floor.
Begin by removing dust, dirt, loose material, and old adhesive. Next, check the surface with a long spirit level or straight edge.
Look for dips, bumps, cracks, or loose areas. Small imperfections may be corrected with a suitable preparation product. Larger problems may need more work before tiling starts.
A flat base gives the tiles a better starting point. Therefore, spend enough time on preparation before opening the adhesive.
Use the Right Tile Adhesive
The adhesive also affects tile height. If one part of a tile has more adhesive than another, the tile may sit unevenly.
Choose an adhesive that suits the tile type and surface. For example, porcelain tiles may need an adhesive designed for porcelain. Always follow the manufacturer’s instructions.
Mix the adhesive correctly. Too much water can weaken it, while an overly dry mix may not spread properly.
Use the correct notched trowel. The notches help create an even adhesive bed. For larger tiles, the installation method may also require adhesive to be applied to the back of the tile.
Good adhesive coverage helps support the tile across its surface. As a result, the tile is less likely to move or sink unevenly.
Plan the Tile Layout First
Before applying adhesive, plan where the tiles will go. Measure the room and mark useful reference lines.
Start from a suitable point rather than simply beginning at the nearest wall. Walls are not always perfectly straight. If you use a crooked wall as your guide, the tile pattern may gradually move out of line.
Dry-lay a few tiles if needed. This gives you a chance to check the layout and decide where cuts will be placed.
Planning also helps reduce waste. More importantly, it gives you a clear guide before the adhesive is spread.
Use Tile Spacers for Consistent Gaps
Tile spacers are small pieces that help maintain an even gap between tiles. They come in different sizes, such as 2 mm, 3 mm, and 5 mm.
The correct size depends on the tile and the design you want. A consistent gap is important because the grout lines will follow it.
However, normal spacers mainly control the gap. They do not always prevent one tile from sitting higher than the next.
That is why many installers combine spacers with a levelling method.
Tile Leveling Spacers for Better Alignment
Tile leveling spacers combine spacing with extra support. They can help maintain the required joint while also reducing small height differences.
The 2 mm floor twister system mentioned above is designed for a 2 mm joint. Its spacer component keeps the tiles apart, while the screw and nut arrangement helps bring the tile edges into alignment.
This can be useful when installing floor tiles where a clean and even finish is important.
Before use, check the product’s recommended tile thickness and installation instructions. Compatibility matters because not every system suits every tile.
How the Tile Spacer Levelling System Works
The Tile Spacer Levelling System 2mm Floor Twister Spacer Screws + Red Twister Nuts uses a simple twisting action.
First, the spacer is positioned between two tiles. The tiles are placed at the correct distance from each other. Next, the twister screw is positioned through the spacer.
The red twister nut is then turned by hand. As it tightens, it applies pressure to the tile edges. This helps bring the nearby tiles to a similar height.
The system remains in place while the adhesive sets. Once the adhesive has cured, the levelling components can be removed according to the product instructions.
This method provides both spacing and levelling support. Therefore, it can reduce the need to use separate components for each task.
Check Each Tile as You Work
Do not wait until the entire floor is finished before checking the level. Check tiles as you install them.
Place a spirit level across two or more tiles. Look for gaps beneath the level. Then check from another direction.
You can also use a straight edge across several tiles. This can reveal height differences that may not be obvious when looking at one tile.
If a tile is too high, adjust it while the adhesive is still workable. Once the adhesive has cured, corrections become much harder.
Use the Correct Pressure
When using a tile leveling system, pressure should be applied carefully.
Too little pressure may not hold the tiles in alignment. On the other hand, too much pressure can move the tiles or push too much adhesive away from the contact area.
The goal is not to force the tiles into position. Instead, use steady and controlled pressure.
With a twister-style system, turn the nut gradually. Check the tile surface as you tighten it. Stop when the edges are aligned and the tiles are secure.
Floor Tile Spacers and Their Role
Floor tile spacers are especially useful when creating a regular floor pattern. They help maintain the joint width across the installation.
For example, a 2 mm spacer can create a narrow and neat grout line. However, the correct joint depends on the tile type and manufacturer’s guidance.
Floor spacers can be used with a levelling system when the products are designed to work together. In the case of a twister system, the spacing element forms part of the levelling setup.
Keep checking the joint as you move across the room. Small spacing changes can become obvious near walls and doorways.
Choose the Right Tiling Tools
Good tiling tools can make the installation much easier. You do not need every tool available, but a few basic items are very useful.
Common tools include:
- Spirit level
- Straight edge
- Measuring tape
- Notched trowel
- Tile cutter
- Tile nippers
- Rubber mallet
- Mixing bucket
- Grout float
- Cleaning sponge
- Tile spacers
- Levelling components
- Safety gloves
Each tool has a different purpose. A spirit level checks alignment, while a notched trowel helps spread adhesive. A tile cutter creates clean cuts, and a rubber mallet can help with gentle positioning.
Having the right equipment ready before starting can save time.
Use a Tile Levelling System on Large Tiles
Large tiles can be harder to level by hand. Their size means that even small surface variations can become visible.
A tile leveling system can provide extra support along the tile edges. This can be helpful when installing large porcelain or ceramic floor tiles.
However, large tiles also require careful adhesive coverage. Follow the tile manufacturer’s recommendations for adhesive application.
Do not use the levelling system to force a large tile onto an uneven base. Correct the surface first.
Tile Levelling System for Wall Tiles
A tile levelling system can also be useful for some wall-tile projects. Wall tiles can move before the adhesive sets, especially when they are large or heavy.
A suitable levelling system can help hold neighbouring tiles in alignment. Still, wall preparation is very important.
Make sure the wall is clean, stable, and suitable for the chosen adhesive. Follow the manufacturer’s instructions for the tile and adhesive.
When working on walls, check the level frequently. Gravity can slowly affect tile position, so early correction is much easier than later repair.
Common Problems That Cause Uneven Tiles
Several mistakes can lead to uneven tiles.
Uneven Base
A poor base is one of the biggest causes. Always check the surface before tiling.
Uneven Adhesive
If adhesive is spread at different depths, the tiles may sit at different heights.
Poor Tile Placement
Moving a tile too much after placing it can disturb the adhesive bed.
Wrong Spacer Size
Using the wrong spacer can change the grout joint and affect the tile pattern.
Too Much Pressure
Over-tightening a levelling component can push tiles out of position.
Working Too Fast
Rushing can lead to missed checks and poor alignment. Work at a steady pace instead.
How to Remove the Levelling Parts
Removal should be done after the adhesive has cured enough.
For the twister system, follow the manufacturer’s removal instructions. Do not remove components while the adhesive is still soft unless the product specifically requires it.
Once removed, inspect the joints. Clean away any adhesive that has entered the grout space.
Never strike the tile surface directly with a hard tool. If a breakaway part needs to be tapped, use the recommended method and direction.
How to Get a Professional-Looking Finish
A professional result starts with careful planning. First, prepare the surface. Then check the tile layout and choose the correct adhesive.
Next, use consistent spacing and check tile height as you work. A tile leveling system can provide extra support, but it should be part of a complete installation method.
Keep your work area clean. Remove excess adhesive before it hardens. Check each section before moving on.
Finally, allow enough curing time before walking on the floor or applying grout. The adhesive manufacturer’s instructions should always be followed.
Frequently Asked Questions
1. How can I tell if my tiles are level?
Use a spirit level or straight edge across two or more tiles. Check from different directions to identify height differences.
2. Can tile spacers level tiles?
Standard spacers mainly control the gap. They do not always control tile height. A levelling system provides additional support.
3. Is a 2 mm tile spacer suitable for every floor?
No. The correct joint depends on the tile and installation requirements. Check the tile manufacturer’s recommendations before choosing a spacer.
4. Is the Tile Spacer Levelling System suitable for DIY projects?
A twister-style system can be useful for DIY users because it provides a simple way to maintain spacing and alignment. Always read the product instructions before use.
5. Can a levelling system fix a very uneven floor?
No. It can help align neighbouring tiles, but it cannot replace proper floor preparation.
Final Thoughts
Making sure tiles are level requires more than simply placing them on adhesive. The surface must be prepared, the layout should be planned, and the correct adhesive and tools should be used.
A tile leveling system adds useful support by helping keep nearby tile edges at a similar height. The Tile Spacer Levelling System 2mm Floor Twister Spacer Screws + Red Twister Nuts also combines spacing and levelling, making it a practical option for suitable floor-tile projects.
Use tile leveling spacers when you need better control over tile height and joint spacing. Combine them with suitable tile spacers, floor tile spacers, and quality tiling tools for a smoother installation.
Most importantly, work slowly and check your tiles as you go. With good preparation, careful spacing, and the right levelling method, you can create a clean, even, and attractive tiled surface.
How Does a Tile Leveling System Work?
Introduction
Tiling can give a room a clean and modern look. However, getting every tile to sit at the same height can be difficult. Small differences between tiles may create raised edges, uneven lines, or an untidy finish. Fortunately, a tile leveling system can make this part of the job much easier.
These systems are useful for both DIY projects and professional work. They help keep nearby tiles at a similar height while the adhesive dries. At the same time, they help maintain an even gap between tiles when the correct type is used.
But how does a tile leveling system actually work? What parts does it use? How should you fit it? Also, is it better than normal spacers?
This guide explains everything in simple language. It covers the main parts, the installation process, common mistakes, benefits, and useful tips. Therefore, you can understand how the system works before starting your next tiling project.
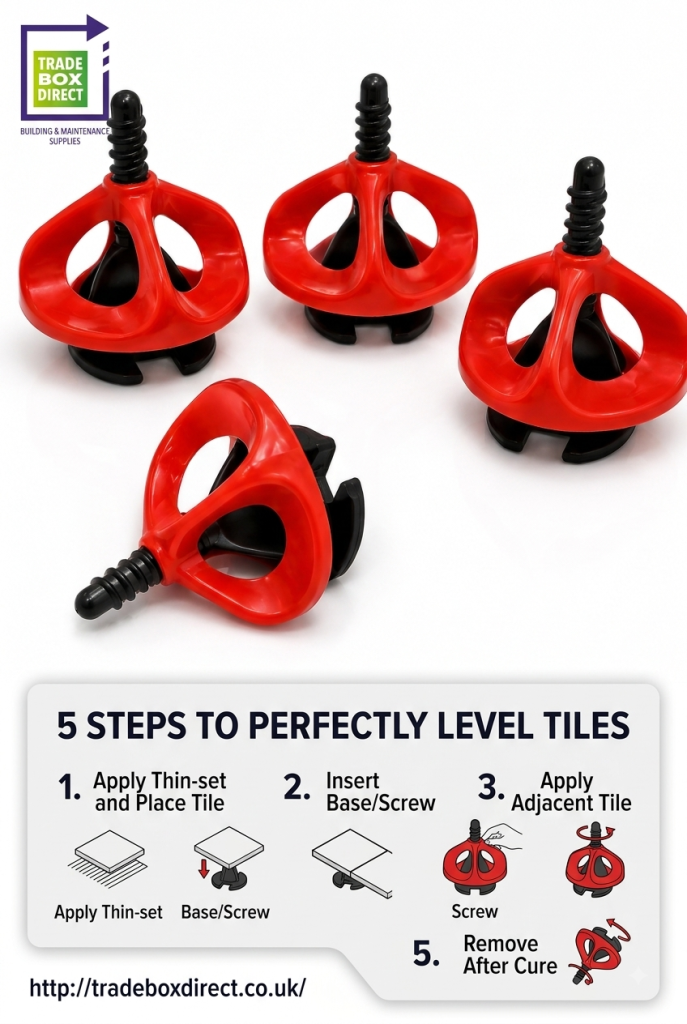
What Is a Tile Leveling System?
A tile leveling system is a set of small parts that helps reduce height differences between tiles. Most systems use clips and wedges, while some use caps, straps, or twist-lock parts.
The clip is placed between two tiles. It sits under or around their edges, depending on the design. Then, a wedge or cap is added to the clip. When the wedge is tightened, it applies pressure to the tile edges.
As a result, the tiles are held at a more even height while the adhesive sets.
This process is especially useful for large tiles. Large tiles can show small height differences more clearly than smaller tiles. Therefore, levelling support can help create a flatter and cleaner surface.
However, the system does not replace proper surface preparation. The floor or wall must still be suitable for tiling.
How Does a Tile Leveling System Work?
The basic process is quite simple.
First, the surface is prepared and the correct tile adhesive is applied. Next, the first tile is placed into position. Clips are then placed along the tile edges according to the product instructions.
The second tile is positioned next to the first one. A suitable gap is kept between them. After that, the wedge or cap is fitted into the clip.
The wedge applies pressure to both tiles. This helps reduce the height difference between their edges. Therefore, one tile is less likely to sit higher than the next tile.
The system stays in place while the adhesive cures. Once the adhesive has set, the clips are removed. Most breakaway clips can be removed with a tap in the correct direction.
Finally, the joints are cleaned and prepared for grout.
Main Parts of the System
Although designs can vary, most systems contain a few basic parts.
Clips
Clips are placed between or underneath the edges of tiles. They provide the main support during the levelling process.
Different clips are made for different tile thicknesses and joint sizes. Therefore, always check the product specifications before use.
Wedges
Wedges slide into the clips. They create pressure that helps bring nearby tile surfaces to a similar level.
Many wedges can be reused. This makes them useful for larger projects and future jobs.
Caps
Some systems use screw caps instead of traditional wedges. The cap is turned to create pressure.
This design can be easy to control because the pressure can be adjusted gradually.
Straps
Strap-based systems use a thin strap between the tiles. A reusable cap then pulls the tiles into alignment.
The best design depends on your tiles, project size, and personal preference.
Tile Leveling System vs Tile Spacers
A common question is whether levelling systems are the same as ordinary spacers. They are not exactly the same.
Tile spacers mainly control the distance between tiles. They help maintain a consistent grout joint. For example, a 2 mm spacer can help keep a 2 mm gap between tiles.
A levelling system has another main purpose. It helps reduce height differences between neighbouring tiles.
For many projects, both can be useful. The spacers maintain the joint, while the levelling parts help align the tile surfaces.
Some modern products combine both functions. These can save time because one component handles spacing and levelling.
Tile Leveling Spacers and Their Purpose
Tile leveling spacers are designed to provide two useful functions. They help keep the correct gap and also support tile alignment.
They are particularly useful when installing large-format porcelain or ceramic tiles. Such tiles often require careful positioning because even a small height difference can be easy to see.
However, users should not rely on the spacer alone. The surface must be flat enough, and the adhesive must be applied correctly.
Before starting, check the recommended joint size and tile thickness. Then choose a spacer that matches both requirements.
Step-by-Step Installation Process
Using the system correctly is important. A simple process can help you get better results.
Step 1: Prepare the Surface
Start with a clean and stable surface. Remove dust, loose material, grease, and other contaminants.
Check for major dips or raised areas. These should be corrected before the tiles are installed.
Step 2: Plan the Layout
Measure the room and decide where the tiles will go. Try to avoid very narrow cuts around visible edges.
Planning first can also reduce waste.
Step 3: Apply the Adhesive
Use an adhesive suitable for the tile and surface. Spread it with the correct notched trowel.
Good adhesive coverage is important. A levelling system cannot correct poor adhesive coverage.
Step 4: Place the First Tile
Set the first tile into the adhesive. Press it gently and make sure it is in the correct position.
Check its level before moving to the next tile.
Step 5: Insert the Clips
Place the clips according to the manufacturer’s instructions. Their position can depend on the tile size and clip design.
Do not use more or fewer clips than recommended without a good reason.
Step 6: Add the Next Tile
Place the next tile beside the first one. Keep the required joint width between them.
Check the tile position before adding the wedge.
Step 7: Insert the Wedge
Push the wedge into the clip. Apply enough pressure to bring the tile surfaces into alignment.
Avoid excessive force. Too much pressure can move the tiles or disturb the adhesive.
Step 8: Continue Across the Area
Repeat the same process for the remaining tiles. Check the alignment as you work.
Working in small sections can make the process easier to control.
Step 9: Allow the Adhesive to Cure
Leave the tiles undisturbed for the recommended curing time. The exact time depends on the adhesive.
Do not remove the system too early.
Step 10: Remove the Clips
Once the adhesive has cured, remove the clips as directed. Breakaway clips are usually tapped sideways with a rubber mallet or similar tool.
Avoid hitting the tile surface directly.
Why Is a Tile Leveling System Useful?
There are several reasons why installers choose a tile leveling system.
First, it helps reduce lippage. Lippage means a height difference between nearby tile edges.
Second, it can make large tiles easier to align. Large tiles cover more area, so small changes in height can be noticeable.
Third, the system can save time. Once the clips are positioned, they provide support while the adhesive cures.
It can also help beginners gain more control during installation. Even so, practice and careful preparation are still needed.
Using Floor Tile Spacers Correctly
Floor tile spacers are helpful when you want consistent grout joints. They are available in different sizes, so you can choose the joint width that suits your design.
For example, smaller joints can create a clean modern look. Wider joints may work better for some rustic tiles or certain installation needs.
When using floor spacers with a levelling system, make sure both products are compatible. The clip should not reduce the required grout gap.
It is also important to keep the spacing consistent across the entire floor. Small changes can become noticeable once the grout is added.
What Tiling Tools Do You Need?
A levelling system is only one part of a successful tiling job. Other tiling tools are also needed.
Common tools include:
- Tile cutter
- Notched trowel
- Measuring tape
- Tile spacers
- Rubber mallet
- Grout float
- Spirit level
- Tile nippers
- Mixing bucket
- Clean sponge
- Safety gloves
- Levelling clips and wedges
Each tool has a specific purpose. For example, a notched trowel helps spread adhesive evenly, while a tile cutter creates clean tile cuts.
Having the right tools ready before you begin can make the job smoother.
Common Mistakes to Avoid
Even a good system will not give great results if it is used incorrectly.
Using the Wrong Clip Size
Every system has a suitable tile thickness range. Check it before buying.
Applying Too Much Pressure
A wedge should hold the tile firmly. It should not be forced into place.
Ignoring the Surface
The system is not designed to repair a badly uneven floor. Major surface problems should be fixed first.
Using Too Few Clips
Large tiles may need more clips to maintain proper alignment. Follow the manufacturer’s recommendations.
Removing the System Too Soon
The adhesive needs time to cure. Removing the parts too early may allow the tiles to move.
Forgetting the Joint Width
The clip must match the required grout gap. Otherwise, the final layout may not look consistent.
Is a Tile Leveling System Suitable for Wall Tiles?
Yes, many systems can be used for wall tiles. They can help keep tile edges aligned while the adhesive sets.
Wall tiling can be challenging because gravity can cause tiles to move. A levelling system can provide extra support.
Still, the wall must be properly prepared. The adhesive should also be suitable for the tile and wall surface.
Always follow the instructions for the specific product you are using.
Is It Suitable for Large Tiles?
Yes. Large-format tiles are one of the main situations where these systems can be helpful.
Large tiles can be harder to position by hand. They may also have slight curves or variations that make alignment more difficult.
A tile leveling system can help reduce these small differences. However, the base must be flat and the adhesive coverage must be good.
For very large tiles, follow the tile manufacturer’s installation recommendations as well.
Tips for Better Results
Good preparation makes a major difference. Start by checking the surface and planning the layout.
Next, choose clips that match the tile thickness and joint width. Keep your adhesive layer consistent. Also, avoid moving tiles after the clips have been tightened.
Check the tile alignment from different angles. Good lighting can help you notice small changes.
Most importantly, follow the instructions supplied with the levelling product. Different systems can have different installation methods.
Frequently Asked Questions
1. Does a tile leveling system replace spacers?
Not always. Standard spacers mainly control the grout gap. A levelling system mainly helps control tile height. Some products combine both functions.
2. Can beginners use a tile levelling system?
Yes. Most clip-and-wedge systems are simple to use. However, beginners should practise on a small section and follow the manufacturer’s instructions.
3. Can the wedges be reused?
Many wedges are designed for reuse. Check the product details before using them on another project.
4. Can these systems prevent all tile lippage?
No. They can reduce height differences between tiles, but they cannot fix a badly uneven surface or poor installation technique.
5. How long should the clips stay in place?
They should normally stay until the adhesive has cured enough. Follow the adhesive manufacturer’s instructions rather than guessing the curing time.
6. Can I use the system with porcelain tiles?
In many cases, yes. However, check the system’s tile thickness range and application guidance before installation.
7. Are levelling systems needed for every tiling job?
No. Small tiles and simple projects may be installed successfully with standard spacers. However, levelling systems can be useful when a flatter and more even finish is required.
Final Thoughts
A tile leveling system works by holding nearby tile edges at a similar height while the adhesive cures. Most systems use clips with wedges, caps, or straps. The parts apply controlled pressure and help reduce uneven tile edges.
The system is especially useful for large-format tiles, floor projects, and areas where a neat finish is important. However, good results still depend on proper surface preparation, suitable adhesive, correct spacing, and careful installation.
Whether you are a DIY user or an experienced installer, choosing the right system can make tiling easier. Combine it with suitable tile spacers, quality adhesive, and the right tools. As a result, you can create a cleaner, more even, and professional-looking tiled surface.
What Is the Best Tile Leveling System? A Simple Guide for Better Tiling
Introduction
Choosing the right tile tools can make a big difference when you want a smooth and professional finish. One of the most useful options for modern tile work is a tile leveling system. It helps keep tiles at the same height and reduces uneven edges between tiles. As a result, floors and walls can look cleaner, flatter, and more attractive.
However, many types of leveling systems are available. Some are made for small tiles, while others work better with large and heavy tiles. Therefore, it is important to understand how each type works before you buy one.
The best option depends on the tile size, tile thickness, joint width, project type, and your experience. In this guide, we will explain the main types, benefits, features, and uses. We will also cover common questions so you can choose with confidence.
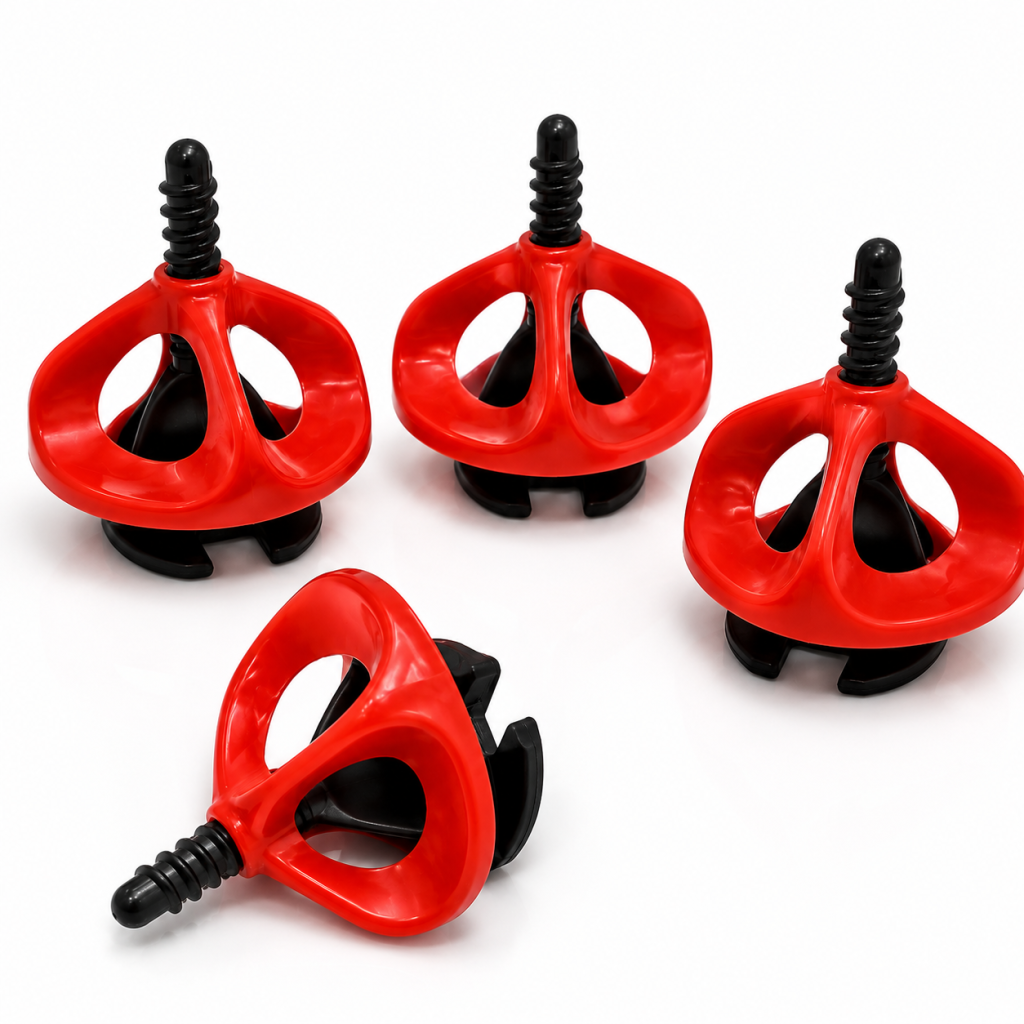
What Is a Tile Leveling System?
A tile leveling system is a set of small tools that helps keep tiles level while adhesive sets. Most systems have two main parts: clips and wedges, caps, or reusable pieces. The clips sit between tiles, while the second part applies pressure to help align their surfaces.
When tiles are installed by hand, one tile may sit slightly higher than another. This problem is known as lippage. It can make the floor feel uneven and can also affect its appearance. A leveling system helps reduce this issue.
The system does not replace good tile preparation. Instead, it supports accurate installation. The floor or wall must still be clean, stable, and properly prepared. Also, the correct adhesive should be used for the tile and surface.
Why Do You Need a Leveling System?
Tile installation may look simple, but keeping every tile perfectly aligned can take time. Even experienced installers can face small height differences. Therefore, leveling tools can make the work easier.
First, they help reduce lippage. This gives the finished surface a more even appearance. Second, they can help maintain straight grout joints. In addition, they can make large-format tiles easier to handle.
A good system can also reduce the need for constant adjustment. Instead of lifting and checking every tile again and again, the installer can use clips and wedges to hold the tiles in position.
As a result, the installation process can become more controlled. However, the system should always be used according to the tile manufacturer’s instructions.
Types of Tile Leveling Systems
There are several designs on the market. Each one has its own strengths.
Clip and Wedge Systems
This is one of the most common choices. A clip is placed under or between the tile edges. A wedge is then pushed into the clip. This creates pressure and helps bring nearby tiles to the same height.
These systems are popular because they are simple to understand. They are also suitable for many floor and wall projects.
Spin Cap Systems
Spin cap systems use a reusable cap that is twisted onto a threaded post. The cap applies pressure to the tile surface. This design can offer good control and is often useful for larger tiles.
Because the cap can usually be reused, it may provide good value for regular installers.
Reusable Leveling Systems
Some systems use reusable components that can be cleaned and used again. They may cost more at first, but frequent users can benefit from their long-term value.
For occasional DIY projects, a basic clip and wedge kit may be enough. For professional work, a stronger reusable system may be a better choice.
Tile Leveling Spacers and Their Role
Many installers use tile leveling spacers to combine spacing and leveling in one process. These products help maintain a consistent gap while also reducing height differences.
The right spacer size depends on the desired grout joint. For example, a narrow joint may be preferred for some wall tiles, while wider joints can suit certain floor designs.
Still, leveling spacers should not be chosen by appearance alone. Their strength and compatibility with the tile thickness also matter.
Tile Spacers vs Leveling Systems
Tile spacers and leveling systems perform different jobs. Traditional tile spacers mainly help create equal gaps between tiles. They do not always control the height of neighbouring tiles.
A leveling system, on the other hand, helps manage both alignment and height. Therefore, it can be especially useful for large-format tiles.
Traditional tile spacers can still be useful for many projects. However, if lippage is a concern, a leveling system offers an added advantage.
Choosing the Right Tile Levelling System
When choosing a tile levelling system, start by checking the tile thickness. Every system has a recommended range. If the clips are too small or too large for the tile, they may not work correctly.
Next, check the joint width. Some systems are designed for very narrow joints, while others suit wider spaces.
Tile size also matters. Large tiles often benefit more from leveling tools because even a small height difference can be easy to notice.
Finally, think about how often you will use the system. A simple kit can work well for one home project. However, a professional tiler may prefer a durable system with reusable parts.
Floor Tile Spacers for Large Projects
Floor tile spacers can help maintain clean and regular grout lines. They are especially useful when laying many tiles across a large area.
However, floor tiles can be heavy, and large tiles can be harder to keep flat. Therefore, combining suitable spacers with a leveling system can provide better control.
For large rooms, it is also important to work in manageable sections. Spread adhesive evenly and avoid covering a larger area than you can tile within the recommended working time.
Key Features of a Good Leveling System
The best system should be easy to use and suitable for your tiles. Look for strong clips that do not break too easily during installation. The wedges or caps should also provide steady pressure.
Another important feature is removal. After the adhesive has cured according to its instructions, clips should be removed in the correct way. Usually, they are broken away in the direction recommended by the manufacturer.
Reusable parts can also be valuable. If you install tiles often, buying a system that allows parts to be reused may reduce future costs.
Most importantly, choose a product that matches the tile thickness and grout joint you plan to use.
How to Use a Tile Leveling System
Start by preparing the surface. It should be clean, firm, and free from dust or loose material. Next, apply the correct tile adhesive using the recommended trowel.
Place the first tile carefully. Then position the clips according to the system instructions. Place the next tile beside the first one and insert the wedge or cap.
Apply enough pressure to align the tiles, but do not force the system. Excessive pressure can move the tiles or squeeze too much adhesive from underneath.
Continue across the area while checking the tile lines. A level can still be useful because leveling systems do not correct a badly prepared surface.
Once the adhesive has cured, remove the clips as instructed. Clean the joints before grouting.
Common Mistakes to Avoid
One common mistake is using the wrong clip size. Always check the manufacturer’s specifications first.
Another mistake is applying too much pressure. A leveling system is designed to assist alignment, not force tiles into an unsuitable surface.
It is also important not to ignore adhesive coverage. Large tiles often need careful adhesive application to achieve proper support.
Some people also leave clips in place for too long or remove them incorrectly. Follow the product instructions to avoid damaging tile edges.
Finally, do not assume that a leveling system can fix every installation problem. Good preparation remains essential.
Tiling Tools That Work Well Together
A leveling system works best when combined with other suitable tiling tools. A quality notched trowel helps spread adhesive evenly. A rubber mallet can help with gentle adjustments where appropriate.
You may also need a tile cutter, measuring tape, tile spacers, a spirit level, grout float, mixing bucket, and cleaning sponge.
Having the right tools nearby can make the installation smoother. More importantly, good tools can help reduce mistakes and improve the final result.
Is a Leveling System Worth It for DIY Tiling?
For many DIY projects, yes. A leveling system can make tile installation easier to control. It is particularly useful for large tiles where uneven edges can be easy to see.
However, it is not essential for every small project. Small wall tiles with simple patterns may be installed successfully with standard spacers.
If you are working on a large floor, using a leveling system can save time and reduce frustration. It can also give beginners more confidence during installation.
The key is to select a system that matches your project rather than simply choosing the most expensive option.
What Is the Best Tile Leveling System Overall?
There is no single product that is perfect for every project. The best tile leveling system is one that matches your tile size, thickness, joint width, and installation method.
For basic DIY work, a simple clip and wedge design is often a practical choice. It is easy to understand and can provide good results when used correctly.
For professional installers, reusable spin-cap systems may offer better long-term value. They can provide controlled pressure and may be used across many projects.
Large-format tile installers should focus on systems that offer strong and stable leveling support. Meanwhile, occasional users should focus on ease of use, compatibility, and value.
In short, the best choice is the system that fits your tiles and your level of experience.
Final Thoughts
A quality tile leveling system can be a valuable addition to any tiling project. It helps keep nearby tiles aligned and can reduce uneven edges. As a result, the finished surface can look more professional.
Still, choosing the right system matters. Check the tile thickness, joint size, tile format, and installation method before buying. Also, use suitable tile spacers and other tools when needed.
For beginners, a simple clip and wedge kit can be a good starting point. For professionals, reusable systems may offer better value and control.
Most importantly, take your time during installation. Prepare the surface properly, follow the product instructions, and check your tile lines often. With the right approach, even a DIY project can achieve a neat and attractive finish.
Frequently Asked Questions
1. What is the main purpose of a tile leveling system?
Its main purpose is to help keep neighbouring tiles at a similar height. It can reduce lippage and help create a smoother finished surface.
2. Are leveling systems better than normal tile spacers?
They serve different purposes. Spacers mainly maintain grout gaps, while leveling systems also help control tile height. For large tiles, a leveling system can provide extra support.
3. Can beginners use a tile leveling system?
Yes. Most basic systems are easy to learn. However, beginners should carefully follow the manufacturer’s instructions and practise on a small area if possible.
4. Can leveling clips be reused?
Some clips are designed for single use, while wedges and caps may be reusable. Always check the product specifications before reusing any component.
5. Do I still need tile spacers when using a leveling system?
It depends on the design. Some systems include spacing features, while others require separate spacers. Check the system before installation.