

How Does a Louvred Air Vent Cover Improve Ventilation in Hull Homes?
Good VENTILATION helps keep a home fresh, dry and comfortable. In Hull, homes can face damp air, condensation and moisture, especially in kitchens, bathrooms, utility areas and older properties. Therefore, having the right vent can make a useful difference.
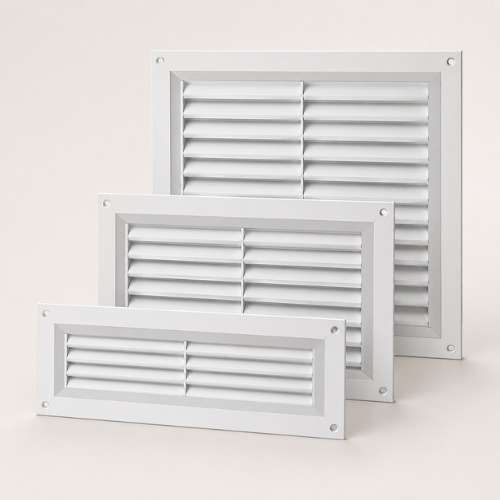
One simple option is a LOUVRED AIR VENT COVER WITH FIXED FLYSCREEN FLY MESH, PLASTIC VENTILATION GRILLE. This type of vent cover allows air to move through an opening while helping keep insects and unwanted debris outside. It can be a practical choice for homeowners who want better airflow without using a complex system.
What Is a Louvred Air Vent Cover?
A louvred air vent cover is a grille with angled openings called louvres. These openings allow air to pass through the vent. At the same time, the design helps protect the opening from direct exposure to the outside.
The LOUVRED AIR VENT COVER WITH FIXED FLYSCREEN FLY MESH, PLASTIC VENTILATION GRILLE adds another useful feature. A fixed flyscreen mesh sits behind the grille. As a result, insects have less chance of entering through the vent.
This product combines a vent cover and mesh screen in one practical design. For Hull homes, it can support everyday VENTILATION in areas where fresh air needs to move through a wall or opening.
How Is the Plastic Ventilation Grille Made?
The grille is generally made from durable plastic. Plastic makes the product light and easy to handle. It also works well for many indoor and outdoor ventilation uses.
The louvres are shaped to create open paths for airflow. Meanwhile, the fixed flyscreen provides a barrier against insects. The two parts work together without making the product complicated to use.
A well-designed LOUVRED AIR VENT COVER WITH FIXED FLYSCREEN FLY MESH, PLASTIC VENTILATION GRILLE should provide a balance between airflow and protection. However, the exact airflow will depend on the size of the grille, the opening behind it and the overall ventilation design.
How Does It Improve Ventilation in Hull Homes?
Air needs a clear route to move in and out of a building. When openings become blocked, airflow can drop. Consequently, rooms may feel stuffy, while moisture can remain trapped for longer.
A louvred vent cover provides a clear opening for air movement. Because of this, it can support better VENTILATION in suitable parts of a property.
For example, it may be useful in a utility room where moisture is created during washing and drying. Likewise, it can support airflow in other areas where a suitable external vent opening is required.
The product does not create airflow by itself. Instead, it allows air to pass through an existing ventilation opening. Therefore, it should be viewed as one part of a wider home VENTILATION setup.
Why Is Fixed Flyscreen Mesh Useful?
Open ventilation points can sometimes allow insects to enter. This can become annoying during warmer months. A fixed flyscreen helps reduce this problem.
The mesh in the LOUVRED AIR VENT COVER WITH FIXED FLYSCREEN FLY MESH, PLASTIC VENTILATION GRILLE acts as a physical barrier. At the same time, it allows air to continue passing through the grille.
This makes the product useful for people who want airflow without leaving an opening completely exposed. The mesh can also help reduce the entry of small outdoor debris, depending on the installation location.
Main Advantages of a Louvred Air Vent Cover
There are several reasons why homeowners may choose this type of grille.
1. Supports Fresh Air Movement
The main purpose is to provide a suitable route for airflow. Better air movement can help reduce stuffiness and support healthier indoor conditions.
2. Helps Keep Insects Out
The fixed flyscreen is a major advantage. It helps create a barrier while keeping the ventilation opening functional.
3. Lightweight Plastic Design
Plastic is generally easy to handle during installation. It can also be a practical material for ventilation grilles used around the home.
4. Simple Appearance
A clean grille can fit neatly on a wall or other suitable ventilation opening. Therefore, it can improve airflow without creating a complicated appearance.
5. Useful for Different Areas
Depending on the size and installation requirements, the grille may suit kitchens, utility rooms, bathrooms, garages and other suitable spaces.
6. Easy to Consider for Replacement
If an old vent cover is damaged, blocked or worn, a replacement grille may help restore the intended airflow path. However, the opening should always be checked before buying a replacement.
Can It Help With Condensation?
Good VENTILATION can help control moisture inside a home. Condensation often develops when warm, moist air meets a cold surface. Bathrooms and kitchens are common areas where this happens.
A suitable ventilation opening can help moist air leave the property. However, a vent cover alone will not solve every condensation problem.
For that reason, homeowners should also consider extractor fans, regular airing, heating and insulation where appropriate. The LOUVRED AIR VENT COVER WITH FIXED FLYSCREEN FLY MESH, PLASTIC VENTILATION GRILLE can form part of this wider approach.
Is It Suitable for Hull Properties?
Hull has a mix of modern houses, older homes, flats and renovated properties. Each building can have different ventilation needs.
Older properties may have existing air openings that need replacement covers. Newer properties may use different ventilation systems. Therefore, it is important to check the existing opening and product measurements before you buy.
If you are shopping for a plastic ventilation grille, look at the dimensions, fixing method and intended use. Choosing the correct size can help ensure that the grille fits properly.
What Should You Check Before You Buy?
Before you buy a LOUVRED AIR VENT COVER WITH FIXED FLYSCREEN FLY MESH, PLASTIC VENTILATION GRILLE, check the following:
- Measure the existing opening.
- Check the grille dimensions.
- Confirm that the product suits your installation area.
- Look at the fixing requirements.
- Check the condition of the existing duct or opening.
- Make sure the mesh is suitable for your airflow needs.
- Consider whether additional ventilation equipment is required.
These simple checks can make shopping easier and help you select a suitable product.
Why Choose This Type of Vent Cover?
The biggest benefit is the combination of airflow and protection. You get a louvred grille that supports air movement, plus fixed flyscreen mesh that helps keep insects outside.
For homeowners looking for practical VENTILATION products, this design can be a useful option. It is especially worth considering when replacing an older external grille or improving an existing ventilation opening.
If you want to shop for ventilation products, compare the available sizes and specifications before you buy. A suitable product can offer a simple way to maintain an open and protected ventilation point.
FAQs
Does a louvred air vent cover improve airflow?
Yes. A suitable louvred cover allows air to pass through a ventilation opening. However, actual airflow also depends on the opening, ductwork and overall system.
What is a fixed flyscreen used for?
A fixed flyscreen helps prevent insects from entering through the ventilation opening. It still allows air to pass through the mesh.
Can this vent cover be used in a Hull home?
Yes, it may be suitable for many Hull properties when the size and installation requirements match the existing opening.
Can I use it to reduce condensation?
It can support VENTILATION, which may help manage moisture. However, condensation can have several causes, so additional measures may be needed.
Is a plastic ventilation grille easy to install?
Installation depends on the wall, opening and fixing method. Always check the product instructions and make sure the opening is suitable before fitting it.
What should I measure before buying?
Measure the existing ventilation opening and compare those measurements with the product size. This helps you choose a suitable grille.
Where can I shop for this type of product?
You can shop online for the LOUVRED AIR VENT COVER WITH FIXED FLYSCREEN FLY MESH, PLASTIC VENTILATION GRILLE and compare size, design and specifications before you buy.
Final Thoughts
A good ventilation opening can make a home feel fresher and more comfortable. The LOUVRED AIR VENT COVER WITH FIXED FLYSCREEN FLY MESH, PLASTIC VENTILATION GRILLE offers a practical combination of airflow and insect protection.
For Hull homeowners, it can be a useful choice for suitable ventilation openings in kitchens, utility rooms, bathrooms, garages and other areas. More importantly, it can form part of a wider VENTILATION plan designed to move stale and moist air from the home.When shopping for a new grille, check the measurements and installation requirements first. Then, choose a product that matches your existing opening and ventilation needs.
How Do Window Vents Improve Ventilation in Hull Homes?
Good indoor air matters in every home. Fresh air helps rooms feel clean, comfortable and pleasant. However, modern homes can hold stale air, moisture and unwanted smells when there is not enough airflow. This is where Window vents can help.
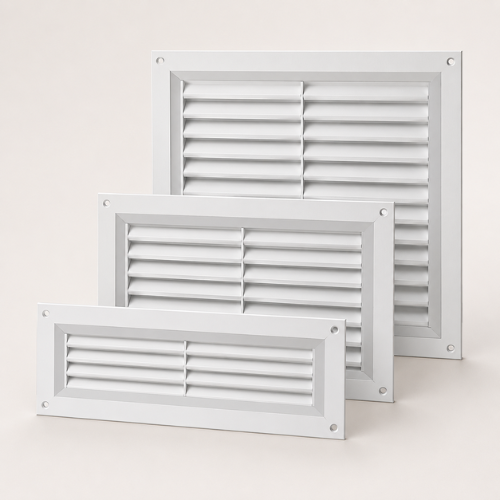
In Hull homes, Window vents offer a simple way to bring fresh air into rooms while allowing stale air to move out. They can be useful in living rooms, bedrooms, kitchens, bathrooms and other areas that need a steady flow of air.
Good VENTILATION also helps control moisture. As a result, it can reduce the conditions that may encourage mould and damp.
What Are Window Vents?
Window vents are small ventilation openings fitted into or around a window. They allow outdoor air to enter a room in a controlled way. Many designs include a cover or grille that helps protect the opening from insects and debris.
These vents come in different sizes, shapes and styles. Some are designed for UPVC windows, while others suit different window systems.
A window vent does not usually need to be large to make a useful difference. Instead, it provides a controlled path for air to enter the home.
Therefore, Window vents can support everyday VENTILATION without requiring homeowners to keep windows fully open.
How Do Window Vents Improve Airflow?
The main purpose of Window vents is to create a regular route for fresh outdoor air. When a room is closed for long periods, the air can become warm and stale.
A window vent provides a small opening for air movement. Fresh air can enter while stale air can leave through other openings or the home’s existing ventilation system.
This steady airflow can make rooms feel fresher. It can also help reduce the build-up of moisture from activities such as cooking, showering and drying clothes.
In addition, controlled airflow can be more convenient than leaving a window open. You can enjoy better VENTILATION while keeping the main window closed.
Why Are Window Vents Useful in Hull Homes?
Hull has a coastal location, and homes can experience changing weather conditions throughout the year. During colder months, people may keep windows closed for warmth. However, this can reduce natural airflow.
That is why Window vents can be useful. They provide a practical way to maintain airflow without opening a full window.
During warmer weather, they can also support natural air movement. Furthermore, they can help reduce the stuffy feeling that may develop in bedrooms and living spaces.
For homes where moisture is a concern, suitable Window vents can become part of a wider VENTILATION approach.
How Are Window Vents Made?
Most Window vents are made from durable materials such as UPVC, plastic or aluminium. The material depends on the product design and where the vent will be installed.
Many vents have a simple outer cover. Behind the cover, there is an opening that allows air to pass through. Some models also include features that help reduce the entry of insects.
The design needs to balance airflow, durability and appearance. A good vent should work effectively while looking neat on the window.
For this reason, check the product size, material and fitting requirements before you buy.
What Are the Main Advantages of Window Vents?
There are several reasons why homeowners choose Window vents.
1. Better Fresh Air
The first advantage is improved airflow. Fresh outdoor air can enter rooms without opening the main window.
2. Moisture Control
Daily activities create moisture. Cooking, washing and bathing all add water vapour to indoor air. Better airflow can help move this moisture away.
3. Reduced Stale Air
Closed rooms can develop stale smells. Regular air movement can make the indoor environment feel fresher.
4. Simple Design
Many Window vents have a compact design. They can fit neatly into a window system without taking up much space.
5. Useful in Different Rooms
You can consider them for bedrooms, kitchens, bathrooms, utility rooms and living spaces, depending on the ventilation needs of the property.
6. Support for a Wider Ventilation System
Window vents can work alongside extractor fans, air bricks and other ventilation products. Together, these products can help create a more balanced airflow system.
Do Window Vents Help With Condensation?
They can help reduce the conditions that contribute to condensation by improving airflow.
Condensation often forms when warm, moist indoor air meets a cold surface. Poor airflow can allow moisture to remain inside a room for longer.
By allowing fresh air to enter, Window vents can support moisture control. However, they are not a complete solution for every condensation or damp problem.
For serious damp, leaks or persistent mould, the underlying cause should also be checked.
How Should You Choose Window Vents?
Before shopping for Window vents, consider the type of window, the required size and the room where the vent will be installed.
You should also check the product specifications. Look at the airflow capacity, material, colour and fitting method.
For UPVC windows, choose a product designed for that window type. A suitable fit can help the vent work properly and provide a neat finish.
It is also useful to think about the overall VENTILATION needs of the home. One vent may not solve every airflow problem.
Can You Buy Window Vents Online?
Yes. Homeowners, landlords and tradespeople can shop online for a wide range of Window vents.
Online shopping makes it easier to compare sizes, designs and prices before placing an order. You can also check product specifications and select the option that suits your project.
If you plan to buy, check the measurements carefully first. Also, look for clear product information and suitable installation guidance.
For UK homeowners, choosing a supplier that offers UK delivery can make ordering easier. You may also find bulk discounts or special offers when buying several vents for a larger property.
Are Window Vents Suitable for New and Older Homes?
Yes, Window vents can be useful in both newer and older properties. However, the correct product depends on the existing window system and the home’s ventilation requirements.
Older homes may have different airflow patterns from modern properties. Meanwhile, newer homes can be more airtight, which makes planned airflow even more important.
Therefore, assess the whole property before choosing a product.
Why Is Good Ventilation Important?
Good VENTILATION helps maintain healthier and more comfortable indoor conditions. It can move stale air, moisture and everyday odours out of rooms while bringing fresh air inside.
Without enough airflow, moisture can remain trapped. Over time, this may contribute to condensation and mould in suitable conditions.
Window vents offer one simple way to support natural airflow. They are not a replacement for every ventilation system, but they can form an important part of a well-planned approach.
Shop Window Vents for Your Hull Home
If your Hull property needs better airflow, it is worth looking at suitable Window vents.
Before you buy, compare the size, material, design and airflow features. Also, make sure the product suits your window type.
Whether you need one vent for a bedroom or several for a full property project, online shopping can help you compare available options.
A well-chosen product can provide a simple and practical way to support indoor VENTILATION.
Frequently Asked Questions
How do Window vents improve ventilation?
Window vents provide a controlled opening that allows fresh outdoor air to enter a room. This helps support airflow and can reduce stale indoor air.
Are Window vents good for condensation?
They can help by improving airflow and allowing moisture to move out of a room. However, serious condensation may have other causes that need attention.
Where should Window vents be installed?
They can be used in rooms that need more airflow, such as bedrooms, kitchens, bathrooms and living areas. The correct position depends on the window and the home’s ventilation design.
Can I buy Window vents for UPVC windows?
Yes. There are vents designed specifically for UPVC window systems. Always check the product specifications before buying.
Do Window vents let insects inside?
Many modern designs include grilles or covers that help limit insect entry. Check the individual product features before you shop.
Are Window vents easy to maintain?
Most have a simple design and need basic cleaning to keep the opening clear. Follow the manufacturer’s care instructions for the specific product.
Can Window vents replace an extractor fan?
Usually, no. An extractor fan actively removes air, while a window vent mainly provides a route for fresh air to enter. Both can work together as part of a wider VENTILATION system.
Are Window vents useful in Hull during winter?
Yes. They can provide controlled airflow while the main window remains closed. This can help maintain fresh air without fully opening the window.
What should I check before I buy Window vents?
Check the window type, vent dimensions, material, airflow performance, colour and fitting method. Also consider the overall ventilation needs of your home.
How Long Do Plastic Pipe Fittings Last in Leeds Plumbing Systems?
Plumbing systems need strong parts that can work for many years. In Leeds, many homes and buildings use plastic pipes for water and heating systems. These systems also need reliable connections. That is where PLASTIC FITTINGS can help.
So, how long can plastic pipe fittings last? In many cases, good-quality products can work for decades. Some may last 25 to 50 years or even longer when you use them in the right way. However, the exact life depends on the product, pipe type, water pressure, heat, and installation.
For this reason, you should choose the right fitting for each job. A good match can help your plumbing system stay safe, neat, and reliable.
How Long Can Plastic Pipe Fittings Last?
Good-quality PLASTIC FITTINGS can last for many years. Their life often depends on how you use them. Cold-water systems may place less stress on fittings than hot-water systems. Also, normal water pressure can help fittings last longer.
High heat can affect some plastic materials. High pressure can also add stress to a joint. Poor installation may create another problem.
Therefore, product quality matters. You should also check the pipe size before you buy. A fitting should match the pipe and the intended use.
With the right product and good installation, plastic plumbing parts can give long-term service.
Why Are Plastic Pipe Fittings Popular in Leeds?
Leeds has many different types of properties. You can find older houses, new homes, flats, offices, and shops across the city. Each building may have different plumbing needs.
Modern plastic pipe fittings offer several useful benefits. They are light and easy to handle. They also do not rust like many metal parts.
Another benefit comes from simple installation. A plumber can often cut and connect plastic pipe with ease. This can save time during repair work.
However, you must select the correct fitting. A poor match may cause leaks or weak connections. For that reason, always check the pipe size and product details before starting work.
What Are Pipe Inserts?
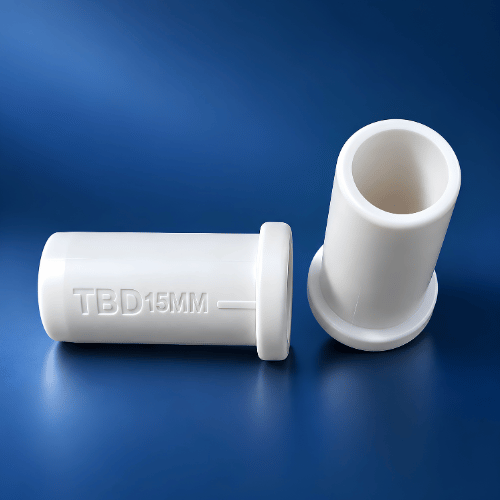
Pipe inserts are small parts that sit inside plastic pipes. They provide support at a pipe connection.
When you tighten a compression fitting, the pipe can face pressure. The insert supports the inside of the pipe. As a result, it can help the pipe keep its shape.
A plastic pipe insert can work well with compatible plastic pipe systems. It can also help create a more stable connection.
Although the insert looks small, it has an important job. It supports the pipe where the fitting grips it.
For this reason, many plumbing projects use suitable pipe inserts when the pipe system requires extra support.
What Is a Plastic Pipe Insert Made From?
A plastic pipe insert uses a strong material that can support the inside of the pipe. The exact material can vary between products.
Manufacturers design each insert for a specific pipe size and application. The insert must fit correctly inside the pipe. It should also provide enough support during installation.
Good manufacturing helps create accurate dimensions. A correct size allows the insert to sit properly inside the pipe.
Before you buy, check the product information. Make sure the insert matches your pipe type and size.
Never assume that every insert will work with every plastic pipe. Compatibility always matters.
What Is a 15mm Pipe Insert?
A 15mm pipe insert is made for compatible 15mm pipe systems. This pipe size appears often in domestic plumbing.
The insert sits inside the pipe before you secure the fitting. It supports the pipe wall and helps the pipe keep its shape.
For example, you may need one during a repair or a new installation. A plumber can also use one when replacing an existing connection.
If you plan to shop for a 15mm pipe insert, check the pipe material first. Then, compare the product size with your plumbing system.
A correct fit can make the installation easier and help support the connection.
What Is a 22MM Pipe Stiffener Insert?
The 22MM PIPE STIFFENER INSERT provides internal support for compatible 22mm plastic pipe.
During installation, a fitting can place pressure on the pipe. The stiffener helps support the pipe from inside. This can reduce the chance of the pipe changing shape at the joint.
Such an insert can prove useful during domestic repairs and new plumbing work. It may also suit maintenance jobs where you need to replace a connection.
Before you buy the product, check the pipe size and fitting type. Always follow the manufacturer’s instructions.
A correct match gives the insert the best chance to perform its job well.
What Is a 15MM Pipe Stiffener Insert?
The 15MM Pipe Stiffener Insert serves a similar purpose for compatible 15mm plastic pipe.
It sits inside the pipe at the connection point. The insert gives the pipe extra internal support. As a result, the pipe can hold its shape when you secure the fitting.
This small part can prove useful for household plumbing repairs. It can also help plumbers keep common pipe accessories ready for future work.
If you want to buy one, check the pipe specification first. A 15mm product should match the correct pipe type.
Shopping for the right size can prevent delays during installation.
What Are the Main Advantages of Pipe Inserts?
Suitable pipe inserts offer several benefits.
First, they support the inside of the pipe. This can help reduce pipe movement or deformation at the joint.
Second, they can help create a more stable connection. The insert supports the pipe while the fitting grips it.
Third, they are small and easy to store. Plumbers can keep different sizes in a toolbox or storage box.
Another benefit is easy replacement. If you need to change a fitting, you can use a new compatible insert when required.
Finally, pipe inserts can support good installation practice. They form a simple part of a wider plumbing connection.
Do Plastic Fittings Need Regular Maintenance?
Most PLASTIC FITTINGS need little routine care. Still, you should check your plumbing system from time to time.
Look around visible joints for water marks or damp areas. Also, watch for dripping connections. Unusual movement can point to a problem as well.
A small leak can grow into a larger issue. Therefore, deal with signs of trouble as soon as possible.
You should also inspect fittings after major plumbing work. A quick check can help you spot a loose connection.
Plastic does not rust like steel. However, heat, pressure, impact, and poor installation can still cause damage.
What Can Shorten the Life of Plastic Fittings?
Several factors can affect the working life of PLASTIC FITTINGS.
Excessive heat can place stress on some plastic materials. High water pressure can also affect joints. Repeated pressure changes may add more strain.
Incorrect installation can create problems too. For example, a badly cut pipe may not sit correctly inside the fitting.
Sharp bends can also place stress on the pipe. Physical impact may damage exposed plumbing.
Using the wrong insert can cause another issue. A 15mm pipe insert should suit the correct 15mm system. Likewise, a 22mm stiffener should match a compatible 22mm pipe.
Always check the manufacturer’s guidance before installation.
How Can You Make Plastic Pipe Fittings Last Longer?
Correct installation can help your plumbing parts last longer.
Start by cutting the pipe cleanly. Remove rough edges and make sure the pipe sits correctly in the fitting.
Next, choose the right product. Check the pipe size, material, pressure rating, and intended use.
Where the system needs internal support, use suitable pipe inserts. A plastic pipe insert can help support the pipe at the connection point.
Avoid putting extra strain on the pipe. Protect exposed sections from heavy impact and extreme heat.
You should also check visible joints from time to time. Early action can prevent a small problem from becoming a costly repair.
Good products plus flexible installation can support a longer service life.
Why Are Plastic Pipe Fittings Useful for Home Plumbing?
Home plumbing needs parts that are simple, practical, and reliable. PLASTIC FITTINGS can meet these needs in many suitable applications.
They are light and easy to handle. They also offer a useful option for many modern plastic pipe systems.
Plumbers can use different fittings for different connections. These may include connectors, elbows, tees, valves, and other plumbing parts.
Pipe inserts can add another layer of support when the system requires them.
Because every plumbing system differs, you should select products based on the actual job. Check the pipe size and application before you shop.
How Do You Choose the Right Plumbing Fittings?
Start with the pipe size. Common sizes include 15mm and 22mm in domestic plumbing.
Next, check the pipe material. Different pipe types may need different fittings or inserts.
Then, consider the water temperature and pressure. A product should suit the conditions in which it will work.
You should also look at the connection method. Compression fittings, push-fit systems, and other connections may have different requirements.
Finally, read the product information before you buy. This simple step can save time and reduce the chance of ordering the wrong part.
Should You Buy Pipe Inserts for a Plumbing Repair?
If your plumbing system needs internal pipe support, suitable pipe inserts can provide a useful solution.
For a 15mm system, you may need a 15mm pipe insert or a compatible 15MM Pipe Stiffener Insert. For a 22mm system, the 22MM PIPE STIFFENER INSERT may be suitable.
However, always check compatibility first. The pipe size alone may not tell you everything.
When shopping online, read the product description carefully. Check the size, material, application, and fitting type.
Buying the right component can make your repair job much easier.
Are Plastic Fittings a Good Choice for Leeds Plumbing?
For many suitable applications, yes. PLASTIC FITTINGS offer a practical option for domestic and commercial plumbing.
They can provide a long service life when you use them under suitable conditions. They are also easy to handle and widely used with modern plastic pipe systems.
However, the product must match the application. A fitting that works well in one system may not suit another.
Therefore, take time to check the specifications before you shop. If you feel unsure, ask a qualified plumber for advice.
Final Thoughts
So, how long do plastic pipe fittings last in Leeds plumbing systems?
The answer depends on the product and the conditions around it. Good-quality parts can last for many years when you install and use them correctly.
The right PLASTIC FITTINGS can support a reliable plumbing system. Suitable pipe inserts can also give extra support at pipe connections.
A plastic pipe insert, 15mm pipe insert, and stiffener insert each have a specific role. The 22MM PIPE STIFFENER INSERT and 15MM Pipe Stiffener Insert can help support compatible plastic pipe during fitting installation.
Before you buy, check the pipe size and product details. Also, make sure the product suits your plumbing system.
Whether you are repairing a home system or working on a larger project, careful product selection matters. With the right parts and good installation, your plumbing system can provide reliable service for many years.
FAQs
How long do plastic pipe fittings last?
Good-quality fittings can last for decades under suitable conditions. Their life depends on temperature, pressure, pipe type, product quality, and installation.
Are plastic fittings suitable for Leeds homes?
Yes. Suitable plastic fittings can work well in many Leeds homes. Always select a product that matches the pipe and application.
What do pipe inserts do?
Pipe inserts support the inside of compatible plastic pipe. They help the pipe keep its shape at a fitting connection.
What is a plastic pipe insert?
A plastic pipe insert is a small support component that fits inside compatible plastic pipe. It can help support the pipe during connection.
What is a 15mm pipe insert used for?
A 15mm pipe insert provides internal support for compatible 15mm pipe. It can help maintain the pipe shape at the joint.
What does a 22MM PIPE STIFFENER INSERT do?
The 22MM PIPE STIFFENER INSERT supports compatible 22mm plastic pipe from inside. It can help reduce pipe deformation during fitting installation.
What does a 15MM Pipe Stiffener Insert do?
The 15MM Pipe Stiffener Insert provides internal support for compatible 15mm pipe. It can help create a more stable connection.
How are pipe inserts made?
Manufacturers make pipe inserts from suitable rigid materials. They shape each product to precise dimensions so it can fit the intended pipe.
Can I use any pipe insert with plastic pipe?
No. The insert must match the pipe size, pipe type, and fitting system. Always check the product details before installation.
Do pipe inserts improve a plumbing connection?
A suitable insert can provide extra internal support. It can help the pipe keep its shape while you secure the fitting.
Should I buy 15mm or 22mm pipe inserts?
Choose the size that matches your compatible pipe system. Use a suitable 15mm product for a 15mm system and a suitable 22mm product for a 22mm system.
Where can I shop for plastic plumbing fittings?
You can shop for plastic pipe fittings, plumbing fittings, pipe inserts, and stiffener inserts from specialist plumbing suppliers. Always compare the product size and specifications before you buy.
What Are the Benefits of Using Solar Mounting Systems in Leeds?
Solar panels are now a popular choice for homes and businesses across Leeds. They help turn sunlight into useful electricity and can support lower energy costs. However, solar panels need a strong and suitable base. This is where MOUNTING becomes important.
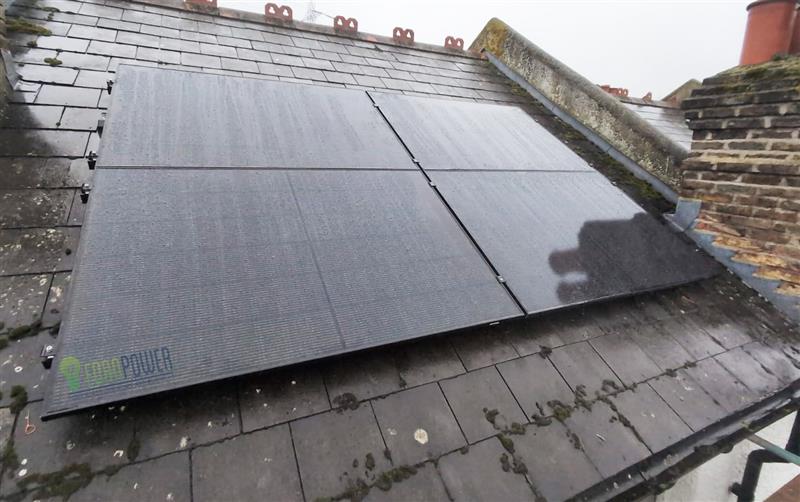
Good solar mounting systems hold panels securely on a roof. They also help keep the panels in the right position. As a result, the system can work safely and efficiently for many years. Whether you have a tiled roof, pantile roof, or another suitable roof type, the right MOUNTING equipment can make a big difference.
What Are Solar Mounting Systems?
Solar mounting systems are the parts used to attach solar panels to a roof or another suitable surface. These systems can include rails, hooks, brackets, clamps, and other fixing parts.
In Leeds, roof design can vary from one property to another. Therefore, installers need to choose suitable MOUNTING parts for each project. A good system should match the roof type and the solar panel design.
For example, a tiled roof may need a suitable roof hook. A pantile roof can require a pantile roof hook designed to work with the shape of the tiles. This helps create a stable base without placing unnecessary pressure on the roof.
Why Is MOUNTING Important for Solar Panels?
Strong MOUNTING gives solar panels a secure connection to the roof. It also helps maintain the correct panel position during normal weather conditions.
Leeds experiences rain, wind, cold weather, and changing temperatures. Therefore, reliable solar mounting rails and fixing parts are important. They help keep panels stable while supporting the overall solar installation.
In addition, quality solar brackets can make installation easier. They provide a practical way to connect panels with the supporting structure. As a result, installers can create a neat and organised solar array.
Benefits of Solar Mounting Systems in Leeds
1. Strong Roof Support
The main benefit of MOUNTING is support. Solar panels need a firm fixing system. Good solar panel mounting brackets help connect the panels to the supporting rails.
A strong system can reduce unwanted movement. This matters because loose or poorly fitted panels may affect the performance and safety of a solar installation.
2. Suitable for Different Roof Types
Leeds has many different homes and buildings. Some properties have traditional tiled roofs, while others use pantile designs.
For this reason, different solar roof hook options are available. A suitable hook can help installers work with the existing roof structure.
A pantile roof hook is especially useful for suitable pantile roofs. It can provide a practical fixing point while helping maintain a clean installation.
3. Better Panel Positioning
Solar panels work best when they receive good exposure to sunlight. Correct MOUNTING helps keep the panels in the planned position.
The use of a solar mounting rail also allows installers to create a straight and organised panel layout. This can improve the appearance of the installation while supporting a professional finish.
4. Long-Term Durability
Good-quality solar mounting systems are designed for long-term use. They need to cope with outdoor conditions throughout the year.
Rain, wind, sunlight, and temperature changes can all affect outdoor equipment. Therefore, choosing reliable solar brackets, hooks, and rails is an important part of a solar project.
5. Easier Solar Installation
A well-planned MOUNTING system can make the installation process more organised. Rails provide a clear structure for attaching panels, while hooks and brackets connect the structure to the roof.
For installers, this can make panel positioning easier. For property owners, it can provide greater confidence in the finished solar system.
Solar Mounting Rails and Solar Panel Rails
Solar mounting rails are an important part of many solar installations. They create the main support line where panels can be fixed.
A solar panel rail must work with the selected hooks, brackets, clamps, and panels. Therefore, compatibility matters when choosing products.
The Fastensol Black Mounting Rail 3.55m is a useful example of a mounting rail product for suitable solar projects. A rail of this type can help create a structured base for panel installation.
When you shop for solar equipment, check the rail length, fixing method, compatibility, and project requirements before you buy.
Fastensol Pantile Roof Hook-Portrait
The Fastensol Pantile Roof Hook-Portrait is designed for suitable pantile roof applications. A roof hook provides a fixing point between the roof structure and the solar mounting framework flexible.
This type of product can be useful when a property has pantile roofing. However, the installer should always check the roof type, tile profile, fixing position, and product compatibility before installation.
The correct MOUNTING choice can help create a stable and tidy solar panel arrangement.
How Are Solar Mounting Products Made?
Solar mounting products normally use strong materials that can handle outdoor conditions. Rails, hooks, and brackets need to provide reliable support while resisting normal environmental exposure.
The exact material and finish depend on the product. Therefore, buyers should check the manufacturer’s specifications before choosing a product.
For example, a mounting rail may use a lightweight but strong metal construction. Roof hooks and brackets can also use durable materials designed for external applications.
This makes product selection important. Instead of choosing only by price, compare size, strength, compatibility, finish, and compatible use.
What Should You Check Before You Buy?
Before you buy solar mounting equipment, consider several points.
First, identify the roof type. Next, check which hook or bracket suits that roof. Then, check the required rail length and panel compatibility.
You should also consider the complete system rather than one individual part. For example, solar panel mounting brackets, a solar roof hook, and a solar mounting rail need to work together.
If you are shopping for solar products in Leeds, clear product information can help you make a better choice. You can also compare suitable products before placing an order.
Why Shop for MOUNTING Products Carefully?
The quality of MOUNTING components can affect the strength and finish of a solar installation. Therefore, it is worth taking time to choose suitable products.
A complete system may include solar mounting systems, solar mounting rails, solar brackets, roof hooks, and panel rails. Each part has a specific job.
For this reason, avoid choosing products only because they look similar. Always check measurements and compatibility. If you are unsure, ask a qualified solar installer for advice.
Is MOUNTING a Good Investment for Leeds Solar Projects?
Yes, suitable MOUNTING can be a valuable part of a solar project. It supports the panels, helps maintain their position, and can make the installation more organised.
Furthermore, a suitable system can work with different roof designs. This makes it useful for many homes and commercial properties in Leeds.
If you are planning a solar installation, consider the complete mounting structure before you start shopping. Products such as the Fastensol Pantile Roof Hook-Portrait and Fastensol Black Mounting Rail 3.55m may be suitable for specific applications.
Always check the product specifications and installation requirements before you buy.
FAQs
What are solar mounting systems used for?
Solar mounting systems are used to secure solar panels to a suitable roof or surface. They can include rails, hooks, brackets, clamps, and other fixing components.
Why are solar mounting rails important?
Solar mounting rails provide a supporting structure for solar panels. They help installers create a stable and organised panel layout.
What is a pantile roof hook?
A pantile roof hook is a fixing component designed for suitable pantile roof applications. It connects the roof structure with the solar mounting framework.
What are solar panel mounting brackets?
Solar panel mounting brackets help secure solar panels or mounting components in place. The correct bracket depends on the panel, roof, and mounting system.
How do solar roof hooks work?
Solar roof hooks provide fixing points between the roof and the solar mounting structure. Installers position them carefully to support the required rail and panel layout.
Are solar brackets suitable for every roof?
No. Different roofs require different fixing methods. Always check the roof type, bracket design, measurements, and installation requirements before buying.
What should I check before buying solar mounting equipment?
Check the roof type, rail size, hook design, bracket compatibility, panel specifications, material, and installation requirements. This helps you choose suitable products.
Can I shop for solar mounting products online?
Yes. You can shop online for solar mounting systems, rails, hooks, brackets, and related solar equipment. However, always check product specifications before you buy.
Final Thoughts
The right MOUNTING system is an important part of a safe and well-planned solar installation in Leeds. From solar mounting systems and solar mounting rails to a pantile roof hook, solar roof hook, solar brackets, and solar panel mounting brackets, each component has a clear purpose.
A suitable solar mounting rail or solar panel rail can provide a strong base for the panels. Therefore, careful product selection matters.If you are planning a solar project, compare suitable products, check compatibility, and choose equipment that matches your roof and panel requirements. With the right MOUNTING approach, you can create a practical and organised foundation for your solar panels.
What Is the Best Dishwasher Detergent for Hard Water in Birmingham Homes?
Hard water can make dishwashing harder than it needs to be. It can leave white marks on glasses, dull plates, and reduce the cleaning power of some products. Therefore, choosing the right Dishwasher detergent matters when you want clean dishes with less effort.
For Birmingham homes, it is useful to choose a product that gives strong cleaning power and works well with your normal washing routine. At the same time, you should understand the difference between dishwasher liquid detergent, washing-up liquid, tablets, powders, and other cleaning products.
Why Does Hard Water Affect Dishwashing?
Hard water contains minerals such as calcium and magnesium. When heated, these minerals can leave deposits on surfaces. As a result, you may notice cloudy glasses, marks around the dishwasher, or a rough layer on some items.
However, the right Dishwasher detergent can help remove food, grease, and everyday dirt. A good cleaning routine can also reduce the effect of mineral build-up.
Birmingham homes may have different water conditions, so results can vary from one home to another. For this reason, it is helpful to check your dishwasher manual and use the correct cleaning product for your machine.
What Is Dishwasher Liquid Detergent?
Dishwasher liquid detergent is a liquid cleaning product designed to help remove grease, food, and other marks. The term is also used by shoppers when they search for liquid cleaning products for dishes.
Still, there is an important point to remember. Not every liquid dish cleaner is designed for an automatic dishwasher. Some products are made for washing dishes by hand. They can create too much foam inside a dishwasher.
Therefore, always check the product label before you buy. Follow the dishwasher manufacturer’s instructions as well.
The wider dishwasher liquid detergent category includes products that help with everyday dish cleaning. Shoppers often compare liquid cleaners based on cleaning strength, size, value, ease of use, and suitability for their routine.
Is Fairy Liquid 5L a Good Choice?
One useful product to consider within the wider dishwashing category is Fairy Liquid 5L – Professional Washing Up Liquid.
This product is a professional-size washing-up liquid. It can be useful for homes, kitchens, offices, cafés, and other places where dishes are washed regularly. The 5L size can also provide good value for shoppers who use washing-up liquid often.
However, Fairy Liquid is a washing-up liquid, not a product that should automatically be poured into an automatic dishwasher. It is mainly intended for hand washing dishes.
So, if you use a dishwasher machine, check whether the product is specifically approved for that machine. Using ordinary washing-up liquid inside a dishwasher can create excessive foam and may cause problems.
For hand washing, the product can help remove grease and food from plates, cups, pans, and kitchen items. Its larger size also means fewer repeat purchases for busy kitchens.
How Is Fairy Liquid Made?
Many shoppers ask how washing-up liquid is made. In simple terms, liquid dish cleaners contain a mixture of cleaning agents, water, fragrance, and other ingredient that help create a usable product.
The cleaning agents help loosen grease and food from dishes. Water provides the liquid base, while other ingredients can support texture, stability, fragrance, and performance.
The exact formula depends on the product and manufacturer. Therefore, you should always check the product packaging for current ingredient and safety information.
What Are the Advantages of Dishwasher Liquid Detergent?
The dishwasher liquid detergent category offers several useful features for shoppers.
First, liquid products are easy to measure when they are designed for the intended cleaning task. Next, they can spread easily across wet surfaces during hand washing.
Also, liquid dish cleaners can work well on greasy plates and kitchen tools. They are especially useful when you need to clean a few dishes quickly instead of running a full dishwasher cycle.
Another advantage is choice. You can shop for different pack sizes and cleaning strengths. Large packs, such as 5L products, can suit households or businesses that wash dishes often.
Still, product selection should match the job. A hand-washing product should be used for hand washing, while a machine-safe dishwasher product should be used in an automatic dishwasher.
How Can You Deal With Hard Water?
Hard water can cause mineral marks, but a few simple steps can help.
First, check the dishwasher’s water-hardness setting. Many modern machines allow you to adjust this setting.
Next, check whether your dishwasher needs dishwasher salt. Some machines use salt to support the built-in water-softening system. Your machine manual should explain whether this is required.
You should also keep the dishwasher clean. Wipe the door seal and check the filter regularly. A blocked or dirty filter can reduce cleaning performance.
Furthermore, avoid overloading the machine. Water and cleaning products need enough space to reach the dishes.
What Should You Look For When You Shop?
When you shop for Dishwasher detergent, think about your dishwasher type, water hardness, cleaning needs, and budget.
Look for clear instructions on the packaging. Check whether the product is made for automatic dishwashers or hand washing. This small step can prevent the wrong product from being used.
Price also matters. However, the cheapest option is not always the best value. A product that cleans well with the correct amount may cost less over time.
For hand washing, a large product such as Fairy Liquid 5L – Professional Washing Up Liquid can be worth considering when you need a regular supply.
If you plan to buy online, compare pack sizes and product information before placing an order. This makes shopping easier and helps you choose a product that fits your needs.
Can Dishwasher Liquid Detergent Remove Grease?
Yes, suitable dishwasher liquid detergent products can help remove grease when used for their intended purpose. Grease can stick strongly to plates, pans, and cooking tools. Cleaning agents help loosen this residue.
For hand washing, warm water can also help soften greasy food. A good washing-up liquid can then help lift the grease from the surface.
However, automatic dishwashers need products designed for their cleaning system. Always follow the machine instructions.
Is a 5L Pack Good for Regular Use?
A 5L pack can be useful for frequent washing. It can reduce the need to buy smaller bottles again and again.
For a busy household, workplace, café, or kitchen, buying a larger pack may offer better value. It can also make stock management easier.
Before you buy, consider storage space. Keep the product in a safe place and follow the label instructions.
Why Choose the Right Cleaning Product?
Choosing the correct product can improve your cleaning routine. It can also help avoid waste.
A good Dishwasher detergent should match your dishwasher and cleaning needs. Meanwhile, a product such as Fairy Liquid 5L can be useful for hand washing when used according to its instructions.
In addition, using the correct amount is important. Too much product does not always mean better cleaning. Follow the recommended amount on the label.
Frequently Asked Questions
1. What is the best Dishwasher detergent for hard water?
The best choice depends on your dishwasher, water hardness, and cleaning needs. Choose a machine-safe product and follow the dishwasher manufacturer’s instructions.
2. Can I use Fairy Liquid inside a dishwasher?
No. Fairy Liquid is a washing-up liquid intended for hand washing. Do not use ordinary washing-up liquid inside an automatic dishwasher unless the product specifically says it is suitable.
3. What is dishwasher liquid detergent?
Dishwasher liquid detergent is a term used for liquid cleaning products in the dishwashing category. However, products vary, so always check whether a specific liquid is made for automatic machines or hand washing.
4. What are the benefits of Fairy Liquid 5L?
The 5L size can provide a convenient supply for regular hand washing. It can suit busy kitchens and users who want to reduce frequent repurchasing.
5. How does hard water affect dishes?
Hard water minerals can leave cloudy marks and deposits on dishes and dishwasher parts. Correct dishwasher settings and suitable cleaning products can help manage these effects.
6. Can I buy dishwasher detergent online in Birmingham?
Yes. You can shop online for many dishwashing products and compare pack sizes, product types, and prices before you buy.
7. Is dishwasher detergent better than washing-up liquid?
They are made for different cleaning methods. Dishwasher detergent is designed for automatic machines, while washing-up liquid is generally designed for hand washing.
8. How can I get better dishwasher cleaning results?
Use the correct product, choose the right dishwasher setting, avoid overloading, clean the filter, and check the water-hardness setting. Together, these steps can improve results.
Final Thoughts
Hard water does not have to make dish cleaning difficult. The key is choosing the right product for the right job.
When you shop for Dishwasher detergent, first check whether it is designed for your automatic dishwasher. For hand washing, products in the dishwasher liquid detergent category can offer convenient cleaning options.
Fairy Liquid 5L – Professional Washing Up Liquid can be a practical choice for regular hand washing, especially where a larger pack is useful. However, it should not be treated as automatic dishwasher detergent.
Finally, compare products carefully before you buy. Check the label, pack size, intended use, and instructions. With the right product and a simple cleaning routine, Birmingham homes can keep dishes cleaner while managing the challenges of hard water.
Which Suppliers Offer Reliable Solar Equipment in Birmingham?
Finding a good solar supplier in Birmingham can make a solar project much easier. Whether you are a homeowner, installer, landlord, or trade buyer, the right supplier can save you time and effort.
A good supplier should offer clear product details, fair prices, useful advice, and fast UK delivery. It should also stock parts that help with solar panel fitting and protection.
Today, many Birmingham customers shop online for solar supplies. Online stores make it easy to compare products, prices, sizes, and delivery options. As a result, you can find the right items without visiting several shops.
The range of solar panel components also matters. You may need clips, mesh, mounting parts, cables, or other accessories. Therefore, choosing a supplier with a good range can make your shopping flexible.
What Should You Look for in a Solar Supplier?
A reliable supplier should make buying simple. First, check the product information. It should clearly show the size, colour, pack size, use, and other key details.
Next, look at the range of solar supplies. A good range gives you more choice. It also means you may find several products for the same project in one place.
Delivery is another key point. Fast UK delivery can help you avoid delays. This matters even more for installers who need parts for a job.
Price is important too. However, the cheapest product may not always be the best choice. Instead, compare quality, size, product use, delivery, and customer service.
By checking these points, you can shop with more confidence.
Why Are Solar Panel Components Important?
Solar panels need more than the main panels. Small parts also play an important role. These products can help with fitting, fixing, safety, and protection.
Common solar panel components include roof hooks, rails, clamps, connectors, cables, clips, and mesh. Each part has a different job.
For example, mounting parts help hold panels in place. Clips can secure protective mesh. Cables and connectors help link the electrical parts of a system.
Because every project is different, always check the product details before you buy. Make sure the part suits your panel type and installation.
A supplier with a wide range can also make shopping faster. You may find the parts you need without using several websites.
Why Are Solar Panel Mesh Clips Useful?
Birds can sometimes get under solar panels. They may build nests, leave waste, or bring leaves into the roof space. These problems can lead to extra cleaning and maintenance.
This is where solar panel mesh clips can help.
These clips hold protective mesh around the edge of a solar panel system. The mesh creates a barrier and can help reduce access below the panels.
When you shop for clips, check the size first. You should also check whether the clips work with your chosen mesh.
A good fit can make the installation cleaner and easier. It can also help keep the mesh in place during normal outdoor conditions.
What Is Bird Mesh for Solar Panels?
Bird mesh for solar panels is a protective mesh used around solar panels. Its main purpose is to reduce access to the open space below the panels.
Birds often look for safe and covered places to build nests. The space below solar panels can seem like a good spot. However, nesting can create unwanted mess and may make maintenance harder.
Bird mesh creates a physical barrier around suitable parts of the panel edge. It can help stop birds from entering while keeping the main panel surface clear.
The mesh usually works with clips or other fixing products. Therefore, you should check that the mesh and clips are compatible before you buy them.
For Birmingham homes, this type of protection can be useful in areas where birds often gather on rooftops.
What Is Bird Proofing for Solar Panels?
Bird proofing for solar panels uses a barrier to reduce bird access below the panels. Mesh and fixing clips often form the main parts of the system.
The process is simple in principle. First, suitable mesh is placed around the panel edge. Next, clips hold the mesh in position. The result is a barrier around the open space.
Proper fitting is important. The mesh should not block important panel parts. It should also avoid cables, roof drainage, and other parts of the installation.
If you are unsure about fitting, ask a qualified solar installer for help. A professional can check the roof and panel system before the work starts.
Solar Panel Bird Proofing Mesh Speed Clips – 30mm Black
One useful product for this type of project is Solar Panel Bird Proofing Mesh Speed Clips – 30mm Black.
These clips are designed to work with suitable solar panel bird-proofing mesh. They provide a practical way to secure mesh around the edge of compatible solar panels.
The 30mm size gives the product a specific fitting option. The black finish can also suit many modern solar panel systems.
Before you buy, check the product details and measurements. You should make sure the clips suit your mesh and panel setup.
For homeowners and installers, the right clip can make mesh fitting more simple. It can also help create a neat finish around the panel edge.
How Are Solar Panel Mesh Clips Made?
The exact manufacturing method can differ between products. However, many clips are formed or moulded into a shape that helps them hold mesh securely.
Manufacturers choose materials that can suit outdoor use. The material should be able to handle normal weather conditions when used as intended.
Product specifications are important here. Always check the supplier’s information before shopping.
For the Solar Panel Bird Proofing Mesh Speed Clips – 30mm Black, buyers should focus on size, intended use, compatibility, and installation requirements.
That simple check can help you avoid buying the wrong product.
What Are the Advantages of Solar Panel Mesh Clips?
There are several useful benefits to using suitable mesh clips.
- They can hold bird-proofing mesh in place.
- Help reduce bird access below panels.
- can make mesh fitting easier.
- can support a cleaner installation.
- It can help keep the mesh secure.
- These are useful for solar maintenance work.
- They can work as part of a wider bird-proofing system.
As a result, small clips can play an important role in solar panel protection.
However, the clips must match the mesh and panel system. Always check the product information before you buy.
How Does Bird Proofing Work?
The basic idea behind bird proofing for solar panels is simple. It creates a barrier around the open space below the panels.
Birds can no longer enter the protected area as easily when the barrier is fitted correctly. This can help reduce nesting and the build-up of bird waste.
Mesh normally sits along the panel edge. Clips then hold the mesh in place. Together, these products form a protective system.
Good fitting is important. The barrier should stay secure without causing damage to the panels or roof.
You should also check existing nests before starting work. If birds are already nesting, seek suitable advice before removing anything.
Why Should Birmingham Customers Shop Online?
Online shopping gives Birmingham buyers more choice. You can compare products from home and check important details before placing an order.
For example, you can compare solar supplies, product sizes, pack quantities, and prices. You can also check delivery times before you buy.
Online stores can also make it easier to find small solar accessories. You may need clips, mesh, mounting parts, or other products for one project.
Another benefit is convenience. You can shop at a time that suits you. This can be helpful for busy homeowners and trade customers.
However, do not choose a supplier based only on price. Check the product details and company service too.
How to Choose the Right Solar Supplies
Start by making a list of what you need. This can include mesh, clips, mounting parts, or other accessories.
Then, check the size and use of each product. Product measurements can vary, so never assume that one size will fit every system.
After that, compare prices. Look at the full cost, including delivery. A low product price may not always mean the lowest total cost.
You should also check stock levels. If you need parts quickly, in-stock products can help you avoid delays.
Finally, review the supplier’s delivery and returns information. Clear terms can give you greater peace of mind.
Benefits of Buying Solar Panel Protection Products
Solar panel protection products can help reduce common bird-related problems. They can also make future cleaning and maintenance easier.
For example, bird mesh for solar panels can create a barrier around the panel edge. Suitable clips can then hold that mesh in place.
This approach can help protect the space beneath solar panels. It can also give the installation a more complete finish.
The right products can be useful for both new installations and suitable existing systems. However, always check the fitting method before starting work.
Where Can You Buy Solar Panel Components in Birmingham?
Birmingham customers can shop from UK suppliers that stock solar accessories and trade products. Specialist online stores can offer a useful range for home and trade projects.
TradeBoxDirect is one option for UK customers looking for practical trade and building products.
When you buy online, check the product description carefully. Look at size, colour, quantity, compatibility, and intended use.
Installers may also benefit from buying several related products from one supplier. This can make ordering simpler and may help with larger projects.
For homeowners, clear product information is just as important. Easy wording can help you understand what you are buying before you place an order.
What Makes a Solar Supplier Reliable?
A reliable supplier should offer:
- Clear product descriptions
- Accurate measurements
- Useful product information
- Fair prices
- Secure online ordering
- UK delivery
- Clear returns information
- A useful product range
- Solar accessories for different projects
These points can help you compare suppliers with greater confidence.
Good solar supplies should also match the needs of your project. For example, you may need bird mesh and clips for panel protection.
Meanwhile, another project may need mounting rails or other solar panel components.
Knowing what you need before shopping can help you choose faster.
What Should You Check Before You Buy?
Before placing an order, check the product size. Next, look at the intended use. Then, check whether it works with your existing solar panel system.
For bird protection, check both the mesh and the clips. Solar panel mesh clips should suit the mesh you plan to use.
You should also check the quantity in each pack. This helps you order enough products for the whole job.
Delivery is another point to review. Fast UK delivery can be useful when you have a planned installation date.
Finally, compare the total cost rather than just the product price.
Final Buying Guide for Birmingham Customers
Finding reliable solar equipment in Birmingham does not have to be hard. Start by choosing a supplier with clear product information and a useful range.
Next, look at the solar supplies that match your project. Check each product before you buy.
For solar panel protection, consider solar panel components, solar panel mesh clips, bird mesh for solar panels, and bird proofing for solar panels together.
The Solar Panel Bird Proofing Mesh Speed Clips – 30mm Black can be a useful option for suitable bird-proofing work. Check the size and compatibility before ordering.
A careful approach can save time and reduce buying mistakes. Therefore, compare products, check specifications, and review delivery information before you shop.
Whether you are working on a home, commercial building, or installation project, the right products can make the job easier.
FAQs
1. What are the best solar supplies for a solar panel project?
The right solar supplies depend on your project. Common items include mounting parts, clips, cables, connectors, mesh, and protective accessories.
2. What are solar panel mesh clips used for?
Solar panel mesh clips help secure protective mesh around suitable solar panel edges. They are often used as part of a bird-proofing system.
3. What is bird mesh for solar panels?
Bird mesh for solar panels is a protective mesh that helps reduce access to the space below solar panels.
4. How does bird proofing for solar panels work?
Bird proofing creates a physical barrier around the panel edge. Mesh and clips work together to reduce access beneath the panels.
5. What is the Solar Panel Bird Proofing Mesh Speed Clips – 30mm Black product?
It is a 30mm black clip designed for use with suitable solar panel bird-proofing mesh. It can help secure mesh around compatible panel edges.
What Are the Signs of Poor Air Ventilation in Manchester Homes?
Good airflow keeps a home fresh and comfortable. However, many Manchester homes can develop poor airflow. Wet weather, closed windows and daily activities can increase indoor moisture. As a result, rooms may feel damp, stale or stuffy.
One useful solution is a terracotta airbrick. It creates a simple route for air to move through a wall. Therefore, it can support fresh airflow in suitable areas. Also, its traditional look can match many brick-built homes.
If you notice condensation, mould or stale smells, check your home’s ventilation. These signs can have other causes too. So, always check the problem before you choose a product.
What Is a Terracotta Airbrick?
A terracotta airbrick is a clay-based brick with openings for airflow. Manufacturers shape the clay and fire it at a high temperature. This process creates a hard and durable product.
The openings allow air to pass through the wall. At the same time, the brick gives the wall a neat and traditional finish.
Its natural colour can blend well with traditional brickwork. Therefore, many homeowners choose it for older properties and renovation projects.
Unlike an electric fan, a standard airbrick does not need power. Instead, it supports natural air movement through its open design.
How Is a Terracotta Airbrick Made?
A terracotta airbrick usually starts with clay. First, manufacturers prepare and shape the clay. Next, they create openings in the brick. Finally, they fire it in a high-temperature kiln.
The heat makes the clay hard and strong. As a result, the finished airbrick can provide a durable wall opening.
The firing process also creates the familiar terracotta colour. However, the exact shade can differ between products.
Different airbricks can have different sizes and opening designs. For this reason, always check the product details before you buy.
What Are the Signs of Poor Ventilation?
Poor ventilation can cause several clear signs. For example, windows may develop condensation. Rooms may also feel warm, heavy or stuffy.
In addition, unpleasant smells may remain for longer. Mould can also grow where moisture stays for too long.
Therefore, homeowners should not ignore these signs.
1. Condensation on Windows
Condensation is one of the most common warning signs. It appears when warm, moist indoor air meets a cold surface.
For example, you may notice water on windows after cooking or showering. You may also see it when you dry clothes indoors.
If condensation keeps returning, your home may need better airflow. Therefore, check the room and look for suitable airflow options.
A terracotta airbrick can support natural airflow in the right location. However, you may also need extractor fans or window vents.
2. Musty or Stale Smells
A room with poor airflow may develop a musty smell. Cooking smells can also remain for longer.
This happens because stale air does not leave the room quickly. As a result, the room can feel less fresh.
Therefore, allow fresh air to move through suitable areas whenever possible.
A terracotta airbrick can provide a passive route for air movement. When you install it correctly, it can support a fresher indoor space.
3. Damp Walls and Surfaces
Damp marks can also signal a problem. However, damp does not always come from poor ventilation.
For example, a leaking pipe can create damp. Damaged gutters can also let water enter a wall. Similarly, rising damp has a different cause.
Therefore, identify the source before you choose an airflow product.
If excess indoor moisture causes the problem, better airflow may help. In this situation, you can consider an airbrick as part of a wider solution.
4. Mould Growth
Mould can grow when moisture remains for a long time. Bathrooms and kitchens often face this issue.
You may see mould around windows, corners and other cool surfaces. Therefore, regular airflow can help manage indoor moisture.
A terracotta airbrick can support airflow in a suitable area. However, you should also clean existing mould safely and deal with the moisture source.
Why Choose a Terracotta Airbrick?
There are several good reasons to choose a terracotta airbrick.
First, it offers a traditional appearance. This makes it a good option for many older Manchester homes.
Second, it provides a simple airflow route. A standard passive airbrick does not need electricity.
Third, it can blend with brick walls. Therefore, it may look more natural than some modern plastic vents.
Also, it can work well during renovation projects. If an old airbrick looks damaged, you can replace it with a suitable matching product.
How Does a Terracotta Airbrick Work?
A terracotta airbrick uses its open design to allow air movement. Air can pass through the openings in the brick.
Natural airflow can occur when indoor and outdoor conditions differ. As a result, stale indoor air can move out while fresh air can enter.
However, several factors affect airflow. These include the airbrick design, wall position, room conditions and outdoor weather.
Therefore, use a terracotta airbrick as part of a wider airflow plan rather than as the only solution.
Where Can a Terracotta Airbrick Be Used?
A terracotta airbrick can work in several suitable areas.
Common locations include:
- External walls
- Under-floor spaces
- Garages
- Utility rooms
- Storage areas
- Kitchens
- Other areas that need passive airflow
However, each property has different needs. Therefore, choose the product according to the wall and its intended use.
If you replace an old airbrick, measure the existing opening first. This step can make shopping easier and reduce the risk of buying the wrong size.
What Are the Main Advantages?
A terracotta airbrick offers several practical benefits.
Traditional Appearance
Its natural terracotta colour can match traditional brickwork. Therefore, it can suit period homes and renovation projects.
Simple Airflow
The openings allow air to move through the wall. As a result, the product can support natural airflow without electricity.
Low Maintenance
A standard airbrick needs little maintenance. However, you should keep the openings clear of dirt and debris.
Durable Material
Manufacturers fire terracotta at high temperatures. This process creates a strong material that can work well in suitable applications.
Useful for Renovation
Old airbricks can crack, break or become blocked. Therefore, homeowners may replace them during repair or renovation work.
What Should You Check Before You Buy?
Before you buy terracotta airbrick products, check the measurements. The product should match the wall opening.
Also, check the material, opening design and intended application. These details can help you choose the right option.
When shopping online, do not choose a product only because it looks attractive. Instead, compare dimensions, specifications and suitability.
For larger projects, consider professional advice. An experienced installer can inspect the wall and recommend a suitable product.
Shopping for Terracotta Airbricks in Manchester
Homeowners can shop for terracotta airbrick products online. Different sizes and designs may suit different projects.
When shopping, compare several products. Check their dimensions and product information. Also, look for suitable offers if you need several units.
Bulk buying can help with larger renovation projects. However, do not choose a product simply because it has the lowest price.
A poorly sized airbrick can create extra work. Therefore, always check the measurements before you order.
Can a Terracotta Airbrick Improve Home Comfort?
Yes, a terracotta airbrick can support airflow in suitable areas. Fresh air can move through the opening. Consequently, stale air can leave the space more easily.
Better airflow can also help manage indoor moisture. However, an airbrick cannot solve every damp problem.
For example, repair a leaking roof as soon as possible. Likewise, fix damaged gutters. Rising damp also needs the correct treatment.
Therefore, identify the cause before you choose an airflow solution.
Terracotta Airbrick or Modern Air Vent?
Both options can support airflow. However, they can have different designs and appearances.
A terracotta airbrick may suit homes that need a traditional finish. Modern vents may offer different materials, shapes and features.
Therefore, consider the property before you choose.
For an older Manchester home, a terracotta finish can blend well with existing brickwork. On the other hand, a modern vent may suit a newer property.
FAQs About Terracotta Airbrick
What is a terracotta airbrick used for?
A terracotta airbrick creates an opening for air movement. It can work in suitable walls, under-floor areas and other spaces that need passive airflow.
How is a terracotta airbrick made?
Manufacturers usually make it from clay. They shape the clay, create the openings and then fire the product at a high temperature.
What are the advantages of a terracotta airbrick?
It provides simple airflow and a traditional appearance. Also, a standard passive design does not need electricity.
Can a terracotta airbrick stop damp?
No. It may help when poor airflow causes excess moisture. However, leaks, rising damp and structural problems need separate solutions.
Can I buy terracotta airbricks online?
Yes. You can buy terracotta airbrick products online. Before ordering, check the size, material and intended use.
Where should an airbrick go?
The right position depends on the building. Common areas include external walls and under-floor spaces. For complex projects, ask a qualified installer for advice.
Can a terracotta airbrick help with condensation?
It can help when poor airflow contributes to condensation. However, you may also need extractor fans, window vents or other suitable solutions.
Is a terracotta airbrick good for old Manchester homes?
Yes, it can suit many traditional properties. Its terracotta finish can blend well with older brickwork.
What should I check before shopping?
Check the size, opening design, material and intended application. Also, measure the existing opening if you plan to replace an old airbrick.
Final Thoughts
Poor ventilation can cause condensation, stale smells, mould and excess moisture. Therefore, check these signs early.
A terracotta airbrick can offer a simple and traditional airflow option. Its fired-clay construction can also provide a durable choice for suitable projects.
Before you buy, compare the size, design and application. Also, check that the product suits your wall.
You can shop for terracotta airbrick products and compare suitable offers. If you need several units, bulk shopping may also provide better value.
Most importantly, remember that good ventilation usually needs more than one solution. Airbricks, window vents, extractor fans and moisture control can all work together.
With the right product and correct installation, you can improve airflow and home comfort. As a result, your Manchester home can feel fresher, drier and more pleasant.
What Are the Most Useful Furniture Accessories for Home Projects in London?
Home projects in London often need small parts that make a big difference. From cabinet repairs to kitchen updates, the right FURNITURE ACCESSORIES can improve safety, strength, and finish. These parts are useful for DIY work because they help protect edges, join panels, and support furniture.
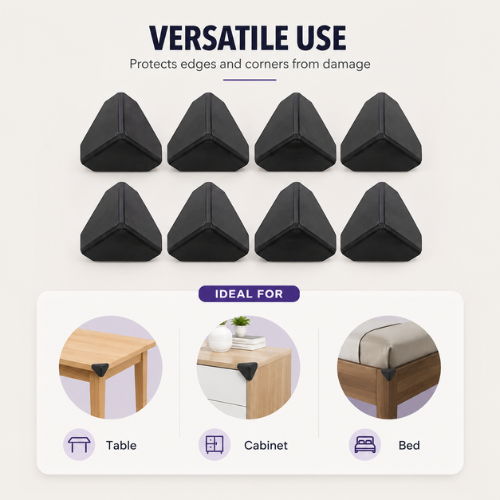
The main category includes corner protectors, furniture fittings, furniture hardware, plastic corner protector, furniture corner protector, corner guards, modesty block, modesty blocks, and mod blocks. Each item has a different job. However, they can work together to make furniture projects easier and safer.
Why Are Furniture Accessories Useful?
London homes include flats, terraces, family houses, and compact rooms. Therefore, furniture often needs to work well in limited space. Good FURNITURE ACCESSORIES can help improve everyday furniture without replacing the whole item.
For example, corner protectors cover sharp furniture edges. They can suit tables, shelves, cabinets, desks, and worktops. Likewise, corner guards can help reduce damage from everyday knocks. They are especially useful in busy homes.
A plastic corner protector is a simple choice for many projects. It is light, easy to handle, and available in useful shapes and colours. A furniture corner protector can also help keep exposed edges neat.
Corner Protectors and Corner Guards
Corner protectors are designed to cover exposed corners. They can reduce contact with hard edges and may help protect furniture from small knocks. This makes them useful for tables, cupboards, shelves, and worktops.
A plastic corner protector is often chosen for its simple design. Before fitting one, clean the surface and check the corner size. A correct fit gives a better finish.
A furniture corner protector can also help protect furniture in small rooms. For example, a table placed near a walkway may receive regular bumps. Adding protection can help reduce visible wear.
Corner guards are another useful option. They can be fitted to furniture corners where safety and edge protection matter. When you shop for them, check the size, material, colour, and fixing method.
Furniture Fittings and Furniture Hardware
Furniture fittings help connect, support, and secure furniture parts. They can include brackets, connectors, screws, joining blocks, and other small components. For this reason, they are important for DIY repairs and new furniture projects.
Furniture hardware covers a wider range of working parts. Hinges, handles, brackets, screws, and connectors can all be included. Choosing the right hardware can help prevent loose joints and poor finishes.
Before you buy furniture fittings, measure the board thickness and joint area. Then check the fitting size. This simple step can prevent mistakes.
Good furniture hardware should match the material and purpose. For example, a fitting for a kitchen cabinet may need different features from one used on a light shelf.
Modesty Block, Modesty Blocks and Mod Blocks
A modesty block is a small fitting used to support or join furniture panels. It is often placed inside cabinets, desks, cupboards, and kitchen units. Since it can sit inside the furniture, it may provide support without changing the outside look.
Modesty blocks can help keep panels connected and stable. They are useful when a hidden support point is preferred. In addition, they can be practical for repairs and furniture assembly.
The term mod blocks is also used for these fittings. They can help connect panels at internal points. Before fitting them, check the panel thickness and choose suitable screws.
How do they work? Usually, the block sits where two panels meet. It is then fixed to the panels. This creates a simple support point. Always follow the product instructions and use suitable fixings.
Plastic Corner Protector – Black
The plastic corner protector – Black is a useful product for projects that need edge protection. Its black finish can suit dark furniture and can also create a clean contrast on lighter surfaces.
How is a plastic corner protector made? Most are formed from plastic during a manufacturing process that creates a set shape. The exact material and method can vary by product. Therefore, check the product information before you buy.
What are the advantages? First, it can cover an exposed corner. Next, it can reduce the effect of small knocks. It can also help keep furniture edges looking tidy.
If you want to shop for this type of product, measure the corner first. Then check the dimensions and fixing method. This helps you choose the right item for your project.
MODESTY BLOCKS KITCHEN MOD BLOCK – VARIOUS PACKS
The MODESTY BLOCKS KITCHEN MOD BLOCK – VARIOUS PACKS can be useful for kitchen furniture assembly and repair. These blocks help support internal joints between furniture panels.
How does a kitchen mod block work? It is normally placed where two panels meet. It can then be fixed to both surfaces with suitable screws. As a result, the joint can gain extra support.
The main advantages include simple fitting, internal support, and a tidy finish. They can be useful when repairing kitchen cabinets, cupboards, and other furniture.
Before you buy modesty blocks, check the pack size and dimensions. If several cabinet need work, a larger pack may be more practical. However, always choose the quantity that matches your project.
How to Choose Furniture Accessories
The best FURNITURE ACCESSORIES depend on the task. Start by asking what needs to be protected, joined, or supported.
If the problem is a sharp edge, look at corner protectors, plastic corner protector, furniture corner protector, or corner guards. If panels need support, consider furniture fittings, furniture hardware, modesty block, modesty blocks, or mod blocks.
Next, check the material and size. Plastic can work well for corner protection, while furniture hardware may be needed for stronger joints. Also, check pack quantities before shopping.
Price matters, but the cheapest option is not always best. A suitable product can save time and reduce repeat repairs. Therefore, compare measurement, product details, and fixing methods before you buy.
Shopping for Furniture Accessories in London
Online shopping makes it easier to compare FURNITURE ACCESSORIES. You can check sizes, colours, pack options, and product descriptions before ordering.
Make a short list before you shop. For example, you may need corner guards for a table, furniture fittings for a cabinet, or modesty blocks for kitchen units. This can help you avoid missing small but important parts.
For larger projects, buying suitable packs can save time. However, check the number of items needed before checkout. Also, review delivery information for your London address.
Safe Installation Tips
Use suitable tools and fixings when working with furniture. First, measure the area. Next, mark the fixing points. Then install the part carefully.
For corner protectors, clean the surface before fitting. For furniture fittings and furniture hardware, avoid over-tightening screws. Too much force can damage boards or plastic parts.
Keep small parts away from young children while working. If a fitting is unclear, follow the product instructions or ask a skilled professional.
Frequently Asked Questions
What are the most useful furniture accessories for home projects?
Useful FURNITURE ACCESSORIES include corner protectors, furniture fittings, furniture hardware, corner guards, and modesty blocks. The best choice depends on the project.
How do corner protectors work?
They cover exposed furniture corners. They can reduce contact with hard edges and help protect furniture from small knocks.
What is a plastic corner protector used for?
It covers a furniture corner and can help reduce edge damage. It can suit tables, cabinets, shelves, and desks.
What is a furniture corner protector?
It is a protective fitting placed over a furniture corner. It can improve edge protection and give the furniture a neat finish.
What is a modesty block?
A modesty block is a small furniture fitting used to support or join panels, often inside cabinets and kitchen units.
What are the advantages of mod blocks?
Mod blocks can improve joint support, help stabilise panels, and provide a hidden fitting solution.
How are plastic corner protectors made?
They are commonly formed from plastic using a manufacturing process that gives them a consistent shape. Material types can vary.
How do modesty blocks work?
They are placed where furniture panels meet and fixed to the panels. This provides an internal support point.
What should I check before I buy furniture accessories?
Check size, material, colour, pack quantity, fixing method, and product instructions. These details help you select the right item.
Can I shop for furniture accessories online?
Yes. Online shopping lets you compare product details and pack sizes. Check measurements and delivery information before you buy.
Final Thoughts
Small parts can have a big effect on a home project. FURNITURE ACCESSORIES can protect edges, support joints, and improve furniture repairs. Corner protectors and corner guards can help with safety, while furniture fittings and furniture hardware can support construction. Modesty blocks can also provide useful internal support.
Whether you need a plastic corner protector – Black or MODESTY BLOCKS KITCHEN MOD BLOCK – VARIOUS PACKS, choose products that match your furniture and project. Measure first, compare options, and then buy with confidence.
For London DIY projects, shopping for the right category products can make repairs simpler. Choose suitable FURNITURE ACCESSORIES, check the measurements, and buy the parts that fit your exact job.
Is Opening Windows Enough to Improve Ventilation in Manchester Houses?
Good ventilation helps keep a home fresh, dry, and comfortable. In Manchester, many homes face damp weather, rain, cold winds, and high indoor moisture. Because of this, simply opening a window may not always give the best result.
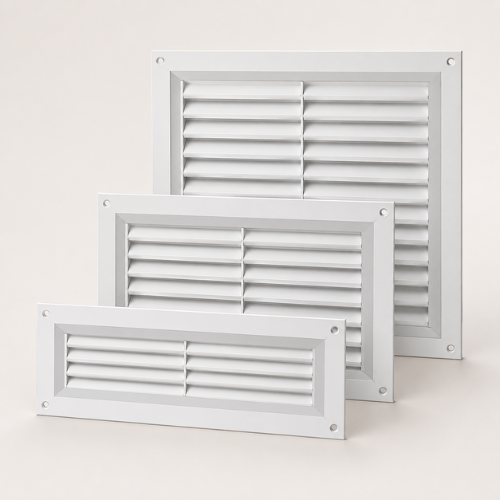
Opening windows can bring fresh air into a room. However, the effect may only last while the window stays open. During cold or wet weather, many people prefer to keep windows shut. This can reduce the flow of fresh air inside the home.
So, is opening windows enough to improve ventilation in Manchester houses? The simple answer is not always. Windows can help, but extra airflow products, such as trickle vents, can provide a more steady flow of fresh air.
Why Is Ventilation Important in Manchester Homes?
Modern homes often have better insulation and tighter windows than older properties. This can help keep heat inside. However, it can also reduce natural airflow.
Everyday activities add moisture to indoor air. Cooking, bathing, drying clothes, and even breathing can increase humidity. If moist air stays inside for too long, it may lead to condensation, mould, and musty smells.
Therefore, good ventilation allows stale and moist air to leave while fresh air enters.
Opening windows is one simple way to do this. Yet, keeping windows open for long periods is not always practical in Manchester. Cold weather, rain, noise, and home security can all make this difficult.
Are Open Windows Enough for Fresh Air?
Opening a window can quickly improve airflow. For example, opening windows on opposite sides of a home can create cross-flow. This can move stale air out faster.
However, there are limits.
You may close the window after a short time because the room becomes cold. As a result, the fresh-air flow stops. This means the home may return to having poor airflow.
A better approach can combine normal window opening with permanent airflow options.
This is where trickle vents for windows can be useful.
What Are Trickle Vents for Windows?
Trickle vents are small ventilation openings fitted into or around a window. They allow a controlled amount of outdoor air to enter a room.
Unlike a fully open window, a trickle vent can provide airflow while the main window remains closed.
The Ventilation Real PVC Plastic 300mm 400mm range is designed for this type of use. These vents can provide a simple way to support fresh-air movement in homes, offices, and other suitable spaces.
For Manchester homes, this can be useful during colder months. You can keep the main window closed while still allowing some fresh air into the room.
How Are Real PVC Plastic Trickle Vents Made?
Many window trickle vents use durable PVC plastic. PVC is commonly used because it is light, practical, and suitable for many building applications.
During production, the plastic material is formed into the required vent shape. The design normally includes an airflow opening and a cover or grille structure.
The Ventilation Real PVC Plastic 300mm 400mm products are made with a practical design for window installation. Their plastic construction also makes them easy to handle during fitting.
Before buying, however, always check the product size, window type, fitting space, and installation requirements.
What Are the Benefits of Trickle Vents for Windows?
There are several reasons why homeowners may choose window trickle vents.
1. Steady Airflow
A trickle vent can allow a small flow of outdoor air into the room. This supports regular air movement without keeping the main window wide open.
2. Better Moisture Control
Fresh air can help reduce excess indoor moisture. This may be useful in kitchens, bathrooms, bedrooms, and other areas where humidity can build up.
3. Useful During Cold Weather
Manchester can have cool and wet weather for much of the year. Therefore, keeping a large window open may not feel comfortable.
A trickle vent provides a smaller airflow route while the main window stays closed.
4. Simple Window Ventilation
These vents offer a practical option for homes that need extra airflow. They can work alongside normal window opening and other home ventilation methods.
5. PVC Construction
Real PVC plastic is lightweight and practical. It can also be suitable for many common window ventilation applications.
How Do Trickle Vents Work?
The idea is simple.
A small opening allows outdoor air to enter the room. At the same time, stale indoor air can move towards other ventilation routes.
For the best result, airflow needs a clear path through the property. A single vent may not solve every ventilation problem.
For example, a bedroom with closed doors and no other airflow route may still need better air movement. Likewise, a bathroom may need an extractor fan to remove moist air quickly.
Therefore, trickle vents should form part of a wider ventilation plan where required.
Where Can You Use 300mm and 400mm Trickle Vents?
The right size depends on the window and available fitting area.
A 300mm vent may suit one application, while a 400mm model may be more suitable for another. Always measure the available space before you shop.
You should also check the product specifications before you buy.
Potential areas include:
- Bedrooms
- Living rooms
- Home offices
- Kitchens
- Utility areas
- Other suitable rooms
However, wet rooms may need additional extraction. A trickle vent should not automatically replace a suitable extractor fan.
What Should You Check Before You Buy?
Before shopping for trickle vents for windows, consider a few basic points.
First, measure your window carefully. Next, check the required vent length. Then, confirm that the product suits your window design.
The Ventilation Real PVC Plastic 300mm 400mm option can be considered when you need a practical window airflow solution.
You should also think about installation. If you are unsure about cutting or fitting a vent into a window, ask a qualified installer for advice.
Buying the correct size is important because a vent that does not suit the window may not work as expected.
Can Trickle Vents Replace Opening Windows?
Not completely.
Opening a window can provide a much larger amount of fresh air in a short time. This can be useful when a room feels stuffy.
Trickle vents offer a different benefit. They support smaller, ongoing airflow while the window remains closed.
Therefore, the two methods can work together.
For example, you could open windows for a short period each day and use trickle vents to support airflow when the windows are closed.
This approach can be especially useful during colder Manchester weather.
What Are the Advantages of Buying Trickle Vents?
If your home needs better airflow, shopping for suitable window vents can be a useful step.
The main advantages include:
- Supports regular fresh-air flow
- Helps reduce stale indoor air
- Can support moisture control
- Allows airflow with the main window closed
- Lightweight PVC construction
- Available in different lengths
- Useful for many suitable rooms
However, product suitability matters. Always check the measurements and installation requirements before you buy.
Final Thoughts
So, is opening windows enough to improve ventilation in Manchester houses? Sometimes it helps, but it may not be enough on its own.
Manchester’s changing weather can make long periods of open-window airflow difficult. Trickle vents offer another practical option. The Ventilation Real PVC Plastic 300mm 400mm range can support a steady flow of fresh air while the main window stays closed.
For homeowners who want to improve indoor airflow, it can be worth considering trickle vents for windows alongside normal window opening and other suitable ventilation methods.
If you are ready to shop, check the required size and window type first. Then, choose a suitable product and buy with confidence based on the installation needs of your property.
FAQs
1. Are trickle vents good for Manchester homes?
Yes. They can support regular airflow while the main window remains closed. This can be useful during cold or wet weather.
2. Do trickle vents improve ventilation?
Yes. Trickle vents allow a controlled amount of outdoor air into a room. They can support better indoor airflow when used correctly.
3. What are Trickle Vents for Windows?
They are small vents fitted to suitable windows to allow fresh outdoor air into the property while the main window remains closed.
4. What is Ventilation Real PVC Plastic 300mm 400mm?
It refers to PVC plastic window ventilation products available in 300mm and 400mm sizes. The correct size depends on the fitting area and application.
5. How are PVC trickle vents made?
They are generally produced by forming PVC plastic into a vent body and airflow design. The finished product is then prepared for suitable window installation.
6. What are the advantages of PVC window vents?
PVC vents are lightweight, practical, and designed for suitable window ventilation applications. They can provide a simple way to support fresh-air flow.
7. Can I buy trickle vents online?
Yes. You can shop for different window vent sizes online. Always check the product dimensions and specifications before you buy.
8. Are 300mm and 400mm vents the same?
No. They have different lengths. Measure your available fitting space and select the size that suits your window.
9. Do trickle vents replace extractor fans?
Usually, no. Extractor fans can provide stronger air extraction in areas such as bathrooms and kitchens. Trickle vents provide a different type of airflow.
10. Should I open windows if I have trickle vents?
Opening windows can still provide strong short-term airflow. Trickle vents can then support airflow when the windows are closed.
What Is the Best Thermostat for Home Heating?
Introduction
Choosing the right thermostats can make heating your home much easier. It can also help you control heat and avoid waste. However, there are many types to choose from.
The best option depends on your boiler, home, and daily routine. It also depends on the type of control you want.
Some people need simple heating control. Others want set times, wireless use, or smart features. Therefore, it helps to know what each type can do before you buy.
Modern THERMOSTATS offer many useful features. These include timed heating, wireless control, and better temperature control.
What Makes a Good Thermostat?
A good thermostat should be easy to use. It should also work well with your heating system.
First, check your boiler type. Then, check which thermostat types it can support. This step can help you avoid buying the wrong model.
You should also think about your daily routine. Do you heat your home in the morning? Do you need heat in the evening? Do you leave the house during the day?
A programmable thermostat can help if your heating times change during the day. You can set times for heating to start and stop. This means you do not need to change the setting each time.
For example, you can set the heating to come on before you wake up. You can then set a lower temperature when you leave home.
What Is a Programmable Thermostat?
A programmable thermostat lets you set a heating schedule.
You can choose different times and temperatures. This gives you more control over your heating.
For example, you could set:
- A warm setting in the morning
- A lower setting when you are out
- A warm setting in the evening
- A lower setting at night
As a result, your heating can follow your daily routine.
A programmable thermostat can also help you avoid heating an empty home. This may help you use less energy.
If you want simple time control, this type can be a good choice.
What Is a Wireless Thermostat?
A wireless thermostat gives you more freedom when you choose its location.
A standard thermostat may need a wired connection. A wireless model uses a wireless signal to communicate with a receiver.
This can make installation more flexible. It can also help when running new cables would be hard.
A wireless room thermostat can work well in a main living area. It can measure the room temperature and send the heating demand to the receiver.
However, always check the wireless range before you buy. You should also check if the model works with your boiler.
What Is an RF Thermostat?
An RF thermostat uses radio frequency to send signals to a receiver.
The thermostat and receiver work together. The thermostat checks the room temperature. It then sends a signal when heat is needed.
This type can be useful when you want wireless heating control.
An RF system can also help with flexible thermostat placement. Therefore, it can be a good choice for homes where new wires may cause a problem.
A programmable RF thermostat adds time control to this system. You can set your heating schedule and use wireless communication at the same time.
What Is a Smart Thermostat?
A smart thermostat offers more advanced control.
Some models let you control your heating from a phone. Others can work with smart home systems.
You may also be able to change the heating when you are away. This can be useful if your plans change.
However, smart features are not needed by everyone. Some people prefer simple controls that are easy to understand.
Therefore, think about what you need before you shop. Do not pay extra for features that you will not use.
What Are Heating Controls?
Heating controls help you manage when and how your home heats up.
A thermostat is one type of heating control. Timers and programmers are also part of a heating control system.
Good heating controls can make your home more comfortable. They can also help you manage energy use.
For example, you can set the heating to run only when you need it. You can also set different temperatures for different times.
This is why heating controls are important when you plan to buy new THERMOSTATS.
Why Choose an OpenTherm Thermostat?
An OpenTherm thermostat can work with boilers that support OpenTherm.
OpenTherm allows the thermostat and boiler to share information. This is different from a basic system that simply turns the boiler on or off.
The system can help the boiler adjust its heat output. This may help the home keep a more steady temperature.
However, your boiler must support OpenTherm. So, check your boiler details before you buy.
If your boiler supports it, an OpenTherm model may offer useful control.
EPH CP4D OpenTherm Programmable RF Thermostat
The EPH – CP4D OpenTherm Programmable RF Thermostat combines several useful features.
It offers programmable heating control. It also uses RF wireless communication. In addition, it supports OpenTherm systems.
This makes it an interesting choice for people who want more control over home heating.
How Does the EPH CP4D Work?
The thermostat checks the temperature in the room.
It then sends a heating request to the compatible heating system. The programmable feature lets you set heating times.
The RF feature allows wireless communication with its receiver. This can give you more choice when you place the thermostat.
The OpenTherm feature can also allow communication with a compatible boiler.
However, always check the product details before you buy. Your boiler must support the required connection and control system.
What Are the Benefits of the EPH CP4D?
The EPH CP4D has several useful features.
1. Programmable Heating
You can set heating times to match your day. This can help you avoid running the heating when you do not need it.
2. RF Wireless Control
The RF connection can make thermostat placement easier. You do not need to rely on a traditional wired connection between the thermostat and receiver.
3. OpenTherm Support
OpenTherm can allow better communication with a compatible boiler. This can help the heating system manage heat output more smoothly.
4. Better Daily Control
You can set heating periods for the morning, day, evening, and night.
5. Flexible Use
The combination of programming and wireless control can suit many modern homes.
These features make the EPH CP4D worth considering when you shop for new heating controls.
Is the EPH CP4D Right for Your Home?
It can be a good option if your boiler supports its features.
However, no single thermostat is right for every home.
A basic heating system may only need a simple thermostat. A modern boiler may benefit from an OpenTherm model.
You may also prefer wireless control if you want more freedom with placement.
Therefore, check your boiler first. Then compare the thermostat features.
Can a Thermostat Help Save Energy?
Yes, a thermostat can help you control heating more carefully.
For example, you can lower the heat when you are asleep. You can also reduce heating when nobody is home.
A timer or programmable system can make this easy.
Good home insulation also matters. Keep doors closed when needed. Reduce drafts where possible. Avoid heating rooms that you do not use.
In this way, THERMOSTATS can become part of a wider plan for better heating control.
When Should You Buy a New Thermostat?
An old thermostat may need replacing if it is hard to use. It may also be worth replacing if it does not offer the control you need.
For example, you may want a programmable thermostat instead of a basic model.
You may also want a wireless thermostat if you need more freedom with placement.
A smart thermostat may suit you if you want phone control. An OpenTherm thermostat may suit you if your boiler supports OpenTherm.
Before you buy, compare the features, price, and boiler compatibility.
What Should You Check Before Shopping?
Before shopping for THERMOSTATS, check these points:
- Does it work with your boiler?
- Is it wired or wireless?
- Does it support RF?
- Can you set heating times?
- Does it support OpenTherm?
- Do you need smart controls?
- Is it easy to use?
- Does the price suit your budget?
These simple checks can help you choose the right product.
FAQs About Home Heating Thermostats
What is the best thermostat for home heating?
The best model depends on your boiler and needs. A programmable, wireless, RF, or OpenTherm model can be a good choice for different homes.
Is a programmable thermostat useful?
Yes. It lets you set heating times in advance. This can make daily heating easier.
What is an RF thermostat?
An RF thermostat uses radio signals to communicate with a receiver. It can offer flexible installation.
What is a wireless heating thermostat?
A wireless heating thermostat controls heating without a standard wired link between the thermostat and receiver. It can give you more freedom when choosing its location.
What is an OpenTherm thermostat?
An OpenTherm thermostat can communicate with a compatible OpenTherm boiler. This can provide more advanced heating control.
What is a smart thermostat?
A smart thermostat can offer extra features. Some models allow heating control through a mobile phone or smart home system.
Is the EPH CP4D a programmable RF thermostat?
Yes. The EPH CP4D is an OpenTherm programmable RF thermostat. It combines programmed heating times with RF wireless communication.
What are the advantages of the EPH CP4D?
The main benefits include programmable control, RF wireless operation, and OpenTherm support. These features can give you more control over your heating.
Can I buy the EPH CP4D for any boiler?
You should check your boiler first. OpenTherm features need a compatible heating system.
Where can I shop for a thermostat?
You can shop for THERMOSTATS online and compare features, prices, and heating system compatibility. Always check the product details before you buy.
Buy quality furniture accessories today and get great offers on reliable products.
The best thermostat is one that suits your home and heating system.
A programmable thermostat is useful for set heating times. A wireless thermostat offers flexible placement. An RF thermostat provides wireless communication. A smart thermostat can add phone and smart home control.
Meanwhile, an OpenTherm thermostat can offer advanced control with a compatible boiler.
The EPH CP4D OpenTherm Programmable RF Thermostat combines several of these features. Therefore, it can be a useful option for homeowners who want more control.
Before you buy, check your boiler. Then compare features, price, and ease of use.
With the right THERMOSTATS, you can make home heating simpler and easier to manage.