No products in the cart.








How Do Push-Fit Plastic Fittings Work? A Complete Guide
Introduction
Push-fit connections have changed the way many plumbing jobs are done. They are quick, simple, and easy to use. Unlike some older connections, they do not always need soldering, glue, or special tools. Instead, the pipe is pushed into the fitting until it locks in place.
But how does this simple connection stay secure and prevent leaks? What are push-fit fittings made of? How should you install them? Also, when should you use them?
This guide explains how plastic fittings work in simple terms. It also covers pipe inserts, plastic pipe fittings, plumbing fittings, and the important role of a plastic pipe insert.
What Are Push-Fit Fittings?
Push-fit fittings are connectors designed to join pipes without complex joining methods. They are often used in domestic plumbing, heating systems, water lines, and other pipework.
The basic idea is very simple. You push the pipe into the fitting. Inside the fitting, special parts grip the pipe and create a seal. This creates a strong connection that can carry water through the pipe.
There are many sizes and shapes available. For example, you can find straight connectors, elbows, tees, reducers, and other plumbing fittings.
The correct fitting depends on the pipe size and the job. Therefore, always check the pipe diameter before buying a fitting.
How Do Push-Fit Plastic Fittings Work?
The working process is easier to understand when you look at the parts inside the fitting.
A typical push-fit connection has several key parts:
- A fitting body
- An internal sealing ring
- A gripping ring or locking mechanism
- A pipe stop
- Sometimes a removable release collar
When the pipe is pushed into the fitting, it passes through the gripping section and reaches the pipe stop.
The sealing ring then sits around the outside of the pipe. It creates a tight seal. At the same time, the gripping ring helps hold the pipe in place.
As a result, water can flow through the pipe without easily escaping from the joint.
This design makes plastic fittings useful for many repair and installation jobs where speed and simplicity matter.
What Are Push-Fit Fittings Made Of?
Push-fit fittings can be made from different materials. Plastic is one of the most common choices for many plumbing applications.
The body may be made from strong engineered plastic. This material is light but can still provide good strength for suitable pipe systems.
Some designs also use metal parts inside the fitting. These parts can help grip the pipe and improve connection strength.
The sealing ring is usually made from a flexible material. Its job is to create a watertight seal around the pipe.
So, although the fitting may look like one simple piece, it can contain several parts that work together.
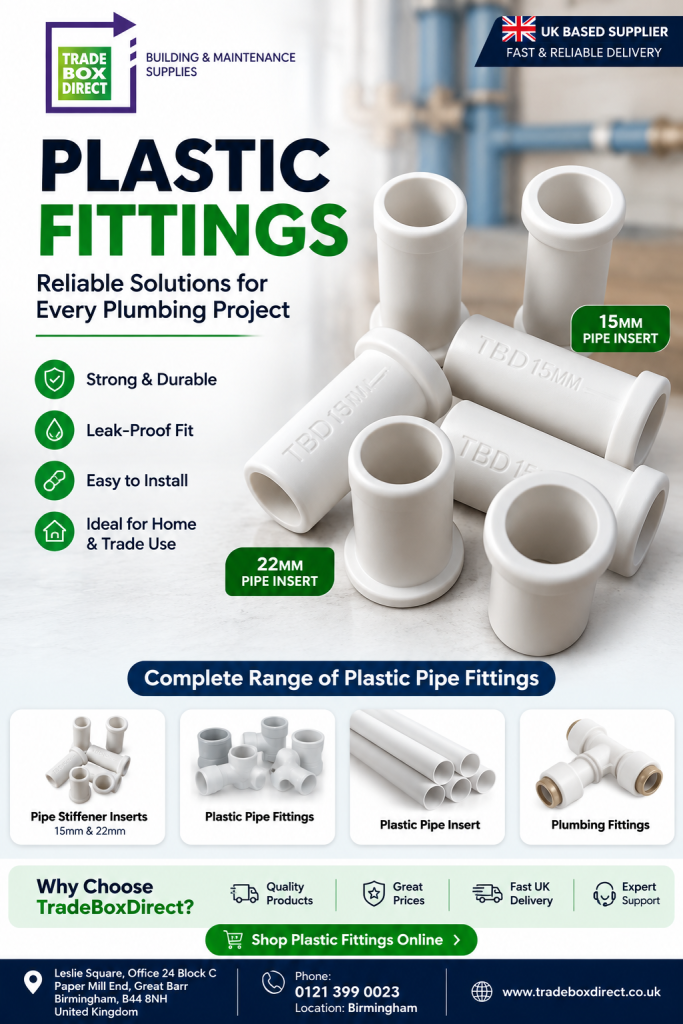
What Is the Role of Pipe Inserts?
Pipe inserts are small components that fit inside certain types of flexible or semi-flexible plastic pipe.
They are also called pipe stiffeners or support inserts in some applications.
Their main purpose is to support the inside wall of the pipe. This can help the pipe keep its shape when it enters a push-fit connection.
Without suitable support, a soft pipe may deform when it is pushed into the fitting. That can affect the seal.
Therefore, using the correct pipe insert can be an important part of making a secure connection.
The insert should match the pipe size and the fitting system. Never assume that one insert will fit every pipe.
What Is a Plastic Pipe Insert?
A plastic pipe insert is a small piece designed to go inside a plastic pipe before the pipe is connected to a fitting.
Its purpose is simple. It supports the pipe from the inside.
When the pipe enters the fitting, the insert can help prevent the pipe wall from being pushed inward. This can make the connection more stable.
However, the need for an insert depends on the pipe type and the fitting manufacturer’s instructions.
Some systems are designed to work without inserts. Others require them for safe and reliable connections.
So, always check the product instructions before installation.
What Is a 15mm Pipe Insert?
A 15mm pipe insert is designed for pipework with a 15mm internal connection size, depending on the pipe system and manufacturer specifications.
It is commonly used with suitable 15mm plastic or multilayer pipe systems where internal support is needed.
For example, if you are connecting a compatible flexible 15mm pipe to a push-fit connector, the correct insert can help support the pipe.
It is important to check the exact pipe specification. A fitting or insert that looks similar may not be suitable.
Do not choose an insert only because the number matches. Check the pipe material, wall thickness, and manufacturer’s instructions too.
How Do You Install Push-Fit Fittings?
Installing push-fit fittings is usually straightforward. However, careful preparation is still important.
Step 1: Measure the Pipe
First, check the pipe size. Common sizes include 15mm and 22mm in many UK plumbing systems.
Make sure the fitting matches the pipe.
Step 2: Cut the Pipe
Cut the pipe cleanly using a suitable pipe cutter.
The end should be straight. Avoid leaving a rough or damaged edge.
Step 3: Prepare the Pipe
Remove dirt and debris from the pipe.
Check the end for scratches, cracks, or deep marks. A damaged pipe may not create a reliable seal.
Step 4: Add the Pipe Insert
If the pipe system requires an insert, place the correct pipe insert inside the pipe.
Push it fully into position.
Step 5: Mark the Insertion Depth
Some manufacturers recommend marking the pipe before inserting it. This helps you see whether the pipe has gone far enough into the fitting.
Step 6: Push the Pipe Into the Fitting
Push the pipe firmly into the fitting.
Do not twist it aggressively or force it at an angle. The pipe should enter straight.
Step 7: Check the Connection
Once connected, gently pull the pipe to check that it is locked.
Then inspect the joint carefully.
Step 8: Test the System
Turn the water back on slowly.
Check the connection for leaks before using the system normally.
Why Is Correct Pipe Preparation Important?
A push-fit connection depends on a good seal. Therefore, pipe preparation is very important.
A rough or uneven pipe end can damage the sealing ring. Dirt can also interfere with the connection.
Likewise, a pipe that has not been pushed far enough may not lock correctly.
For this reason, take a little extra time to prepare the pipe.
A clean, straight, and undamaged pipe can make the installation much easier.
What Are the Main Advantages?
Push-fit systems offer several useful benefits.
Fast Installation
The biggest benefit is speed. You can often make a connection by simply pushing the pipe into the fitting.
This can save time during repairs and new installations.
No Soldering
Many push-fit systems do not need soldering. This means you do not need a flame or soldering equipment for the connection.
That can make some jobs easier, especially in tight spaces.
Easy Repairs
Push-fit connections can be useful when replacing a damaged section of pipe.
For example, a connector can join a new section of compatible pipe to an existing system.
Easy Access
Some fittings can be released using the manufacturer’s recommended method. This can make future changes easier.
However, always follow the instructions for the specific fitting.
Lightweight Design
Many plastic pipe fittings are light and easy to carry. This can make them convenient for both professionals and DIY users.
Clean Installation
Because many push-fit systems do not require heat or glue, installation can be cleaner.
There is also less preparation compared with some traditional joining methods.
Are Push-Fit Fittings Reliable?
When correctly selected and installed, push-fit connections can provide a reliable joint.
However, reliability depends on several factors.
The fitting must be suitable for the pipe. The pipe must be cut correctly. The sealing area must be clean. The pipe must also be inserted to the correct depth.
Using the wrong product can lead to poor results.
Therefore, quality matters. When buying plastic fittings, choose products that are suitable for your pipe system and intended application.
What Types of Plastic Pipe Fittings Are Available?
There are many designs available for different plumbing needs.
Straight Connectors
These join two pipes in a straight line.
They are useful when extending or repairing a pipe run.
Elbow Fittings
Elbows change the direction of the pipe.
Common angles include 90 degrees and 45 degrees.
Tee Fittings
A tee allows one pipe run to split into two directions.
They are useful for creating branches in a pipe system.
Reducers
Reducers connect pipes of different sizes.
For example, they can be used where a larger pipe needs to connect to a smaller pipe.
End Stops
End stops close the end of a pipe.
They can be useful during repairs or when a pipe run is no longer required.
Choosing the correct shape and size makes installation easier and helps create a neat pipe system.
Push-Fit vs Traditional Plumbing Connections
Traditional plumbing methods can include soldering, threading, compression connections, or other joining techniques.
Push-fit systems offer a different approach.
They are often faster to install and require fewer tools. This can be useful for simple repair work.
However, traditional methods still have important uses. The best connection depends on the pipe material, location, pressure, temperature, and system requirements.
Therefore, push-fit should not be viewed as the answer for every plumbing job.
Instead, consider the application before choosing the connection type.
Where Can You Use Push-Fit Fittings?
Suitable applications depend on the product. However, push-fit systems can be found in many domestic plumbing and heating situations.
They may be used for:
- Cold water pipework
- Hot water systems where approved
- Heating systems where approved
- Bathroom plumbing
- Kitchen plumbing
- Pipe repairs
- Pipe extensions
- Temporary modifications
- Domestic water distribution
Always check the manufacturer’s specifications before using a fitting for hot water, heating, drinking water, or other specialist applications.
How Do You Remove a Push-Fit Connection?
Many push-fit systems have a release mechanism.
The exact method depends on the design.
Some fittings use a release collar. You may need to press or hold the collar while pulling the pipe out.
However, do not force the connection.
First, isolate the water supply and release system pressure. Then follow the manufacturer’s removal instructions.
If the fitting has been damaged, replacing it may be safer than trying to reuse it.
Common Mistakes to Avoid
Even simple plumbing work can go wrong if small details are ignored.
Here are some common mistakes to avoid.
Using the Wrong Size
A 15mm fitting should not automatically be used with every pipe labelled 15mm. Check compatibility carefully.
Skipping the Insert
If the pipe system requires an insert, do not leave it out.
Cutting the Pipe Poorly
A crooked or rough cut can affect the seal.
Failing to Clean the Pipe
Dirt can damage the seal or stop the pipe from entering fully.
Not Inserting the Pipe Fully
A pipe that is only partly inserted may not lock correctly.
Using Damaged Pipe
Deep scratches near the sealing area can cause leaks.
Ignoring Manufacturer Instructions
Every system can have its own requirements. Always read the product instructions.
How Should You Choose Plastic Fittings?
When buying plastic fittings, start with the pipe size.
Next, check the pipe material. A fitting designed for one type of pipe may not be suitable for another.
Then consider the application. Is the connection for cold water, hot water, heating, or another system?
Also check the pressure and temperature limits.
If you are buying pipe inserts, make sure the insert matches the pipe. For example, a suitable 15mm pipe insert should be selected for the correct 15mm pipe system.
If you are unsure, check the manufacturer’s product information before placing an order.
Buying Plumbing Fittings Online
Online stores can make it easier to compare different products.
Before buying, check the product description, size, material, compatibility, and quantity.
You should also look at the fitting type. A straight connector, elbow, tee, and reducer all have different purposes.
For a repair job, it can help to measure the existing pipe before ordering.
If you need several connections, buying the correct pack size can also make the job more convenient.
When browsing plastic fittings, focus on compatibility rather than choosing only by price.
Where Can You Find the Right Pipe Products?
For UK plumbing projects, you can search online stores for pipe connectors, pipe inserts, plastic pipe fittings, and other plumbing accessories.
TradeBoxDirect provides a range of plumbing-related products for different repair and installation needs.
When looking for a product, use the pipe size and fitting type as your starting point. This makes it easier to find the right item.
You can also compare products based on their intended use and specifications.
Are Push-Fit Fittings Good for DIY Projects?
Push-fit connections can be convenient for DIY users because the installation process is relatively simple.
Still, simple does not mean risk-free.
Water systems can cause serious damage if a connection leaks. Therefore, work carefully and test every joint.
If you are working on a complex system, a high-pressure system, gas pipework, or an installation that requires certification, use a suitably qualified professional.
For smaller, suitable plumbing repairs, following the manufacturer’s instructions can make the process much easier.
How Can You Make a Push-Fit Connection Last Longer?
Good installation is the first step.
Use the correct pipe and fitting. Prepare the pipe properly. Use the required insert. Keep the connection clean. Then test the joint.
It is also useful to avoid putting unnecessary stress on the pipe.
For example, do not bend the pipe sharply next to the fitting. Provide suitable support where needed.
A neat installation can reduce strain on the connection.
Frequently Asked Questions
Are push-fit fittings easy to install?
Yes, many push-fit fittings are designed for quick installation. The pipe is prepared and pushed into the fitting until it reaches the correct position. However, you must follow the manufacturer’s instructions.
Do plastic fittings need glue?
Many push-fit plastic fittings do not require glue. They use an internal grip and sealing system instead. However, different products work in different ways, so check the product instructions.
Do all plastic pipes need inserts?
No. The need for an insert depends on the pipe type and fitting system. Some pipes require an insert for proper support, while others are designed to connect without one.
What does a pipe insert do?
A pipe insert supports the inside of the pipe. It can help stop the pipe wall from deforming when it enters a push-fit connection.
Can I use a 15mm pipe insert in any 15mm pipe?
Not necessarily. The pipe size alone is not always enough. Check the pipe material, wall thickness, and manufacturer’s compatibility information before using a 15mm pipe insert.
Can push-fit fittings be used for hot water?
Some can, but not all. Always check the temperature rating and intended application before using a fitting on hot water or heating systems.
Can push-fit fittings be reused?
Some systems allow removal and reuse under certain conditions. Others may recommend replacing the fitting. Always follow the manufacturer’s instructions.
Why is my push-fit connection leaking?
A leak can happen for several reasons. The pipe may not be inserted fully, the pipe end may be damaged, the wrong insert may have been used, or the seal may be dirty or damaged.
How do I stop a push-fit fitting from leaking?
First, turn off the water supply and release pressure. Then inspect the pipe and fitting. Check that the pipe is correctly prepared and fully inserted. If the seal or fitting is damaged, replace the affected component.
Are push-fit fittings better than compression fittings?
Neither is automatically better. Push-fit fittings are often faster to install, while compression fittings have their own benefits. The right choice depends on the pipe, application, location, and installation requirements.
Conclusion
Push-fit connections provide a simple way to join compatible pipes. Their design uses internal gripping and sealing parts to hold the pipe and reduce the chance of leaks.
The process is simple, but correct preparation is still important. Always use the correct pipe size, fitting, and insert. Keep the pipe clean, make a straight cut, and push the pipe fully into position.
A suitable plastic pipe insert can provide extra support where the pipe system requires it. Likewise, choosing the correct plastic fittings can help create a neat and reliable installation.
Whether you are repairing a small domestic pipe or planning a larger project, understanding how push-fit systems work can help you make better choices. Most importantly, always check the manufacturer’s instructions before installation.
With the right products and careful preparation, push-fit plumbing can offer a fast, clean, and practical solution for many suitable pipework applications.
Which Insulation Is Best for Energy Efficiency?
Introduction
Choosing the right insulation can make a big difference to your home. Good insulation helps keep heat inside during winter and outside during summer. As a result, your heating and cooling systems do not need to work as hard. This can help lower energy use and reduce your bills.
However, not every type of insulation works in the same way. Some materials are better for roofs, while others work well in walls or floors. Therefore, it is important to choose insulation based on your home, budget, and energy goals.
At the same time, insulation should work with good ventilation. A home needs to stay warm, but it also needs fresh air. So, the best energy plan should balance heat retention with healthy airflow.

What Does Insulation Do?
Insulation is a material that slows down the movement of heat. In winter, it helps stop heat from leaving your home. In summer, it can help stop unwanted heat from entering.
For example, warm air from your heating system naturally moves towards colder areas. Without insulation, much of this heat can escape through the roof, walls, windows, and floors.
With good insulation, heat stays where you want it for longer. Therefore, your heating system may run for less time. This can reduce energy use and make rooms feel more comfortable.
Insulation also works alongside ventilation systems. While insulation controls heat transfer, ventilation helps remove stale air, moisture, and unwanted smells.
Which Insulation Is Best for Energy Efficiency?
There is no single insulation material that is best for every home. The right option depends on the part of the building, the available space, the required insulation level, and your budget.
Some of the most common choices include:
- Mineral wool
- Fibreglass
- PIR boards
- Spray foam
- Cellulose
- Expanded polystyrene
- Extruded polystyrene
Each option has its own benefits. Therefore, it is worth looking at how each material performs before making a decision.
1. Mineral Wool Heat barrier
Mineral wool is a popular choice for homes and buildings. It is made from mineral-based materials and is often available as rolls, slabs, or boards.
One key benefit is its good thermal performance. It can help reduce heat loss through walls, roofs, and floors. It also provides useful sound insulation.
Mineral wool is also resistant to high temperatures. In addition, it can be easier to fit between roof rafters and wall spaces.
However, it must be installed correctly. Gaps or compression sections can reduce its performance. Also, areas that need airflow should not simply be blocked with insulation.
This is where proper ventilation becomes important, especially in roof spaces. Airflow can help control moisture and reduce the risk of damp problems.
2. Fibreglass Heat barrier
Fibreglass is another common option. It is made from very fine glass fibres and is often sold in rolls or batts.
One major advantage is its low cost. It can also be simple to install in suitable areas. For example, it is often used in lofts, walls, and floors.
When fitted correctly, fibreglass can provide good thermal resistance. It can also help reduce sound passing between rooms.
However, the material must fit properly. Small gaps can create weak points where heat can escape.
For that reason, careful installation is just as important as choosing a good material. Furthermore, the insulation should not interfere with required ventilation routes.
3. PIR Board Insulation
PIR, or polyisocyanurate, is a rigid board insulation. It offers strong thermal performance for its thickness.
This makes it useful when space is limited. For example, PIR boards can be used in walls, floors, roofs, and other areas where a thinner insulation layer is useful.
Another benefit is that the boards are lightweight and can be cut to fit many spaces. However, installation needs care because joints should be fitted properly.
PIR can be more expensive than some basic insulation materials. Even so, its strong thermal performance can make it a good choice for energy-efficient projects.
4. Spray Foam Heat barrier
Spray foam is applied as a liquid and expands to fill gaps. It can create a continuous layer of insulation when installed correctly.
Because it expands, it can reach small spaces that are difficult to fill with standard rolls or boards. Therefore, it may help reduce unwanted air movement and heat loss.
However, spray foam needs professional care. Poor installation can cause problems with moisture, building materials, or future repairs.
It is also important to consider airflow before using it in a roof or wall system. Blocking an important ventilation path can create moisture problems.
5. Cellulose Insulation
Cellulose insulation is usually made from recycled paper products. It can be blown into walls, lofts, and other spaces.
One benefit is that it can fill spaces around obstacles. This can help create a more even layer when installed correctly.
Cellulose can also provide good thermal performance. However, moisture control is important. The material needs to be used in a suitable building system.
As with other insulation types, it should not be used to block necessary ventilation openings.
Why Does Loft Heat barrier Matter?
A large amount of heat can escape through a poorly insulated roof. This is because warm air rises and can move towards the roof space.
Therefore, loft insulation can be one of the most useful improvements for many homes.
Mineral wool rolls are a common choice because they are easy to handle and can cover large areas. However, rigid boards may also be useful where space is limited.
When insulating a loft, make sure air can still move where required. Roof spaces often need suitable ventilation to help control moisture.
Insulation should also be fitted evenly. Avoid leaving gaps, as these can reduce the overall performance of the system.
What Is the Most Energy-Efficient Heat barrier?
The most energy-efficient insulation is not always the thickest or most expensive option. Instead, performance depends on the material, thickness, installation, and location.
PIR boards can offer high thermal performance in a thin layer. Mineral wool can provide a good balance between cost, thermal protection, sound control, and fire resistance.
Fibreglass can be a cost-effective choice for many basic applications. Meanwhile, cellulose can work well when loose-fill insulation is suitable.
Therefore, the best choice is the one that provides the right level of thermal resistance for your building.
Why Installation Matters
Even the best insulation will not perform well if it is installed poorly.
For example, gaps around boards can allow heat to move through the building. Compressed rolls may also lose some of their intended performance.
In addition, insulation must be installed around pipes, cables, doors, and other features with care.
At the same time, the building needs suitable ventilation. A well-insulated home should not become completely sealed without a plan for fresh air.
Good airflow helps remove moisture produced by cooking, washing, bathing, and everyday activities.
Heat barrier and Energy Bills
Better insulation can help reduce heat loss. As a result, your heating system may not need to run as often.
This can lead to lower energy use over time. It can also make rooms feel warmer and more stable.
For example, a well-insulated loft can help keep heat inside the living areas below. Wall insulation can also reduce heat passing through external walls.
However, savings depend on many factors. These include the size of your home, current insulation levels, heating system, energy prices, and how you use your home.
Does Insulation Need Ventilation?
Insulation and airflow serve different purposes, so both need to be considered.
Insulation slows heat transfer. Ventilation manages the movement of fresh and stale air.
A home with poor airflow can develop excess moisture. Over time, this may contribute to condensation, mould, and damp conditions.
Therefore, do not cover vents or block designed air paths with insulation. Instead, make sure insulation is fitted around them in the correct way.
If you are unsure, a qualified installer can check the building before work begins.
How to Choose the Right Insulation
Start by looking at the area you want to insulate. A roof may need a different product from a wall or floor.
Next, consider the available space. If you have limited room, a high-performance board may be useful. If there is plenty of space, rolls or batts may offer a more affordable solution.
Also, check the insulation’s thermal performance. Look for reliable product information and make sure it suits the building.
Finally, think about moisture and airflow. Good ventilation should remain available wherever the building design requires it.
Final Thoughts
So, which insulation is best for energy efficiency? The answer depends on your home and the area being insulated.
Mineral wool and fibreglass can offer affordable and practical solutions. PIR boards can provide strong thermal performance where space is limited. Spray foam and cellulose can also be useful in suitable situations.
Most importantly, choose the right material and install it correctly. Good insulation can reduce heat loss, improve comfort, and help lower energy use.
However, energy efficiency is not only about keeping heat inside. A healthy home also needs fresh air. Therefore, always consider ventilation when planning insulation work.
With the right balance of insulation, airflow, and efficient heating, your home can become warmer, more comfortable, and more energy efficient.
What Are Pipe Inserts Used For?
Introduction
Pipe inserts are small but useful parts used in many plumbing and heating systems. They are placed inside a pipe before a fitting is connected. Their main job is to support the pipe and help create a strong, secure connection.
Although pipe inserts are small, they can make a big difference. In particular, they are often used with flexible plastic pipes. These pipes can be easy to work with, but they may need extra support at connection points.
That is where pipe inserts can help. They provide strength inside the pipe and help reduce the risk of damage. As a result, the finished connection can be safer and more reliable.

What Is a Pipe Insert?
A pipe insert is a small piece that fits inside a pipe. It is usually made from a strong material, such as metal or hard plastic. The insert is pushed into the pipe before the pipe is connected to a fitting.
The insert gives the pipe extra support from the inside. This is especially helpful when the pipe wall is thin or flexible.
For example, when a compression fitting is tightened, it puts pressure on the pipe. Without enough support, a soft pipe can become damaged or change shape. However, an insert helps the pipe keep its shape.
Pipe inserts are commonly used with plastic pipes. They can also be used with other types of flexible pipe, depending on the system and fitting.
Why Are Pipe Inserts Used?
The main reason for using a pipe insert is to strengthen the pipe at a connection point.
When a fitting is attached, the pipe may be squeezed or compressed. Therefore, the pipe needs enough support to handle this pressure.
A pipe insert can help by:
- Supporting the inside of the pipe
- Helping the pipe keep its round shape
- Reducing the risk of pipe damage
- Improving the connection between pipe and fitting
- Helping create a more secure joint
- Providing extra strength at connection points
In addition, pipe inserts can help make plumbing work more reliable. A well-supported pipe is less likely to move, bend, or collapse when pressure is applied.
How Do Pipe Inserts Work?
The process is quite simple.
First, the correct size of insert is selected for the pipe. Next, the insert is pushed into the end of the pipe. It should fit properly without being forced too far.
After that, the pipe can be connected to the plumbing fitting. Depending on the system, this could be a compression fitting or another suitable connector.
The insert sits inside the pipe and supports it from within. When the fitting is tightened, the pipe is less likely to deform.
As a result, the fitting can grip the pipe more effectively.
This simple design is one reason pipe inserts are widely used in plumbing applications.
Pipe Inserts and Plastic Fittings
Pipe inserts are often used alongside plastic fittings in domestic and commercial plumbing systems. They can provide extra support where a flexible pipe meets a connector.
Plastic pipe is popular because it is lightweight, easy to handle, and resistant to many common forms of corrosion. However, some plastic pipes are softer than metal pipes.
Because of this, they may need internal support at connection points.
When used correctly, plastic fittings and pipe inserts can work together to create a strong connection. The insert supports the pipe, while the fitting joins the pipe to another pipe, valve, or plumbing component.
Therefore, choosing the correct insert for the pipe and fitting is important.
What Types of Pipes Use Pipe Inserts?
Pipe inserts are commonly used with several types of plastic and flexible pipes.
These may include:
- Polyethylene pipes
- PEX pipes
- Multilayer pipes
- Flexible plumbing pipes
- Certain barrier pipes
- Other approved plastic pipe systems
However, not every pipe requires an insert. The need depends on the pipe type, fitting design, and manufacturer’s instructions.
For this reason, it is always important to check the product information before installation.
The insert should also match the pipe size. A 15mm pipe insert, for example, needs an insert designed for that pipe size. Similarly, a 22mm pipe normally requires a suitable 22mm insert.
What Are the Benefits of Pipe Inserts?
Pipe inserts offer several useful benefits.
1. Extra Pipe Support
The first benefit is extra support. The insert sits inside the pipe and helps prevent it from collapsing or changing shape.
This is useful when the pipe is connected to a compression fitting.
2. Stronger Connections
A supported pipe can provide a better surface for the fitting to grip. Therefore, an insert can help create a more secure connection when used correctly.
3. Reduced Pipe Damage
Fittings can place pressure on pipes. However, the insert helps spread and support this pressure from inside.
As a result, the risk of damage can be reduced.
4. Easy Installation
Most pipe inserts are simple to install. They are normally pushed into the pipe by hand.
Because of this, they can save time during plumbing work.
5. Better Long-Term Reliability
A good connection should remain secure after installation. Pipe inserts can provide extra support at an important point in the plumbing system.
Therefore, they can contribute to long-term reliability when the correct products are used.
Are Pipe Inserts Necessary?
Not every plumbing connection needs a pipe insert.
Some fittings are designed to work without one. Other systems may require an insert as part of the installation process.
Therefore, you should always check the instructions for the pipe and fitting you are using.
For example, some manufacturers may state that an insert must be used with a particular flexible pipe. In other cases, the fitting may have been designed for a specific pipe system.
Using the correct method is important because an incorrect connection may leak or fail.
So, never assume that all pipe inserts are the same.
Pipe Inserts for 15mm and 22mm Pipes
15mm and 22mm are common pipe sizes in UK plumbing systems.
For these sizes, there are different types of pipe inserts available. A 15mm insert is designed for a suitable 15mm pipe, while a 22mm insert is designed for a suitable 22mm pipe.
The size must be correct.
If the insert is too large, it may not fit properly. On the other hand, if it is too small, it may not provide enough support.
Therefore, always check the pipe size before buying or installing an insert.
How Do Pipe Inserts Work With Plastic Fittings?
When plastic fittings are used with flexible plastic pipe, the connection needs to be properly supported.
First, the pipe should be cut cleanly. Then, the pipe insert can be placed inside the pipe if the fitting system requires it.
Next, the pipe is pushed into the fitting. The fitting then holds the pipe securely.
In some systems, plastic fittings are designed to provide a simple and reliable connection without complicated tools. However, the correct installation method should always be followed.
A pipe insert can provide the internal support needed to help the fitting grip the pipe correctly.
Choosing the Right Pipe Insert
Choosing the right insert is important for a safe and reliable installation.
Consider the following points:
Pipe Size
Check whether the pipe is 15mm, 22mm, or another size.
Pipe Material
Different pipes can have different requirements. Check the pipe manufacturer’s guidance before choosing an insert.
Fitting Type
The insert should be suitable for the fitting being used. This is especially important when working with plastic fittings.
Manufacturer Instructions
Always follow the manufacturer’s instructions. They can tell you whether an insert is required and which type should be used.
Quality
A good-quality insert should be strong, correctly sized, and suitable for the intended application.
Can Pipe Inserts Prevent Leaks?
Pipe inserts can help create a more secure connection, but they are not a guarantee against leaks.
Leaks can happen for many reasons. For example, the pipe may be cut poorly, the wrong fitting may be used, or the connection may not be installed correctly.
Therefore, correct installation is just as important as using an insert.
When installing plastic fittings, make sure the pipe is clean and properly prepared. Also, make sure the fitting is suitable for the pipe.
Once the work is complete, the system should be checked carefully for leaks.
Common Mistakes to Avoid
There are several simple mistakes that can cause problems.
First, avoid using the wrong insert size. The insert should match the pipe and fitting system.
Next, do not force an insert into a pipe if it does not fit correctly. This could damage the pipe.
Also, avoid mixing components that are not designed to work together. While many plastic fittings look similar, their specifications can be different.
Finally, do not ignore manufacturer instructions. They provide important information about installation and compatibility.
Are Pipe Inserts Good for Plumbing Projects?
Yes, pipe inserts can be very useful for many plumbing projects.
They are small, simple components, but they provide valuable internal support. They can help flexible pipes maintain their shape and improve the connection with a suitable fitting.
For homeowners, plumbers, and maintenance teams, using the correct insert can make installation easier and more reliable.
In addition, plastic fittings are widely used because they are lightweight and easy to handle. When the correct insert is used with the correct pipe system, the connection can be both practical and secure.
Final Thoughts
Pipe inserts are small components that play an important role in many plumbing systems. They fit inside pipes and provide support where a fitting is connected.
They are especially useful with flexible plastic pipes because these pipes may need extra support when a fitting is tightened.
The main benefits include better pipe support, reduced deformation, easier installation, and stronger connections. However, the correct size and type must always be selected.
Whether you are working with 15mm or 22mm pipe, always check the manufacturer’s instructions before installation. This is particularly important when using plastic fittings, because different products may have different requirements.
Ultimately, a pipe insert is a simple component that can help improve the reliability of a plumbing connection. When properly selected and installed, it can support the pipe and help create a dependable system.
For anyone working with plumbing components, understanding how pipe inserts work is useful. Even though they are small, they can provide an important layer of support inside the pipe.
Which Insulation Is Best for Energy Efficiency?
Introduction
Energy efficiency is important for every home. When a house loses heat, your heating system has to work harder. As a result, energy use can rise and rooms may feel cold.
The right Insulation can help reduce heat loss. It keeps more warmth inside during winter. It can also help keep your home cooler during warmer weather. Therefore, choosing the right type is an important step towards a more comfortable and energy-efficient home.
There are many insulation products available today. However, loft insulation is one of the most common options for homes.
This guide explains which Heat barrier works well for energy efficiency, what to look for, and why loft insulation can make a difference.
Why Is Insulation Important for Energy Efficiency?
Heat naturally moves from warmer areas to cooler areas. In winter, this means heat inside your home can escape through the roof, walls, floors, windows, and doors.
A large amount of heat can be lost through the roof when a loft has little or no insulation. Therefore, insulating the loft can be a simple way to reduce heat loss.
Good Insulation slows down the movement of heat.
This can help reduce the workload on your heating system. In turn, you may use less energy to maintain a comfortable temperature.
Which Type of Insulation Is Best?
There is no single product that is best for every part of a building. The right choice depends on where the material will be installed, the required thickness, the building design, and your energy goals.
For loft spaces, mineral wool products are a popular choice. They are easy to install between and over loft joists when used correctly.
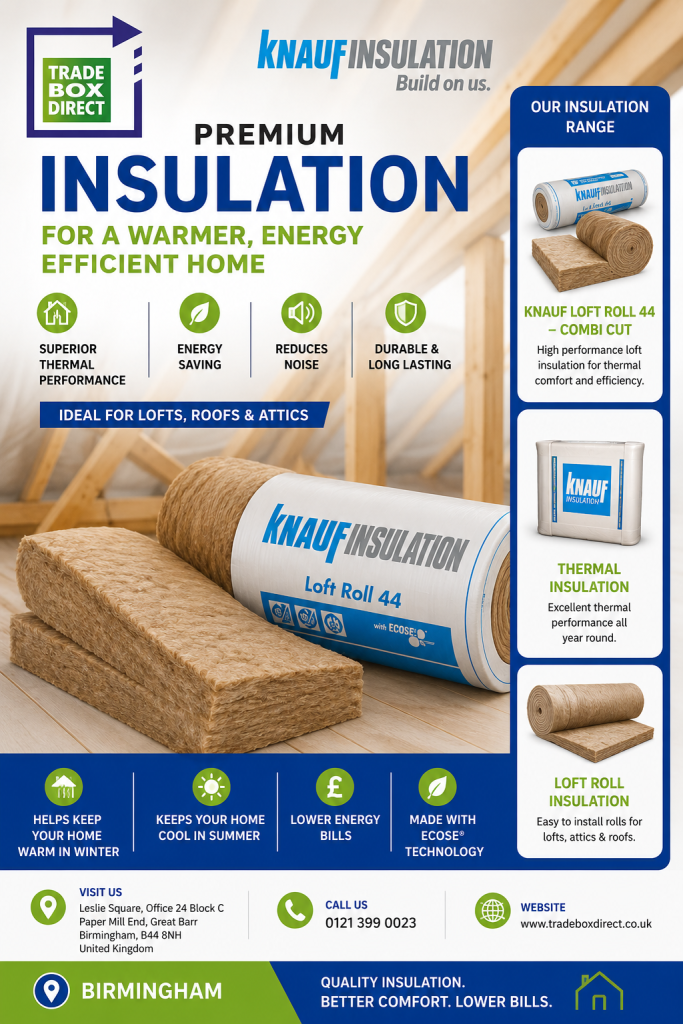
One well-known option is Knauf Loft Roll 44.
Other types include rigid boards, spray foam, sheep’s wool, cellulose, and blown mineral wool.
However, for many standard loft spaces, mineral wool rolls offer a practical balance of performance, installation, and cost.
What Is Knauf Loft Insulation?
Knauf loft insulation is designed to help reduce heat loss through the roof area.
Knauf produces mineral wool products for different building applications.
One product to consider is Knauf Loft Roll 44 – Combi Cut. It is designed for loft applications and can be cut to suit different spaces.
The material can help reduce heat transfer through the roof. Therefore, it can support a more energy-efficient home when installed correctly.
What Is Knauf Loft Roll 44?
Knauf Loft Roll 44 is a mineral wool insulation product designed for loft spaces.
The number 44 refers to its thermal insulation conductivity value. Lower thermal conductivity generally means a material provides better thermal resistance at the same thickness.
However, thickness also matters. A thicker layer usually provides greater resistance to heat flow. Knauf Loft Roll 44 100mm can be used as part of a layered loft Heat barrier system, depending on the required specification.
The correct thickness should always be based on the building requirements and current standards.
How Does Loft Insulation Save Energy?
Loft insulation works by slowing down heat movement.
Imagine your home as a warm box. Without enough insulation, heat can escape through the roof.
As a result, rooms below the loft can stay warmer for longer.
This can reduce the amount of heating needed. Therefore, Insulation can play an important role in improving energy efficiency.
However, loft insulation should not be considered on its own. Walls, floors, windows, doors, and heating controls can also affect energy use.
Knauf Insulation Roll for Loft Spaces
Knauf insulation roll is a flexible mineral wool product that can be used for suitable building applications.
Roll products are useful because they can cover larger areas. They can also be cut to fit around certain spaces.
For lofts, Knauf insulation loft roll 44 is designed to provide thermal resistance while being practical to install.
When installing a roll, it is important to avoid gaps. Even small gaps can create areas where heat can escape more easily.
Why Is Thickness Important?
Choosing Heat barrier based only on the product name is not enough. Thickness also plays a major role.
A thin layer may provide some thermal resistance. However, a thicker layer can provide greater resistance to heat flow.
For example, Knauf Loft Roll 44 100mm provides a 100mm layer. Additional layers may be required to reach the desired total depth.
In many loft installations, insulation is placed between the joists first.
This second layer helps reduce thermal bridging through the timber.
However, the exact design should follow the relevant building requirements.
Earthwool Loft Insulation
You may also come across Earthwool loft insulation when comparing products.
Earthwool is a mineral wool Heat barrier range designed for different building applications.
Like other mineral wool products, it can provide thermal resistance when installed at the correct thickness.
When comparing products, look at thermal conductivity, thickness, fire performance, installation method, and the intended application.
Price is also important. However, choosing a product based only on the lowest price may not provide the best long-term result.
Benefits of Good Loft Insulation
Good loft Temperature control can provide several benefits.
1. Less Heat Loss
First, it slows down heat escaping through the roof. This can help your home retain warmth.
2. Lower Energy Use
Because less heat escapes, your heating system may not need to run as often.
3. Better Comfort
Rooms below the loft can feel more comfortable. Cold ceilings and rooms can become less of a problem.
4. Long-Term Value
A properly installed Temperature control layer can continue to provide thermal benefits for many years.
5. Better Energy Efficiency
Finally, reducing heat loss can improve the overall energy efficiency of the building.
For these reasons, Insulation is an important part of many home energy-saving plans.
How to Install Loft Roll Correctly
Correct installation is just as important as choosing a good product.
First, measure the loft area. Next, check the required Temperature control depth.
Then, place the first layer between the joists. Make sure the material fits closely without large gaps.
After that, a second layer can be installed across the joists when required.
Avoid compressing the material more than the manufacturer allows. Compression can change the product’s designed performance.
Also, do not block important ventilation routes. Roof spaces need suitable airflow to help manage moisture.
Therefore, installation should balance thermal performance with safe roof-space ventilation.
Common Mistakes to Avoid
Several mistakes can reduce the performance of loft Temperature control.
Leaving Gaps
Gaps can allow heat to escape. So, make sure the material covers the required area properly.
Using the Wrong Thickness
A product that is too thin may not provide the required thermal performance.
Compressing the Material
Excessive compression can affect its performance.
Blocking Ventilation
Do not cover ventilation paths in the roof. Good airflow helps protect the roof space from moisture problems.
Ignoring Other Areas
A well-insulated loft will help, but heat can still escape through walls, floors, windows, and doors.
Therefore, consider the whole building when improving energy efficiency.
Is Knauf Loft Roll 44 a Good Choice?
Knauf Loft Roll 44 can be a good option for suitable loft applications.
The Knauf Loft Roll range can also be useful when working across larger loft areas.
However, the best product depends on your property. Before buying, check the required thermal performance, thickness, coverage area, and installation requirements.
If you are unsure, speak with a qualified building professional.
How to Choose the Best Insulation for Your Home
When choosing Temperature control, consider several factors.
First, decide where the material will be installed. Loft insulation is different from wall or floor insulation.
Next, check the thermal conductivity. A lower value generally means better thermal performance at the same thickness.
Then, consider the required thickness. A suitable product at the correct thickness is more important than choosing a product simply because it has a familiar brand name.
Also, check fire performance, moisture resistance, durability, and installation requirements.
Finally, compare the total cost. This includes the product, installation, and any additional materials.
With these points in mind, choosing the right Temperature control becomes much easier.
Can Insulation Help Reduce Heating Costs?
Yes, insulation can help reduce heat loss. As a result, your heating system may need less energy to maintain the desired temperature.
However, the amount you save depends on several factors.
Therefore, it is better to think of insulation as one part of a complete energy-efficiency plan.
Combining good loft insulation with efficient heating controls, draught reduction, and suitable windows can produce better results.
Final Thoughts
So, which insulation is best for energy efficiency?
For many loft spaces, mineral wool rolls are a practical and effective choice. Products such as Knauf Loft Roll 44 – Combi Cut, Knauf insulation roll, and Earthwool loft insulation can provide good thermal performance when selected and installed correctly.
The key is not simply choosing a product. Thickness, coverage, installation quality, and the condition of the building all matter.
A properly insulated loft can slow heat loss, improve comfort, and support lower energy use. Therefore, investing in good Insulation can be a useful step towards a more energy-efficient home.
Before starting work, always check the manufacturer’s instructions and current building requirements. If the project is complex, professional advice can help you choose the right product and installation method.
Frequently Asked Questions
1. What is the best insulation for energy efficiency?
For many loft spaces, mineral wool rolls are a practical choice. Knauf Loft Roll 44 is one option that can provide good thermal performance when installed at the correct thickness.
2. Is Knauf Loft Roll 44 good for a loft?
Yes. Knauf Loft Roll 44 is designed for loft applications. It can be used between and over joists, depending on the installation design.
3. Is thicker insulation better?
Generally, increasing thickness increases thermal resistance. However, the correct depth depends on the building, available space, and required thermal performance.
4. What is Knauf insulation roll used for?
Knauf insulation roll products are used for different building applications. Specific products should be selected based on the area being insulated and the manufacturer’s guidance.
5. Can loft insulation reduce energy bills?
It can reduce heat loss, which may lower the energy needed for heating. However, actual savings depend on the property and other factors.
Do Air Bricks Improve Airflow? A Simple Guide for Better Home Airflow
Introduction
Airflow is important in every home. Fresh air helps reduce moisture, stale smells, and indoor pollutants. However, many homes need a simple way to allow air to move in and out. This is where air bricks can help.
An air brick is a vent built into a wall. It has openings that allow air to pass through. At the same time, it can help protect the opening from unwanted objects and pests. Therefore, an air brick can play an important role in VENTILATION.
But do air bricks really improve airflow? The short answer is yes, when they are used and placed correctly. However, they are not a complete solution for every home. Their main purpose, location, size, and condition all affect how well they work.
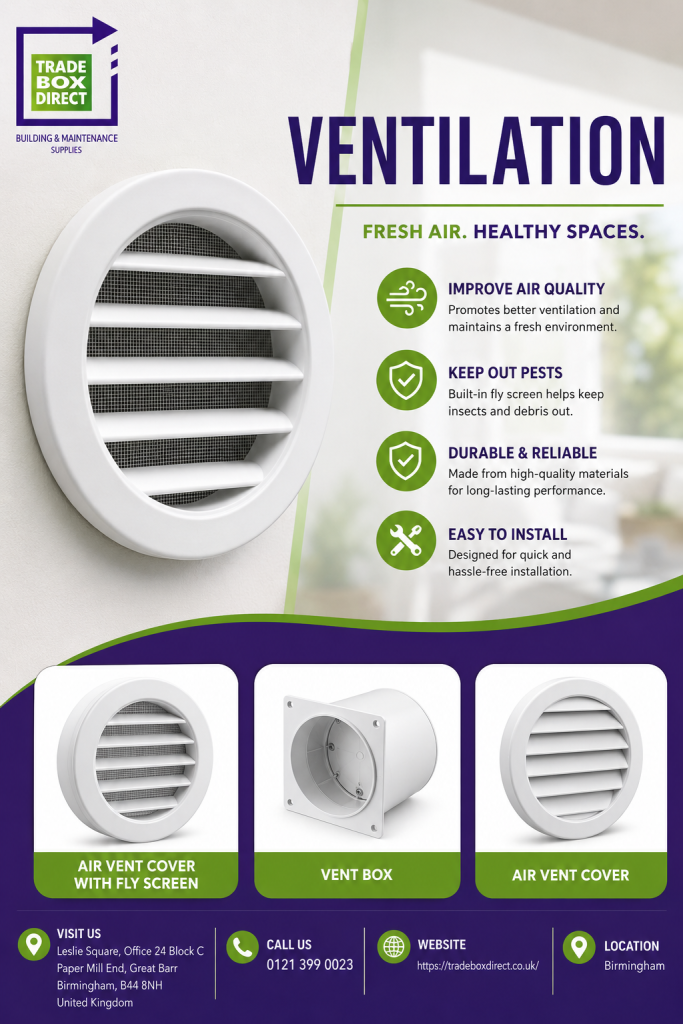
What Is an Air Brick?
Unlike a normal brick, it has holes or openings through its body.
These openings create a path for air to move between the inside and outside of a building. As a result, an air brick can support natural airflow.
Air bricks are often found near ground level. They can be used to provide airflow under floors, inside walls, or around certain building areas that need a steady flow of fresh air.
A ventilation air brick may be made from terracotta, plastic, or another suitable material. A terracotta airbrick is a popular choice because it can blend well with traditional brickwork.
Do Air Bricks Improve Airflow?
Yes, air bricks can improve airflow. They provide a direct route for air to enter or leave a space.
For example, a room or under-floor area may have poor natural airflow. Adding a suitable air brick can create an opening for fresh air. Consequently, stale or damp air may move out more easily.
However, an air brick does not force air to move. It relies mainly on natural air pressure and differences in temperature. Therefore, the results can vary from one building to another.
The design of the air brick also matters. A blocked, damaged, or poorly sized air brick will not work as well.
For this reason, good VENTILATION depends on more than simply installing a vent. The whole airflow path needs to work properly.
How Do Air Bricks Work?
Air bricks work by creating openings through a wall. These openings allow air to travel between two areas.
Natural airflow can happen because of wind pressure. It can also happen because warm air rises while cooler air moves into its place.
For example, warm air inside a building may rise. Cooler outside air can then enter through a lower opening. This creates a natural movement of air.
The process is simple, but it can be useful. In particular, air bricks can help ventilate areas such as suspended timber floors.
However, airflow needs both an entry and an exit path.
Therefore, a well-planned VENTILATION system should consider the position of every vent.
Where Are Air Bricks Used?
Air bricks are used in several areas of a building. Their most common use is to provide airflow to spaces below floors.
Under-floor airflow is especially important in some properties. Good airflow can help reduce the build-up of damp air.
Air bricks can also be used alongside other products. For example, ventilation grilles, window vents, and other air vents may form part of a wider home airflow plan.
However, each building is different. The right product should always suit the structure and the required airflow.
Air Bricks and Damp Prevention
Damp air can create problems in a building. It may contribute to condensation, unpleasant smells, and damage to some materials.
Air bricks can help by allowing air to move through areas that need ventilation. This can be useful under suspended floors, where trapped moisture can become a concern.
However, air bricks do not fix every damp problem.
If water is entering through walls, roofs, pipes, or damaged gutters, installing an air brick alone will not solve the cause.
Air Bricks vs Window Vents
Air bricks and window vents have different jobs.
Window vents, on the other hand, allow controlled airflow through windows. For example, trickle vents for windows can provide a small amount of fresh air without opening the whole window.
There are also trickle vents for UPVC windows, window trickle vents, and plastic window vents designed for modern window systems.
These products can support window ventilation while helping reduce the need to keep a window fully open.
What Are Trickle Vents?
They allow a controlled amount of outside air to enter a building.
They are useful because they can provide background airflow while the window remains closed.
For example, upvc trickle vents can be fitted to suitable UPVC windows. There are also trickle vents for doors and other types of window air vents.
However, trickle vents and air bricks are not the same. An air brick is usually part of a wall, while a trickle vent is fitted into a window or door.
Both can support VENTILATION, but they serve different purposes.
Choosing the Right Air Brick
Choosing the correct air brick is important. First, consider where it will be installed.
Next, check the required size and airflow. The material should also suit the building.
A terracotta option can work well with traditional brickwork. For example, Vent Axia – Double Louvred Airbrick Terracotta – 220x90mm is designed as a louvred airbrick solution.
Louvres help guide airflow while providing a practical cover for the opening.
It is also important to keep the air brick clear. Soil, leaves, paint, dust, and other materials can reduce the open area.
Therefore, regular checks can help maintain good airflow.
Using Air Vent Covers
An air vent cover with fly screen can be useful where protection from insects is needed. A suitable cover can help keep unwanted insects out while still allowing air to pass.
An air vent cover can also provide a neat finish around an opening.
However, the cover should not block most of the vent area. A cover that is too restrictive can reduce airflow.
Likewise, an air box or vent box should be selected based on the type of installation.
The key is to protect the opening without stopping the airflow.
Can Air Bricks Work With a Home Ventilation System?
Yes. Air bricks can form part of a larger home ventilation system.
A modern air ventilation system for home use may include several components. These can include air vents, window vents, trickle vents, fans, grilles, and ducting.
For example, a property may use wall air bricks for under-floor airflow and window trickle vents for background airflow inside living spaces.
These systems can work together.
A professional assessment may be useful when a property has serious condensation, damp, or airflow problems.
Common Airflow Problems With Air Bricks
Although air bricks can improve airflow, several problems can reduce their performance.
Blocked Air Bricks
An air brick may become blocked by soil, leaves, dust, or other debris. Therefore, check the openings regularly.
Damaged Air Bricks
Cracked or broken vents may need repair or replacement. Damage can reduce airflow and may also allow unwanted pests to enter.
Poor Positioning
An air brick needs to be placed where it can provide useful airflow. A poor location may limit its benefit.
Covered Air Bricks
Never cover an air brick without understanding its purpose. Covering an important airflow route can reduce natural airflow.
Incorrect Covers
A poorly designed cover can restrict air movement. Therefore, always choose a suitable ventilation grille or vent cover.
Product Options for Better Airflow
Different products can be useful for different areas of a building.
5000 AirFlow UPVC Trickle Vent for Windows & Doors | White is a practical option for window and door applications where controlled background airflow is required.
For wall-based airflow, the Vent Axia – Double Louvred Airbrick Terracotta – 220x90mm can be considered for suitable installations.
Another useful option is the Trickle Slot Vents Window Ventilation Real PVC Plastic 300mm 400mm.
These products have different uses. Therefore, the correct choice depends on the location, window or wall type, and airflow needs.
How to Keep Air Bricks Working Properly
Keeping an air brick clear is simple but important.
First, check the opening from time to time. Remove visible dirt, leaves, or other debris.
If the opening has a fly screen, make sure dust has not built up on the screen.
Also, check for cracks or damage.
Do not seal an air brick simply because cold air is entering the building. Instead, consider why the vent is there.
Good VENTILATION often requires a balance between fresh air and heat retention.
Are Air Bricks Enough for a Whole House?
Usually, no.
Air bricks can improve airflow in the areas they serve. However, they are not normally a complete whole-house solution.
A modern home may need several forms of airflow. These can include window vents, trickle vents, extractor fans, wall vents, and other systems.
For example, house window vents can provide background airflow through windows. Meanwhile, air bricks can serve wall or under-floor areas.
Together, these products can support better house ventilation.
The best approach depends on the building. Older homes, newer homes, flats, and houses with different construction types can all have different airflow needs.
Benefits of Good Home Airflow
Good airflow can provide several benefits.
First, it helps bring fresh air into indoor spaces. It can also help remove stale air and excess moisture.
Furthermore, good airflow can reduce the feeling of stuffiness. In some areas, it may also help manage condensation.
However, airflow should be controlled. Too much uncontrolled airflow can make a home feel cold and may increase heat loss.
Therefore, the goal is balanced VENTILATION, not simply having as many vents as possible.
Final Thoughts
So, do air bricks improve airflow?
Yes, they can. Air bricks provide a simple path for air to move through walls and into areas that need airflow. They are particularly useful for certain under-floor and wall applications.
However, their performance depends on correct installation, good positioning, suitable sizing, and regular maintenance.
Air bricks can also work alongside window vents, trickle vents, ventilation grilles, and other products. As a result, they can become part of a wider home ventilation system.
Whether you need an air brick vent, window air vents, UPVC trickle vents, or an air vent cover, always choose a product that matches the intended application.
Most importantly, keep vents clear and make sure airflow routes are not blocked. With the right products and a sensible approach, your home can have a healthier and more comfortable airflow system.
Frequently Asked Questions
1. Do air bricks increase airflow?
Yes. Air bricks create openings that allow air to move between different areas. However, the amount of airflow depends on the vent size, position, weather, and the building design.
2. Should air bricks be covered?
Air bricks should not normally be covered if they are providing necessary airflow. If protection is needed, use a suitable vent cover that still allows air to pass.
3. Can air bricks help with damp?
They can help improve airflow in areas where moisture may become trapped. However, they cannot fix damp caused by leaks, rising damp, or other water problems.
4. Are air bricks and trickle vents the same?
No. Air bricks are generally installed in walls, while trickle vents are usually fitted into windows or doors. Both can support airflow, but they have different applications.
5. How often should air bricks be checked?
It is sensible to check them regularly for dirt, leaves, insects, or damage. Keeping the openings clear helps maintain airflow.
How Ventilation Works in a House: A Simple Guide to Healthy Living
A healthy home needs more than strong walls and a solid roof. It also needs fresh air that moves through every room. Good ventilation removes stale air and brings in clean outdoor air. At the same time, INSULATION helps keep your home warm in winter and cool in summer. Together, they create a home that feels comfortable, saves energy, and protects your health.
Many people think ventilation and INSULATION are separate topics. However, they work as a team. A well-insulated house without proper ventilation can trap moisture and poor-quality air. Likewise, a house with excellent ventilation but poor INSULATION can lose heat and waste energy. Therefore, both systems must work together.
In this guide, you will learn how ventilation works in a house, why it matters, and how INSULATION supports the entire process.
What Is House Ventilation?
Ventilation is the movement of fresh air into your home while stale air moves out. This process helps remove moisture, dust, cooking smells, smoke, and indoor pollutants.
Without proper airflow, moisture can build up inside walls, ceilings, and windows. As a result, mould and mildew may grow. Moreover, stale air can make your home feel uncomfortable and unhealthy.
Fresh air enters through windows, doors, vents, trickle vents, air bricks, and mechanical ventilation systems. Meanwhile, old air leaves through extractor fans, roof vents, and other openings.
Because homes today are built to be more airtight, ventilation has become more important than ever. Good INSULATION keeps warmth inside, while ventilation keeps indoor air fresh.
Why Is Ventilation Important?
Every day, your family creates moisture simply by living in the house. Cooking, showering, washing clothes, and even breathing release water vapour into the air.
If this moisture cannot escape, several problems may appear.
These include:
- Damp walls
- Condensation on windows
- Mould growth
- Bad smells
- Poor indoor air quality
- Damage to furniture
- Higher humidity
Fortunately, proper ventilation removes this extra moisture before it becomes a problem.
At the same time, INSULATION keeps indoor temperatures stable. Therefore, the right balance between airflow and INSULATION helps prevent condensation while improving comfort.
How Ventilation Works in a House
Ventilation works by replacing stale indoor air with clean outdoor air. Air naturally moves because of pressure and temperature differences.
There are three main ways this happens.
1. Natural Ventilation
Natural ventilation uses outdoor air without electricity.
Fresh air enters through:
- Open windows
- Air bricks
- Window trickle vents
- Small wall vents
Meanwhile, warm air rises and leaves through higher openings.
This method is simple, affordable, and effective during mild weather.
However, natural ventilation depends on wind and outdoor temperatures. Therefore, it may not always provide enough airflow.
Good INSULATION helps reduce unwanted heat loss while allowing planned ventilation to work properly.
2. Mechanical Ventilation
Mechanical ventilation uses electric fans to move air.
Common systems include:
- Bathroom extractor fans
- Kitchen extractor hoods
- Whole-house ventilation systems
- Positive Input Ventilation (PIV)
- Mechanical Ventilation with Heat Recovery (MVHR)
These systems provide steady airflow throughout the year.
Moreover, they continue working even when windows remain closed.
Many modern homes use mechanical ventilation because strong INSULATION makes buildings much more airtight.
3. Hybrid Ventilation
Hybrid ventilation combines natural airflow with mechanical systems.
For example, windows may provide airflow during summer. However, extractor fans may operate during winter.
As a result, homeowners enjoy better comfort while using less energy.
How Fresh Air Travels Through Your Home
Air should move through every room in a planned way.
Usually, fresh air enters living rooms and bedrooms first.
Then, it flows through hallways.
Finally, it leaves through bathrooms, kitchens, and utility rooms.
This airflow removes moisture where it is produced most.
Therefore, indoor air stays cleaner and healthier.
Strong INSULATION supports this process because rooms stay warm without needing unwanted air leaks.
The Role of Air Bricks
Air bricks are small openings in outside walls.
They allow air to move beneath suspended wooden floors and inside wall cavities.
Without air bricks, moisture may collect under floors.
Eventually, timber can rot.
Fortunately, air bricks improve airflow and reduce damp problems.
They also help protect the effectiveness of INSULATION installed inside floors and walls.
How Window Trickle Vents Help
Modern windows often include trickle vents.
These small openings allow fresh air inside without opening the entire window.
Because they stay open slightly, they provide continuous airflow.
As a result, humidity stays lower while heat loss remains limited.
This makes trickle vents an excellent partner for modern INSULATION systems.
Kitchen and Bathroom Ventilation
Bathrooms and kitchens create the highest moisture levels.
For example:
- Boiling water creates steam.
- Showers release humidity.
- Drying clothes indoors adds moisture.
- Cooking releases smoke and grease.
Extractor fans remove this warm, moist air before it spreads through the house.
Therefore, they are one of the most important ventilation features.
When combined with quality INSULATION, these rooms stay warmer and dry faster.
Loft and Roof Ventilation
Your roof also needs ventilation.
Warm indoor air naturally rises.
If moisture becomes trapped in the loft, condensation may develop.
Over time, this can damage roof timbers and reduce the life of roofing materials.
Roof vents, ridge vents, soffit vents, and eaves ventilation allow fresh air to circulate.
At the same time, loft INSULATION keeps heat inside your living spaces while allowing the roof area to stay cool and dry.
How Insulation Supports Ventilation
Many people believe ventilation removes heat.
While some warm air does leave the house, good INSULATION reduces unnecessary heat loss.
This creates several benefits.
Better Energy Efficiency
Warm air stays inside longer.
Therefore, heating systems work less.
Less Condensation
Warmer walls reduce cold surfaces where moisture forms.
Improved Comfort
Rooms feel warmer with fewer cold spots.
Healthier Living
Fresh air continues moving while temperatures stay comfortable.
Because of these benefits, INSULATION and ventilation should always work together instead of competing.
Common Signs of Poor Ventilation
You may already have ventilation problems if you notice:
- Wet windows each morning
- Damp patches
- Mould around ceilings
- Musty smells
- Peeling wallpaper
- High indoor humidity
- Dust build-up
- Allergies becoming worse
If you notice these signs, improving ventilation should become a priority.
In many cases, checking your home’s INSULATION at the same time also provides long-term improvements.
Tips to Improve Ventilation at Home
Fortunately, improving ventilation is often simple.
You can:
- Open windows regularly.
- Use extractor fans while cooking.
- Turn bathroom fans on after showers.
- Keep air bricks clear.
- Clean trickle vents.
- Avoid blocking vents with furniture.
- Dry clothes outdoors when possible.
- Maintain roof ventilation.
- Check loft airflow regularly.
- Upgrade old INSULATION if needed.
Together, these small actions make a noticeable difference.
Ventilation and Energy Savings
Many homeowners worry that ventilation wastes heat.
Fortunately, modern ventilation systems are designed to reduce this problem.
Mechanical Ventilation with Heat Recovery (MVHR) captures heat from outgoing air.
Then, it transfers that heat to incoming fresh air.
As a result, the house receives clean air while keeping much of its warmth.
When combined with effective INSULATION, energy bills can stay lower without sacrificing comfort.
This balanced approach is becoming common in modern energy-efficient homes.
Common Ventilation Mistakes
Many people accidentally reduce airflow.
Common mistakes include:
- Blocking air bricks
- Closing trickle vents all year
- Turning off extractor fans
- Covering vents with furniture
- Ignoring roof ventilation
- Skipping fan maintenance
Although these actions may seem harmless, they often create moisture problems.
Instead, allow air to move naturally while relying on good INSULATION to maintain indoor comfort.
Final Thoughts
A healthy home depends on fresh air moving through every room. Ventilation removes moisture, improves indoor air quality, and helps prevent damp and mould. At the same time, INSULATION keeps heat where it belongs and improves energy efficiency. When these two systems work together, your home becomes healthier, warmer, and more comfortable throughout the year.
Whether you are building a new house or improving an older one, never focus on only one system. Instead, combine effective ventilation with quality INSULATION for the best results. This balanced approach protects your home, supports your family’s health, and helps reduce energy costs for many years to come.
How VENTILATION Works in a House: A Simple Guide to Fresh and Healthy Air
A healthy home needs fresh air every day. Many people think opening a window is enough. However, a good VENTILATION system does much more than that. It removes stale air, controls moisture, and brings fresh outdoor air inside. As a result, your home feels cleaner, healthier, and more comfortable.
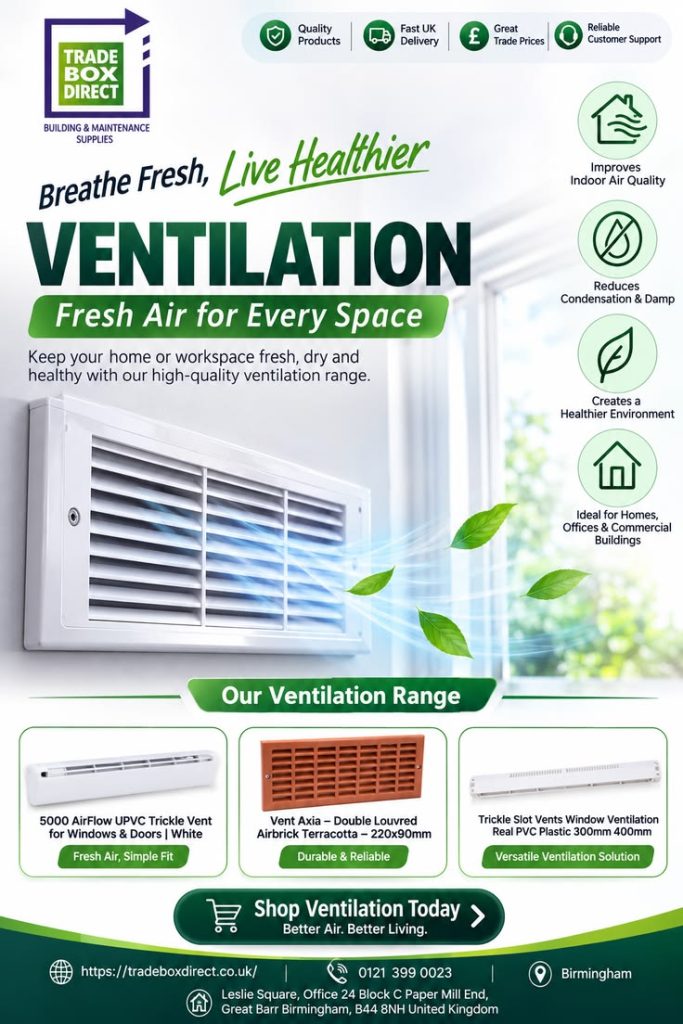
In modern homes, good airflow is even more important. Houses are now built to keep heat inside. While this saves energy, it also traps moisture and indoor pollutants. Therefore, proper airflow is essential for every room.
In this guide, you will learn how VENTILATION works in a house, why it matters, and which products help improve indoor airflow.
Why Is Ventilation Important?
Fresh air helps people stay healthy. Every day, people breathe, cook, shower, and clean. These activities release moisture, dust, and tiny particles into the air. Without proper airflow, these pollutants stay inside your home.
Because of this, poor airflow can lead to:
- Damp walls
- Condensation on windows
- Mold growth
- Musty smells
- Poor indoor air quality
- Allergies and breathing problems
On the other hand, good VENTILATION removes stale air and replaces it with fresh outdoor air. Consequently, your home becomes healthier and more pleasant to live in.
How Does Ventilation Work in a House?
The basic idea is very simple. Fresh air enters the home while stale air leaves it.
Air naturally moves from areas of high pressure to low pressure. At the same time, warm air rises while cooler air enters through small openings. Therefore, air keeps moving around the house.
A typical airflow process looks like this:
- Fresh air enters through window vents, trickle vents, or an air brick vent.
- Air travels through living rooms and bedrooms.
- Moist air moves towards kitchens and bathrooms.
- Finally, extractor fans or air vents remove stale air outside.
This continuous cycle keeps the indoor air fresh all day.
Natural Ventilation vs Mechanical Ventilation
There are two main ways to improve airflow in a home.
Natural Ventilation
Natural airflow uses wind and temperature differences.
Examples include:
- Opening windows
- Using window air vents
- Installing air bricks
- Adding ventilation grilles
This method uses no electricity. Therefore, it is affordable and easy to maintain.
Mechanical Ventilation
Mechanical systems use electric fans.
These include:
- Bathroom extractor fans
- Kitchen extractor hoods
- Whole-house ventilation systems
- Heat recovery ventilation units
These systems work well because they move air continuously, even when windows remain closed.
What Are Air Bricks?
An air brick vent is a brick with small holes that allow air to pass through.
It is usually installed near ground level.
Ventilation air brick products help air flow beneath suspended timber floors. As a result, moisture cannot build up under the floor.
This prevents:
- Rotting timber
- Damp floors
- Bad smells
- Mold growth
Many homes also use a terracotta airbrick because it matches traditional brickwork while providing excellent airflow.
What Are Trickle Vents?
Trickle vents are small openings fitted into window or door frames.
Unlike fully opened windows, they let in a small amount of fresh air throughout the day.
They help by:
- Reducing condensation
- Improving indoor air quality
- Lowering humidity
- Preventing mold
Many modern homes include:
- Trickle vents for UPVC windows
- Trickle vents for doors
- UPVC trickle vents
- Window trickle vents
- Trickle vents for windows
Since they stay slightly open, they provide fresh air without creating large drafts.
How Window Vents Improve Airflow
Many people rely on window vents every day without even noticing them.
These small openings allow outdoor air to enter slowly. Consequently, rooms remain fresh even when the windows stay shut.
Good window ventilation helps:
- Reduce indoor humidity
- Improve sleeping conditions
- Remove stale air
- Keep rooms comfortable
Today, many homeowners also install house window vents because they improve airflow while helping maintain indoor temperatures.
Why Air Vents Matter
Every home contains several types of air vents.
They allow fresh air to enter and stale air to leave.
Common locations include:
- Bedrooms
- Living rooms
- Bathrooms
- Kitchens
- Utility rooms
Without proper airflow, moisture builds up quickly. Therefore, installing the right vents makes a big difference.
What Are Ventilation Grilles?
A ventilation grille is a protective cover placed over an air opening.
These grilles allow air to move freely while stopping debris and insects from entering.
You can find ventilation grilles in:
- Walls
- Floors
- Doors
- Ceilings
They improve airflow while giving the installation a neat appearance.
Why Vent Covers Are Useful
A good air vent cover protects the vent opening.
Likewise, vent covers help:
- Stop insects
- Reduce dust entering vents
- Improve appearance
- Protect the ventilation opening
Many modern covers are made from durable plastic or metal, making them suitable for both indoor and outdoor use.
Which Rooms Need the Most Ventilation?
Every room benefits from fresh air, although some areas need it more than others.
Kitchen
Cooking creates steam, smoke, and grease.
Therefore, good airflow removes moisture before it settles on walls and ceilings.
Bathroom
Bathrooms produce large amounts of steam.
Without proper airflow, condensation quickly forms on mirrors, windows, and walls.
As a result, mold can grow in hidden corners.
Bedroom
Fresh air improves sleep quality.
It also lowers carbon dioxide levels that build up overnight.
Living Room
Living rooms often contain several people at once.
Fresh airflow helps remove odors while keeping the room comfortable.
Loft and Underfloor Areas
These hidden spaces can trap moisture.
Using air bricks, vents, and proper airflow helps protect timber and insulation from damp damage.
Signs Your House Needs Better Ventilation
Many homes show warning signs long before serious problems appear.
Watch for:
- Condensation on windows
- Mold spots
- Damp patches
- Peeling wallpaper
- Musty smells
- Poor air quality
- Excess humidity
- Stale rooms
If you notice these signs, improving airflow should become a priority.
Tips to Improve House Ventilation
Fortunately, improving airflow is often simple.
You can:
- Install quality window trickle vents
- Fit additional air brick vent products
- Keep existing vents clear
- Clean vent covers regularly
- Use extractor fans during cooking
- Run bathroom fans after showers
- Open windows when weather allows
- Install extra ventilation grilles where needed
Even small improvements can make a noticeable difference.
Benefits of Good Ventilation
A properly ventilated home offers many advantages.
These include:
- Cleaner indoor air
- Less condensation
- Lower humidity
- Reduced mold growth
- Better comfort
- Healthier breathing
- Longer-lasting building materials
- Improved energy efficiency
- Fresher-smelling rooms
- Better overall home value
Because fresh air constantly moves through the home, the indoor environment stays healthier throughout the year.
Choosing the Right Ventilation Products
The best solution depends on your home.
Older houses often benefit from:
- Terracotta airbrick
- Traditional air bricks
- Wall vents
Newer homes usually work well with:
- Trickle vents for windows
- UPVC trickle vents
- Modern window vents
- Decorative ventilation grille products
Bathrooms and kitchens also benefit from mechanical extractor fans for faster moisture removal.
Conclusion
Good VENTILATION is one of the most important parts of a healthy home. It keeps fresh air moving while removing moisture, odors, and indoor pollutants. As a result, it helps prevent condensation, damp, and mold before they become serious problems.
Simple products such as air bricks, window vents, trickle vents, ventilation grilles, and air vent cover solutions all play an important role in improving airflow. Moreover, combining natural airflow with mechanical extraction creates an even healthier indoor environment.
Use up and down arrow keys to resize the meta box pane.
Whether you live in an older property or a modern home, investing in proper airflow will improve comfort, protect your building, and support better health for everyone in the house.
Use up and down arrow keys to resize the meta box pane.
How Does a Dishwasher Work with Detergent? A Simple Guide to Better Cleaning
Introduction
A dishwasher makes life easier. It washes plates, bowls, cups, and cutlery with very little effort. As a result, you save time every day. It also uses less water than washing many dishes by hand.
However, many people still ask one simple question. How does a dishwasher work with detergent? The answer is easier than you may think. A dishwasher uses hot water, strong spray arms, and detergent at the right time. Together, these parts remove food, grease, and stains from your dishes.
Moreover, the detergent does much more than make bubbles. It breaks down grease and lifts food from every surface. Then the hot water washes everything away. Finally, the dishwasher rinses and dries your dishes, so they are ready to use again.
Furthermore, using the right detergent helps your dishwasher work better. It keeps dishes shiny, helps stop cloudy marks, and leaves glasses looking clear. Therefore, choosing a good product can improve every wash.
This guide explains each step in simple words. In addition, you will learn why detergent matters, how each wash cycle works, and where products such as Fairy Liquid – Professional Washing Up Liquid – Original 5L fit into everyday kitchen cleaning.
How Does a Dishwasher Work?
A dishwasher cleans dishes in a few simple steps. Although the machine looks simple from the outside, many parts work together inside. Each step helps remove food, grease, and stains. As a result, your dishes come out clean and fresh.
Let’s look at each step.
Step 1: The Dishwasher Fills with Water
First, the dishwasher fills with fresh water.
Next, the machine heats the water. Most dishwashers warm it to about 50°C to 70°C. This temperature helps soften grease and dried food much faster than cold water.
Meanwhile, the dishwasher checks that enough water has entered the machine. Once the water reaches the right level, the wash cycle begins.
Because the water is hot, food starts to loosen from plates and pans. At the same time, the detergent can work much better.
Therefore, hot water is one of the most important parts of the cleaning process.
Step 2: The Detergent Is Released
Once the water becomes hot enough, the detergent dispenser opens.
Then the detergent mixes with the hot water. Together, they form a strong cleaning solution.
This solution starts breaking down many kinds of dirt, including:
- Grease
- Cooking oil
- Dried food
- Tea stains
- Coffee marks
- Sticky sauces
- Food leftovers
As the detergent spreads around the dishwasher, it reaches every rack. Meanwhile, the cleaning ingredients keep working on tough stains.
Because of this, food becomes much easier to remove.
Without detergent, hot water would remove only some dirt. Grease would still stick to many dishes. Therefore, detergent plays a very important role in every wash.
Step 3: The Spray Arms Start Spinning
After the detergent mixes with the water, the spray arms begin to spin.
These spray arms push hot water across every shelf inside the dishwasher.
As they turn, they spray water in different directions. Therefore, water reaches plates, bowls, glasses, and cutlery from many angles.
Meanwhile, the fairy detergent keeps breaking down grease and food.
Together, the water pressure and detergent lift dirt away from every surface.
Because the spray arms move all the time, every dish gets a deep clean.
However, this only works if nothing blocks the spray arms. Therefore, always leave enough space between your dishes.
Step 4: Dirty Water Drains Away
Once the wash cycle ends, the dirty water leaves the machine.
Then the dishwasher fills with fresh water again.
Next, it rinses every dish with clean water.
As a result, any leftover detergent washes away.
Moreover, the rinse removes tiny food particles that may still remain.
Therefore, your dishes come out clean, fresh, and free from soap.
Step 5: The Dishwasher Dries the Dishes
Finally, the drying stage begins.
Some dishwashers use warm air.
Others use condensation drying.
Both methods remove water from the dishes.
As a result, your plates, cups, and bowls become dry and ready to use.
However, opening the dishwasher door for a few minutes after the cycle ends can help the dishes dry even faster.
Therefore, many people leave the door slightly open before putting everything away.
Why Is Dishwasher Detergent So Important?
Many people think hot water does all the cleaning.
However, that is not true.
Hot water helps, but it cannot remove thick grease by itself.
Instead, detergent does the hard work.
It breaks grease into tiny pieces.
Then the water washes those pieces away.
Because of this, your dishes become much cleaner.
A good dishwasher detergent can also:
- Remove grease quickly
- Break down dried food
- Stop food from sticking again
- Help glasses stay clear
- Reduce white water marks
- Leave dishes looking bright
Furthermore, good detergent helps protect the inside of the dishwasher. It also helps keep the machine cleaner after every wash.
Therefore, choosing the right detergent is just as important as choosing the right wash cycle.
What Happens Inside Dishwasher Detergent?
Dishwasher detergent contains several cleaning ingredients.
Each one has its own job.
Together, they clean dishes much better than water alone.
Surfactants
Surfactants lift grease from dishes.
They also help water spread across every surface.
As a result, cleaning becomes faster and more even.
Enzymes
Enzymes break down food.
For example, they remove:
- Rice
- Pasta
- Eggs
- Bread
- Potato
- Sauce
- Meat juices
Because of this, dried food becomes much easier to wash away.
Water Softeners
Some homes have hard water.
Hard water contains extra minerals.
These minerals leave white spots on glasses.
Fortunately, water softeners reduce these marks.
As a result, your dishes look much cleaner.
Cleaning Agents
Cleaning agents remove stains that are harder to clean.
For example, they help remove tea stains, coffee marks, and greasy food.
Together, all these ingredients help your dishwasher deliver better cleaning after every cycle.
How Does Hot Water Help a Dishwasher?
Hot water plays a big role in every dishwasher cycle. In fact, it helps the detergent work better from the start. Without enough heat, grease can stay on your dishes.
First, hot water softens dried food. Then, it melts grease and oil. As a result, the detergent can lift the dirt much more easily.
Moreover, warm water helps the detergent dissolve faster. Because of this, the cleaning solution spreads across every plate, bowl, and glass.
Hot water also helps reduce germs. Therefore, your dishes come out cleaner and safer to use.
For the best results, most dishwashers heat the water to about 50°C to 70°C. This temperature gives a good balance between cleaning power and energy use.
Why Should You Load a Dishwasher the Right Way?
Even the best dishwasher cannot clean dishes that are packed too tightly. Therefore, loading the machine the right way is very important.
First, place dirty dishes so they face the spray arms. This helps the water reach every surface.
Next, leave a small gap between each item. As a result, water can move freely around every dish.
Also, keep large pots at the sides or back. This prevents them from blocking the spray arms.
For better cleaning, follow these simple tips:
- Face dirty dishes toward the centre.
- Leave space between plates.
- Put cups upside down.
- Place bowls at an angle.
- Keep tall items away from the detergent door.
- Do not block the spray arms.
- Avoid overloading the racks.
By following these steps, your dishwasher can clean every item more evenly.
Common Dishwasher Wash Cycles
Most modern dishwashers have several wash programs. Each one suits a different type of load.
Quick Wash
Quick Wash is best for lightly dirty dishes.
It finishes in less time. Therefore, it is useful when you need clean dishes quickly.
Eco Wash
Eco Wash saves water and electricity.
Although it takes longer, it uses less energy. As a result, many people use this cycle every day.
Intensive Wash
This cycle is made for heavy cleaning.
It works well for:
- Pots
- Pans
- Baking trays
- Burnt food
- Thick grease
Moreover, it uses hotter water and stronger sprays.
Normal Wash
Normal Wash is the most common program.
It works well for everyday dishes.
Because it balances time, water, and cleaning power, it is suitable for most families.
How Much Detergent Should You Use?
Many people think more detergent gives better results.
However, that is not true.
Too much detergent can leave white marks on dishes. It may also waste money.
On the other hand, too little detergent may leave food behind.
Therefore, always follow the instructions on the detergent pack or your dishwasher manual.
The correct amount depends on:
- The size of the load
- How dirty the dishes are
- Your water hardness
- The type of detergent
Using the right amount helps your dishwasher clean better while avoiding waste.
Does Hard Water Affect Dishwasher Cleaning?
Yes, it does.
Hard water contains natural minerals such as calcium and magnesium.
These minerals can stay on your dishes after washing.
As a result, you may notice:
- White spots
- Cloudy glasses
- Limescale inside the dishwasher
- Poor cleaning results
Fortunately, many dishwasher detergents contain water-softening ingredients.
In addition, many dishwashers use dishwasher salt to reduce hard water problems.
Therefore, your dishes stay cleaner and your machine lasts longer.
How Often Should You Clean Your Dishwasher?
Although a dishwasher cleans your dishes, it also needs regular care.
Small food pieces, grease, and soap can build up inside the machine over time.
Therefore, cleaning it often helps it work better.
For the best results:
- Clean the filter every week.
- Wipe the door seals with a soft cloth.
- Check the spray arms for blocked holes.
- Run an empty cleaning cycle once a month.
- Remove grease from the inside walls.
As a result, your dishwasher stays fresh and performs well for many years.
Fairy Detergent and Professional Cleaning
Many homes trust detergent because it removes grease quickly.
Likewise, many cafés, restaurants, and workplaces use fairy washing products every day.
One popular choice is Fairy Liquid – Professional Washing Up Liquid – Original 5L.
This large bottle is made for busy kitchens where many dishes need to be washed by hand.
It offers several benefits:
- Powerful grease removal
- Rich, long-lasting foam
- Professional cleaning quality
- Large 5-litre size
- Good value for regular use
- Suitable for heavy kitchen work
It is important to remember that Fairy Liquid – Professional Washing Up Liquid – Original 5L is made for manual washing. It is not designed for use inside the detergent compartment of an automatic dishwasher.
Instead, it is ideal for washing:
- Pots
- Pans
- Trays
- Kitchen tools
- Serving dishes
- Cooking utensils
Similarly, fairy washing up liquid 5l is a popular choice for schools, offices, cafés, hotels, and commercial kitchens that need reliable cleaning every day.
Simple Tips for Better Dishwasher Results
A few simple habits can make a big difference.
First, scrape large food pieces into the bin.
Next, load your dishes correctly.
Then, choose the right wash cycle.
Also, use fresh detergent every time.
For even better results:
- Clean the filter often.
- Check the spray arms.
- Keep the rinse aid full.
- Use dishwasher salt if needed.
- Avoid overloading the racks.
- Leave space between dishes.
As a result, your dishes will come out cleaner after every wash.
Benefits of Using a Dishwasher
A modern dishwasher offers many advantages.
Saves Time
The machine washes the dishes for you.
Therefore, you have more time for other jobs.
Saves Water
Most modern dishwashers use less water than hand washing.
As a result, they help reduce water use.
Better Cleaning
Hot water and detergent remove grease more easily.
Therefore, dishes come out cleaner.
Better Hygiene
High water temperatures help reduce germs.
Because of this, your dishes become more hygienic.
Less Effort
Simply load the dishwasher, add detergent, and press Start.
Then the machine does the rest.
Common Dishwasher Mistakes
Even a good dishwasher cannot fix simple mistakes.
Fortunately, most problems are easy to avoid.
Common mistakes include:
- Using too much detergent
- Using too little detergent
- Blocking the spray arms
- Overloading the racks
- Forgetting to clean the filter
- Choosing the wrong wash cycle
- Ignoring hard water problems
By avoiding these mistakes, your dishwasher will perform much better.
People Also Ask
How does a dishwasher clean dishes?
A dishwasher sprays hot water mixed with detergent over your dishes. Then, the detergent breaks down grease and food. Finally, clean water rinses everything away before the drying stage begins.
Does a dishwasher need detergent?
Yes. Hot water helps, but detergent removes grease, food, and stains much more effectively.
Can I use washing-up liquid in a dishwasher?
No. Regular washing-up liquid creates too many bubbles. As a result, it may cause leaks and poor cleaning.
Products such as Fairy Liquid – Professional Washing Up Liquid – Original 5L are made for washing dishes by hand. They should not be poured into the detergent compartment of an automatic dishwasher.
Why are my dishes still dirty after a wash?
Several things can cause this problem, including:
- Incorrect loading
- Dirty filters
- Blocked spray arms
- Hard water
- Too little detergent
- A poor wash cycle
Fortunately, most of these problems are easy to fix.
How often should I clean my dishwasher?
Clean the filter every week.
Then, run an empty cleaning cycle once each month.
This keeps your dishwasher working well.
Does hot water clean dishes better?
Yes.
Hot water softens food, melts grease, and helps detergent work faster.
As a result, your dishes become cleaner.
Which detergent should I choose?
Choose a dishwasher detergent that matches your machine and your local water type.
For manual dishwashing, Fairy Liquid – Professional Washing Up Liquid – Original 5L is a trusted choice for cleaning greasy pots, pans, and kitchen tools.
Conclusion
A dishwasher is one of the easiest ways to keep your kitchen clean. It uses hot water, detergent, strong spray arms, rinsing, and drying to remove grease and food from your dishes. Because every stage works together, the machine delivers reliable cleaning with very little effort.
Moreover, using the right detergent helps your dishwasher perform at its best. At the same time, cleaning the machine often and loading it correctly will improve every wash.
If you also wash pots and pans by hand, Fairy Liquid – Professional Washing Up Liquid – Original 5L is a dependable choice. It cuts through grease quickly and is suitable for busy homes and commercial kitchens. However, remember that it is made for manual dishwashing, not for use inside an automatic dishwasher.
Finally, with the right habits, the right detergent, and regular care, your dishwasher can give you sparkling clean dishes, save time, reduce water use, and make daily kitchen cleaning much easier.
Why Are Signs of Poor Air Ventilation Important? A Complete Guide to Better Ventilation in Your Home
Introduction
Ventilation plays a big part in keeping your home healthy and comfortable. It helps fresh air come in and stale air go out. As a result, your home feels cleaner, smells better, and stays drier. Good airflow also helps remove dust, moisture, and indoor pollutants.
However, many people do not notice poor ventilation until problems become serious. At first, the signs seem small. For example, you may notice a damp smell or fog on your windows. Later, mould, condensation, and poor air quality may appear. Because of this, it is important to understand the warning signs early.
Moreover, poor ventilation can affect both your home and your health. It can lead to breathing problems, allergies, headaches, and even damage to walls and furniture. Therefore, improving airflow should be a priority in every property.
Fortunately, there are many simple ways to improve airflow. Products such as air brick vent, ventilation air brick, terracotta airbrick, trickle vents, window vents, air vents, air bricks, ventilation grilles, vent covers, trickle vents for UPVC windows, window trickle vents, window ventilation, and air vent cover all help fresh air move around your home.
In this guide, you will learn the common signs of poor ventilation, why they happen, and how you can fix them before they become expensive problems.
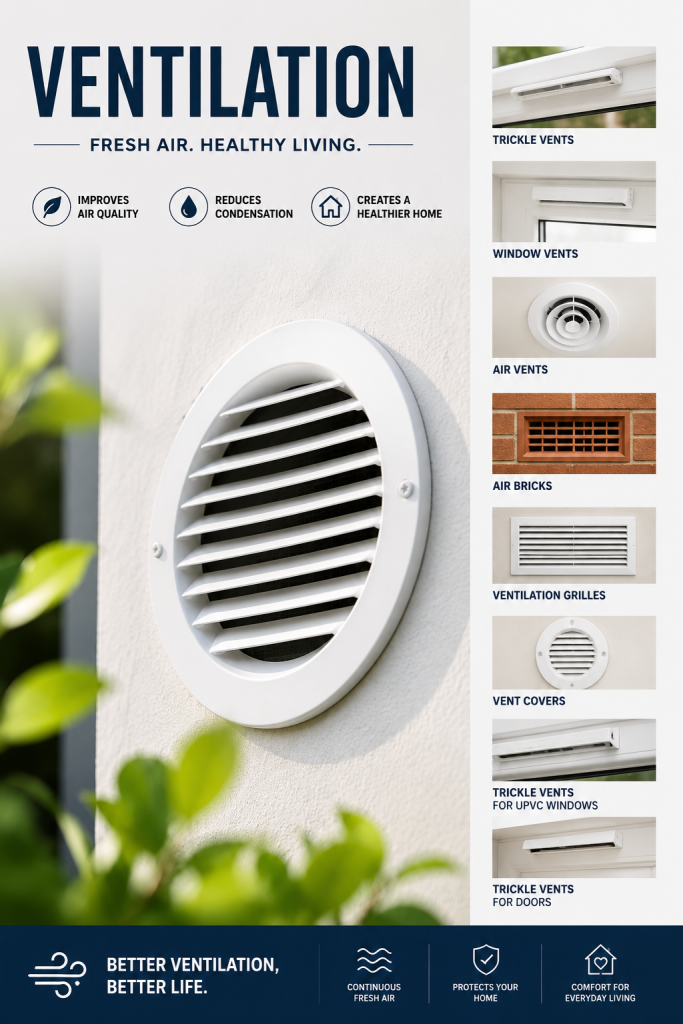
What Is Ventilation?
Ventilation is the movement of fresh air into a building while stale air moves out. This process removes moisture, smoke, dust, cooking smells, and harmful gases.
Without enough fresh air, indoor air quality becomes poor. Consequently, your home may feel stuffy and uncomfortable.
There are different ways to improve airflow. For example, homes often use window vents, house window vents, window air vents, ventilation grilles, and air brick vent systems. These products allow fresh air to enter while helping damp air leave.
Why Is Good Ventilation So Important?
Good ventilation does much more than keep rooms fresh.
It also:
- Reduces excess moisture.
- Prevents condensation.
- Helps stop mould growth.
- Removes bad smells.
- Improves indoor air quality.
- Protects furniture and walls.
- Supports better breathing.
- Makes your home more comfortable.
Furthermore, good airflow helps reduce allergens such as dust mites and mould spores. As a result, people with asthma or allergies often feel better in a well-ventilated home.
What Are the Main Signs of Poor Air Ventilation?
Many homes show warning signs before serious damage happens. Therefore, knowing these signs can save money and protect your family’s health.
1. Condensation on Windows
One of the first signs is water droplets on windows.
This usually appears in the morning or after cooking and showering.
When warm air meets a cold window, moisture forms. If this happens every day, your home may not have enough airflow.
Installing trickle vents for windows, UPVC trickle vents, or window trickle vents can help reduce this moisture by allowing fresh air inside.
2. Damp or Musty Smells
A home should smell fresh.
However, if rooms have a damp smell that does not disappear, poor ventilation may be the reason.
This smell often develops because moisture becomes trapped. Over time, mould begins to grow behind furniture, inside cupboards, or on walls.
Therefore, improving window ventilation can remove stale air before mould develops.
3. Mould Growing on Walls or Ceilings
Mould is one of the clearest signs of poor ventilation.
You may notice black, green, or grey spots near windows, ceilings, bathrooms, or kitchens.
Although cleaning mould removes what you see, it does not solve the real problem.
Instead, your home needs better airflow. Products like ventilation grilles, air vents, and air brick vent systems help moisture escape naturally.
4. Stuffy Indoor Air
Does your home feel heavy or uncomfortable?
If opening a door immediately makes the room feel fresher, poor airflow is likely the cause.
Stale air often contains carbon dioxide, dust, and indoor pollutants.
Consequently, people may feel tired or uncomfortable after spending several hours indoors.
5. Lingering Cooking Smells
Cooking smells should disappear after a short time.
However, if food smells remain for many hours, your kitchen may not have enough ventilation.
Likewise, smoke and steam may stay inside instead of leaving the room.
Adding vent covers, extractor fans, or ventilation grilles helps remove cooking fumes more effectively.
6. High Humidity Levels
A healthy home should not feel damp.
If your walls, windows, or furniture often feel wet, excess humidity may be building up indoors.
High humidity encourages mould, bacteria, and dust mites.
Therefore, improving airflow with air bricks, terracotta airbrick, or ventilation air brick products can help reduce moisture naturally.
7. Peeling Paint or Wallpaper
Too much moisture slowly damages decorating materials.
You may notice wallpaper lifting from the wall or paint beginning to bubble.
Although many people blame poor decorating, trapped moisture is often the real cause.
As airflow improves, these problems usually become much less common.
8. Allergies That Become Worse Indoors
Indoor air should help you feel comfortable.
Instead, poor ventilation may make allergies worse.
Dust, mould spores, pet hair, and pollen stay trapped inside when fresh air cannot circulate properly.
Because of this, people may sneeze more often or develop itchy eyes and coughing while indoors.
Why Does Poor Ventilation Happen?
Many homes experience poor airflow for simple reasons.
For example, modern houses are built to save energy. Although this reduces heating bills, it also traps indoor air.
Likewise, keeping windows closed all year limits fresh air.
Other common causes include:
- Blocked air bricks
- Covered ventilation grilles
- Broken extractor fans
- Sealed window vents
- Missing trickle vents
- Poor loft airflow
- Furniture blocking vents
- Dirty air vent covers
Fortunately, most of these problems are easy to fix.
Practical Solutions to Fix Poor Air Ventilation
Now that you know the signs of poor ventilation, the next step is to improve the airflow in your home. Fortunately, many solutions are simple and affordable. Moreover, they can protect both your health and your property for years to come.
Install Air Brick Vents
An air brick vent is one of the easiest ways to improve natural airflow. It allows fresh air to enter your home while letting stale, damp air escape.
Many homes already have air bricks, but they may become blocked by dirt, leaves, or paint. Therefore, check them regularly and keep them clean.
If you are building or renovating a property, installing a ventilation air brick or a terracotta airbrick can provide long-lasting airflow while matching the style of your home.
Fit Trickle Vents to Your Windows
Modern homes are often sealed very tightly. As a result, fresh air cannot enter easily.
This is where trickle vents help. They allow a small amount of fresh air to enter without opening the whole window.
There are several options available, including:
- Trickle vents for UPVC windows
- UPVC trickle vents
- Window trickle vents
- Trickle vents for doors
- Trickle vents for windows
These products improve window ventilation throughout the day. In addition, they help reduce condensation and improve indoor air quality.
Use Window Vents and Air Vents
Fresh air needs a clear path into your home.
Installing window vents, window air vents, house window vents, or other air vents helps keep air moving naturally.
Furthermore, these vents work well in bedrooms, living rooms, and home offices where people spend many hours each day.
Install Ventilation Grilles and Vent Covers
A ventilation grille allows air to move between rooms while protecting the opening.
Likewise, ventilation grilles improve airflow in cupboards, lofts, garages, and utility rooms.
At the same time, an air vent cover or quality vent covers protect vents from insects, dirt, and debris while allowing air to pass through.
Therefore, they improve both airflow and appearance.
Open Windows Every Day
Although mechanical systems help, opening windows is still one of the easiest ways to improve ventilation.
Even opening them for 10 to 15 minutes each morning allows stale air to leave and fresh air to enter.
As a result, moisture levels fall, and indoor air becomes cleaner.
Use Extractor Fans
Bathrooms and kitchens create a large amount of moisture.
Therefore, always use extractor fans while cooking or showering.
Moreover, leave the fan running for several minutes after you finish. This removes steam before it turns into condensation.
Keep Vents Clear
Sometimes the solution is very simple.
Furniture, curtains, or storage boxes may block airflow without you noticing.
For this reason, keep all vents, air brick vents, and ventilation grilles free from obstructions.
Regular cleaning also keeps dust from reducing airflow.
How to Prevent Poor Ventilation
Preventing poor ventilation is much easier than repairing mould or damp damage later.
Follow these simple habits:
- Open windows every day.
- Clean air bricks regularly.
- Keep ventilation grilles dust free.
- Leave trickle vents open.
- Use extractor fans after cooking and showering.
- Dry clothes outside whenever possible.
- Avoid blocking window vents.
- Check vent covers for dirt or damage.
- Monitor humidity levels during winter.
- Inspect your home for condensation every week.
These small steps can make a big difference over time.
Frequently Asked Questions
What is the biggest sign of poor ventilation?
The most common sign is condensation on windows. However, mould, damp smells, stale air, peeling wallpaper, and high humidity are also strong warning signs.
Do trickle vents really work?
Yes. Trickle vents provide a constant supply of fresh air. Consequently, they help reduce condensation, improve indoor air quality, and lower moisture levels.
Are air bricks important?
Yes. Air bricks improve airflow beneath floors and inside walls. As a result, they help prevent damp, timber decay, and mould growth.
Can poor ventilation damage a house?
Yes. Over time, trapped moisture can damage paint, wallpaper, plaster, timber, flooring, and furniture. Therefore, improving ventilation protects your home as well as your health.
Conclusion
Good ventilation is one of the easiest ways to create a healthier and more comfortable home. Although poor airflow may seem like a small problem at first, it can quickly lead to condensation, mould, unpleasant smells, and expensive property damage. Furthermore, it can affect your family’s health by reducing indoor air quality and increasing allergens.
Fortunately, improving airflow does not have to be difficult. Installing an air brick vent, ventilation air brick, terracotta airbrick, trickle vents, window vents, air vents, air bricks, ventilation grilles, vent covers, or an air vent cover can make a noticeable difference. Likewise, keeping vents clean, opening windows daily, and using extractor fans help fresh air circulate throughout your home.
By recognising the early signs and taking action quickly, you can prevent costly repairs and enjoy cleaner, fresher indoor air all year round. Investing in proper ventilation today will help protect both your home and your family’s well-being for many years to come.
Why Does My Thermostat Not Stay at One Temperature? A Simple Guide to Fixing It
Introduction
Keeping your home at a comfortable temperature should be simple. However, many homeowners find that their THERMOSTATS do not stay at the temperature they set. As a result, rooms can become too hot or too cold. In addition, your heating system may work harder and use more energy.
The good news is that most thermostat problems are easy to fix. In many cases, you do not need a new heating system. Instead, a few simple checks can help you find the cause.
For example, your thermostat may follow a schedule, use smart settings, or have a sensor problem. Therefore, understanding how your thermostat works can help you solve the issue quickly.
In this guide, we will explain why THERMOSTATS change temperature by themselves. We will also look at different thermostat types, heating controls, and simple ways to keep your home at a steady temperature.
What Does a Thermostat Do?
A thermostat is the main control point for your heating system. It checks the room temperature and tells your boiler or heating system when to start and stop.
For example, imagine you set your thermostat to 21°C. The thermostat checks the room temperature all the time. When the temperature drops below 21°C, it tells the heating system to turn on.
Then, when the room reaches the chosen temperature, the heating turns off.
Because of this simple process, THERMOSTATS help keep your home comfortable. They also reduce wasted energy by stopping the heating when it is not needed.
However, if your thermostat keeps changing temperature, there may be a setting or system issue that needs attention.
If your thermostat does not stay at one temperature, start with these easy checks.
How Do I Get My Thermostat to Stay at One Temperature?
1. Check Your Heating Schedule
Many modern thermostats use automatic schedules. These schedules change the temperature at different times of the day.
For example, your thermostat may keep the temperature at 21°C during the day. However, it may lower the temperature to 17°C at night to save energy.
Therefore, check the programmed schedule first.
If you want the same temperature all day, update the schedule settings. This simple change often fixes the problem.
2. Turn On Hold Mode
Many programmable thermostats have a Hold feature.
This setting keeps your chosen temperature for a longer period. As a result, the thermostat will stop following its normal schedule.
For example, if you set the temperature to 21°C and turn on Hold mode, the thermostat will keep that temperature until you change it again.
Therefore, Hold mode is useful when you want full control.
3. Turn Off Smart Learning Features
Smart thermostats are designed to make heating easier. They learn your daily habits and adjust the temperature automatically.
For example, a smart thermostat may lower the heating when you leave home. Then, it may warm your home before you return.
Although this feature can save energy, some people prefer manual control.
Therefore, if your thermostat keeps changing temperature, check the smart learning settings. You can disable this feature if you want a fixed temperature.
4. Replace Old Batteries
Weak batteries can also cause thermostat problems.
When batteries become low, the thermostat may show incorrect information. In some cases, it may lose settings or stop communicating properly with your heating system.
Fortunately, replacing batteries is quick and simple.
Most thermostat batteries last between one and two years. However, checking them regularly can prevent unexpected problems.
5. Check Wi-Fi Connections
Smart and wireless thermostats often connect to Wi-Fi.
This allows you to control your heating from a mobile phone or tablet. However, it also means another person with access can change the temperature.
Therefore, check your connected devices and app settings.
Also, make sure your thermostat has a stable Wi-Fi connection. A poor connection may affect smart features and remote controls.
Why Does My Thermostat Keep Changing by Itself?
There are several common reasons why your thermostat changes temperature without warning.
Programmed Settings
The most common reason is automatic programming.
Many thermostats are designed to change temperatures at certain times. This helps reduce energy use and lower heating costs.
However, it can be confusing if you forget that a schedule is active.
Therefore, always check your thermostat programme before making major changes.
Smart Thermostat Features
Smart thermostats use advanced technology to improve comfort.
They can learn your routine, detect when you are away, and adjust heating automatically.
For example, the thermostat may reduce heating while the house is empty. Then, it may increase the temperature before you arrive home.
This is useful for energy saving. However, it can feel like the thermostat is changing settings by itself.
Temperature Sensor Problems
Every thermostat uses a sensor to measure room temperature.
However, if the sensor becomes dirty or damaged, it may read the wrong temperature.
As a result, your heating may turn on too early or stop too soon.
Therefore, keeping the thermostat clean can improve accuracy.
Incorrect Thermostat Location
The location of your thermostat has a big effect on performance.
For accurate readings, avoid placing thermostats near:
- Windows
- Direct sunlight
- Radiators
- Fireplaces
- Ovens
- Kitchen areas
For example, a thermostat near a radiator may think the room is warmer than it really is.
Therefore, the heating may stop before the rest of the room feels comfortable.
Electrical Problems
Sometimes, wiring problems can cause thermostat issues.
Loose connections may interrupt communication between the thermostat and boiler.
As a result, the heating system may turn on and off at the wrong time.
Because electrical work can be dangerous, it is better to ask a qualified professional to check wiring problems.
Different Types of THERMOSTATS
Choosing the right thermostat can make your heating system easier to control. In addition, the correct thermostat can improve comfort and help reduce energy waste.
Today, there are many types of THERMOSTATS available. Each type offers different features, from simple manual controls to advanced smart technology.
Therefore, understanding the differences can help you choose the best option for your home.
Manual Thermostat
A manual thermostat is the simplest type of heating control.
It allows you to change the temperature by turning a dial or moving a switch. However, it does not include automatic schedules or smart features.
Because of this, you need to adjust the temperature yourself.
Manual thermostats are easy to use. However, they provide fewer energy-saving benefits compared with modern models.
Programmable Thermostat
A programmable thermostat gives you more control over your heating.
You can create heating schedules based on your daily routine.
For example, you can set different temperatures for:
- Morning
- Afternoon
- Evening
- Night
As a result, your heating only runs when you need it.
Furthermore, programmable thermostats help reduce energy waste because they avoid unnecessary heating when nobody is home.
Wireless Thermostat
A wireless thermostat connects to your heating system without long cables.
Therefore, installation is usually easier and more flexible.
You can place the thermostat in a better location where it can measure room temperature accurately.
In addition, wireless models are useful for homes where installing new cables would be difficult.
Wireless Room Thermostat
A wireless room thermostat measures the temperature of the room where it is installed.
This helps your heating system maintain a more comfortable temperature.
For example, if your living room feels cold, the wireless room thermostat can tell the boiler to provide more heat.
As a result, your home can stay warmer without unnecessary heating.
RF Thermostat
An RF thermostat uses radio frequency signals to communicate with the boiler receiver.
Unlike traditional thermostats, it does not need a direct wired connection.
Therefore, installation is faster and causes less disruption.
Programmable rf thermostats are popular because they offer reliable communication and flexible placement.
Programmable RF Thermostat
A programmable RF thermostat combines two useful features:
- Wireless communication
- Automatic heating schedules
Because of this, you get better control and improved energy management.
For example, you can programme lower temperatures while you sleep. Then, you can schedule the heating to increase before you wake up.
This creates a comfortable home while helping reduce heating costs.
Wireless Heating Thermostat
A wireless heating thermostat allows you to control your heating system without fixed wiring.
This gives you more freedom when choosing the thermostat location.
Moreover, it can improve comfort because the thermostat can be placed in the area where temperature control is most important.
OpenTherm Thermostat
An OpenTherm thermostat works differently from a standard thermostat.
A standard thermostat usually turns the boiler on or off. However, an EPH – CP4D OpenTherm Programmable RF thermostat can communicate continuously with compatible boilers.
As a result, it can adjust the boiler output instead of only switching it between two settings.
Therefore, your heating system works more smoothly.
Benefits of an OpenTherm thermostat include:
- Better temperature control
- Lower energy use
- Reduced boiler cycling
- Improved comfort
- Quieter heating operation
Because of these benefits, many modern heating systems use OpenTherm technology.
Smart Thermostat
A smart thermostat is one of the most advanced heating controls available.
It connects to Wi-Fi and allows you to control your heating using a smartphone.
For example, you can increase the temperature before arriving home. You can also lower the heating when you are away.
In addition, many smart thermostats include:
- Energy reports
- Learning schedules
- Weather information
- Holiday settings
- Voice control
Therefore, smart thermostats make heating easier while helping reduce wasted energy.
Why Heating Controls Matter
Modern heating controls do more than simply turn your heating on and off.
Instead, they help your entire heating system work more efficiently.
Good heating controls can:
- Improve home comfort
- Reduce energy waste
- Lower heating bills
- Prevent unnecessary boiler use
- Extend boiler life
Furthermore, when thermostats and heating controls work together, your home temperature becomes easier to manage.
For example, a programmable thermostat can heat your home before you wake up. Then, it can lower the temperature when you leave.
As a result, you get comfort without wasting energy.
Benefits of Keeping One Temperature
Many people change their thermostat settings several times a day.
However, keeping a steady temperature often works better.
A stable temperature can provide:
Better Comfort
A consistent temperature helps every room feel more comfortable.
Instead of feeling hot one moment and cold the next, your home stays more balanced.
Lower Energy Waste
Large temperature changes can make your heating system work harder.
Therefore, small adjustments are often better than turning the heating up and down frequently.
Less Pressure on Your Boiler
When your thermostat maintains a steady temperature, your boiler does not need to work as hard.
This can reduce unnecessary heating cycles.
Improved Efficiency
A well-controlled heating system uses energy more effectively.
As a result, you may notice better performance and lower heating costs.
Should You Leave Heating On All Day?
This depends on your home, insulation, and heating habits.
For example, a well-insulated home may keep heat for a long time. Therefore, it may not need constant heating.
However, older homes often lose heat faster.
Instead of switching heating fully off, many homeowners choose to lower the temperature when they leave.
For example, reducing the thermostat by a few degrees can save energy while keeping the home comfortable.
Therefore, the best approach depends on your property and lifestyle.
Common Thermostat Mistakes
Many thermostat problems happen because of simple mistakes.
However, these issues are usually easy to correct.
Common mistakes include:
- Setting the temperature too high
- Blocking the thermostat with furniture
- Ignoring low battery warnings
- Forgetting old schedules
- Installing the thermostat near heat sources
- Using the wrong heating mode
For example, placing a thermostat behind furniture can stop it from measuring the room temperature correctly.
Therefore, always keep the thermostat area clear.
Also, check your settings regularly to make sure they match your needs.
Can One Thermostat Control the Whole House?
Yes, many homes use one thermostat to control the entire heating system.
However, larger homes may benefit from heating zones.
A zoned heating system allows different areas of your home to have separate temperature controls.
For example:
- Bedrooms can have a lower temperature at night
- Living rooms can stay warmer during the evening
- Empty rooms can use less heating
As a result, zoning can improve comfort and reduce wasted energy.
Simple Tips to Reduce Heating Bills
Reducing heating costs does not always mean turning your heating off completely.
Instead, small improvements can make a big difference.
Try these simple tips:
- Keep a steady temperature
- Use heating schedules correctly
- Improve home insulation
- Close curtains at night
- Bleed radiators regularly
- Service your boiler every year
- Upgrade old heating controls
Furthermore, using the right thermostat settings can help your heating system work more efficiently.
Therefore, small changes can create long-term savings.
People Also Ask
Why won’t my thermostat stay on one temperature?
Usually, the problem is caused by automatic schedules, smart features, incorrect settings, or sensor issues. Check these areas before replacing the thermostat.
Is it better to keep one constant temperature?
Yes. A steady temperature often improves comfort and reduces unnecessary heating changes.
Can a smart thermostat change temperature automatically?
Yes. Smart thermostats can adjust temperatures based on schedules, location, and learning features.
What is an RF thermostat?
An RF thermostat uses radio frequency signals to communicate with the heating system without physical control wires.
What is a wireless room thermostat?
A wireless room thermostat measures room temperature and sends signals to the heating system without cables.
Is OpenTherm better than standard thermostats?
Yes. OpenTherm thermostats can control boiler output more smoothly, which can improve efficiency and comfort.
Conclusion
Modern THERMOSTATS make home heating easier, smarter, and more efficient.
However, problems can occur when settings, schedules, sensors, or thermostat locations are not correct.
Fortunately, most issues are simple to solve.
First, check your heating schedule and smart settings. Next, check the thermostat location and battery condition. Finally, consider upgrading if your thermostat is old or unreliable.
Products such as the EPH – CP4D OpenTherm Programmable RF Thermostat combine modern technology with simple controls. Therefore, they make it easier to maintain a comfortable temperature while using energy more effectively.