








How Do You Choose the Right Mounting Products for Solar Roofs?
Choosing the right roof components is an important step in any solar installation. A strong and suitable MOUNTING system helps keep solar panels secure and correctly positioned on the roof. It also supports a clean installation and helps the panels stay stable in changing weather.
However, not every roof has the same design. Pantile roofs, slate roofs and other roof types may need different components. Therefore, it is important to check the roof style before you buy any products.
For installers, builders and homeowners, choosing the right MOUNTING products can make a big difference. The correct components can help create a safe, neat and long-lasting solar panel installation.
What Is Solar Mounting?
Solar mounting is the system used to attach solar panels to a roof or another suitable surface. It normally includes several components that work together to support the panels.
These products may include roof hooks, rails, clamps, fasteners and other accessories. Each part has a specific role. As a result, choosing compatible components is essential.
You can learn more about the meaning of solar energy and its use in modern buildings before planning an installation.
A good MOUNTING system should suit the roof structure and the solar panel design. It should also provide a secure fixing point without causing unnecessary damage to the roof.
Why Is Mounting Important for Solar Panels?
Solar panels need a stable support system. They face wind, rain and other outdoor conditions throughout the year. Therefore, the fixing system must be suitable for the roof and installation.
A reliable MOUNTING solution helps keep the panels in the correct position. It can also help installers create an organised layout across the roof.
Moreover, suitable roof components can make the installation process easier. When the correct parts are selected before work begins, installers can reduce delays and avoid compatibility problems.
For this reason, buying the right components is just as important as choosing good-quality solar panels.
What Is a Pantile Roof Hook?
A pantile roof hook is a fixing component designed for suitable pantile roof installations. It provides a connection point between the roof structure and the solar panel support system.
The Fastensol Pantile Roof Hook-Portrait is designed for solar panel installations on suitable pantile roofs. Its portrait application makes it useful for projects where panels are positioned in a portrait orientation.
When selecting a roof hook, always check that the product matches the roof type and the rest of the installation system.
You can shop for the Fastensol Pantile Roof Hook-Portrait and review its product information before buying.
How Does a Pantile Roof Hook Work?
A pantile roof hook connects to the suitable roof structure and provides a secure point for the solar support system. The exact installation method depends on the roof construction and the manufacturer’s instructions.
The hook works with other components, such as rails and panel clamps. Together, these parts create a complete support system.
Before installation, the installer should check the position of the roof tiles and supporting structure. This helps ensure that the fixing is placed correctly.
A suitable MOUNTING system should always be installed according to the product instructions and the requirements of the roof.
What Should You Check Before Buying Mounting Products?
There are several points to consider before you buy:
1. Roof Type
First, identify the type of roof. A pantile roof may need different hooks from a slate or plain tile roof.
2. Panel Orientation
Next, check whether the panels will be installed in portrait or landscape orientation. This can affect the components required.
3. Compatibility
Make sure the roof hooks, rails and clamps work together. Compatible components help create a more reliable installation.
4. Product Dimensions
Check the size and design of every component. Small differences can affect installation.
5. Installation Requirements
Read the manufacturer’s instructions before buying. Also, ensure that the installer understands the requirements of the roof.
These checks can help you choose the right MOUNTING products for your project.
What Are the Benefits of Using the Right Roof Hooks?
The correct roof hook can offer several benefits.
First, it provides a suitable fixing point for the solar support system. Next, it can help maintain a consistent panel layout. In addition, a well-matched hook can make the installation process more straightforward.
Roof hooks are also available for different roof designs. Therefore, installers can select products that suit the specific application.
However, the hook should never be selected based only on price. Product compatibility, roof type and installation requirements are equally important.
How Do Mounting Rails Work With Roof Hooks?
Rails provide a support path for solar panels. Roof hooks connect the rail system to the roof structure.
Once the hooks are correctly positioned, rails can be fixed to them. Solar panels can then be secured to the rails using suitable clamps and fasteners.
This creates a complete MOUNTING structure.
If you are looking for additional brackets, always check their intended use and compatibility with the rest of the system.
The complete installation should be planned before any components are fitted. This helps the installer work in an organised way.
Why Buy Solar Mounting Products From a Specialist Supplier?
Buying from a specialist building or solar supply website can make product selection easier. You can compare specifications, product types and applications in one place.
For example, TradeBoxDirect provides a dedicated MOUNTING category for suitable roof and solar support products.
Before shopping, make a list of the components required for your project. This may include roof hooks, rails, clamps and fixing accessories.
As a result, you can order the correct products together and reduce the risk of missing an important component.
Can Mounting Products Be Used on Every Roof?
No. Different roof types require different fixing solutions.
A component designed for pantile roofs may not be suitable for another roof style. Therefore, always identify the roof type before you buy.
The roof structure also matters. The installer should check the condition and construction of the roof before fitting solar equipment.
A professional installer can help determine which MOUNTING components are appropriate for the project.
What Makes a Good Solar Mounting System?
A good system should be suitable for the roof, compatible with the solar panels and appropriate for the installation design.
It should also use quality components that are designed for the intended application.
Furthermore, correct installation is essential. Even high-quality products need to be fitted correctly to perform as expected.
When shopping for solar products, focus on compatibility rather than choosing components based only on the lowest price.
Frequently Asked Questions
What is solar mounting?
Solar mounting refers to the equipment used to secure solar panels to a roof or other suitable surface. It can include roof hooks, rails, clamps and fixing accessories.
What is a pantile roof hook used for?
A pantile roof hook provides a fixing point for a solar panel support system on a suitable pantile roof.
Can I use any roof hook for solar panels?
No. Roof hooks are designed for different roof types and applications. Always check compatibility before you buy.
Is the Fastensol Pantile Roof Hook-Portrait suitable for pantile roofs?
It is designed for suitable pantile roof solar installations. However, the roof and complete installation should be checked before fitting.
What other products are needed with roof hooks?
A complete system may require rails, clamps, fasteners and other compatible accessories. The exact parts depend on the installation.
Should I install solar mounting products myself?
Solar roof work can involve safety and structural considerations. It is best to use a suitably qualified and experienced installer where required.
Where can I buy solar mounting products?
You can shop for suitable solar support products through specialist suppliers. Always check product specifications before placing an order.
Conclusion
Choosing the right MOUNTING products is an important part of a successful solar installation. The roof type, panel orientation, product compatibility and installation method should all be considered before buying.
For pantile roofs, a suitable product such as the Fastensol Pantile Roof Hook-Portrait can provide an important connection point within the support system.
Therefore, take time to check your requirements before shopping. Choose compatible components, follow the manufacturer’s guidance and use an experienced installer where needed.
With the right MOUNTING products and careful planning, installers can create a secure and well-organised solar panel support system that suits the roof and the project.
How Do Trickle Vents Improve Ventilation in Homes and Buildings?
Good indoor air quality matters in every home and building. Fresh air helps create a more comfortable space, while controlled air movement can support a healthier indoor environment. For this reason, choosing the right VENTILATION products is an important part of many building and improvement projects.
One simple solution is trickle vents. These small vents fit into windows or doors and allow a steady supply of fresh air. They are useful in homes, flats, offices, schools and other buildings where controlled air movement is needed without keeping windows fully open.
If you are planning a new installation or replacing old products, understanding how trickle vents work can help you make a better buying choice.
What Are Trickle Vents?
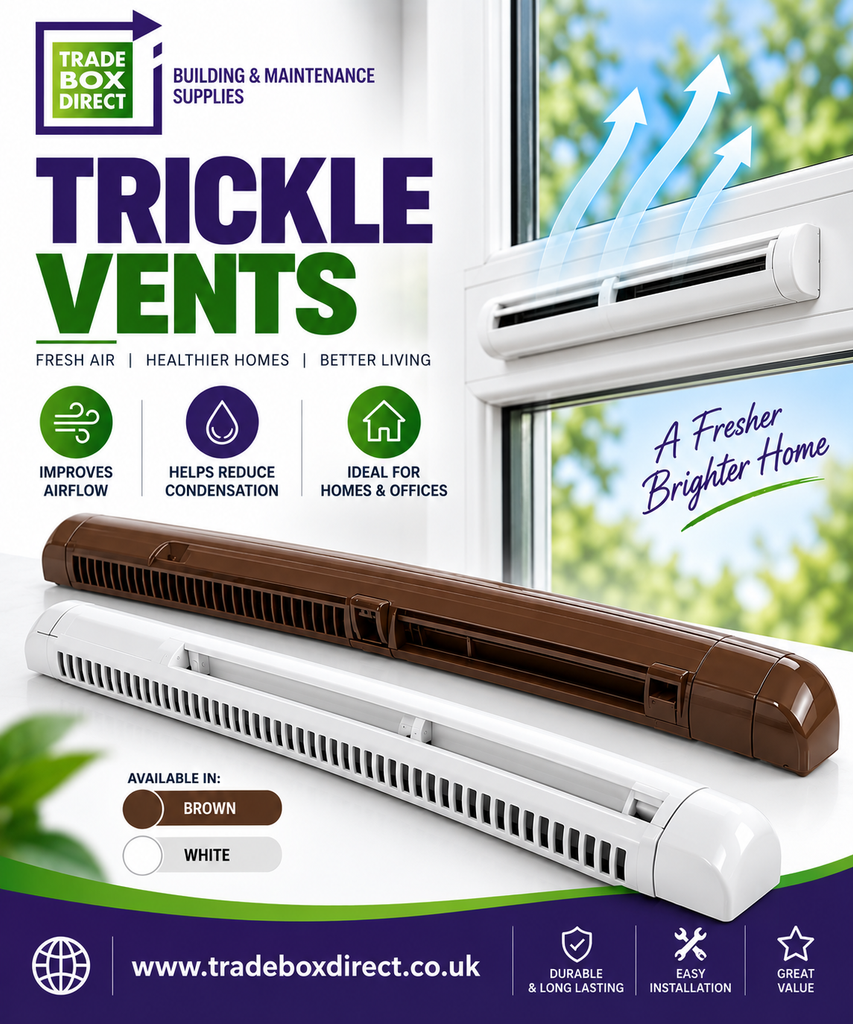
Trickle vents are small openings fitted to windows or doors. They allow fresh air to enter a room through a controlled opening. Unlike an open window, a trickle vent provides a smaller and more consistent air path.
Modern trickle vents come in different shapes, sizes and finishes. White vents are popular for uPVC windows, while other options may suit different frames and designs.
These products are also simple to use. Depending on the design, the vent can usually be opened or closed with a small slider or flap. Therefore, users can adjust the amount of fresh air entering the room.
For homeowners, builders and trade professionals, trickle vents can be a practical addition to a wider VENTILATION system.
How Are Trickle Vents Made?
Most trickle vents are made from strong plastic or similar durable materials. The material needs to cope with regular use and normal changes in indoor and outdoor conditions.
A typical trickle vent has a narrow vent channel, an outer cover and an adjustable opening. Some designs also include features that help reduce the entry of insects and debris.
Manufacturers produce these components in different lengths and profiles. As a result, you can find products designed for different windows, doors and installation needs.
Before you buy trickle vents, check the size of the existing opening. You should also consider the window type and available installation space. Correct sizing makes installation easier and helps the product work as intended.
Why Are Trickle Vents Important?
Modern buildings often have better insulation and tighter doors and windows. While this can improve energy efficiency, it can also reduce natural air exchange.
That is where trickle vents can help. They provide a controlled route for fresh air without requiring a window to stay open.
Good VENTILATION can also make indoor spaces feel more comfortable. In kitchens, bedrooms, bathrooms and living areas, controlled fresh air can be especially useful.
For example, bedrooms may benefit from a steady air supply during the night. Kitchens and bathrooms may also need suitable air movement during daily use.
You can learn more about the meaning of moisture and why controlling indoor conditions matters when planning a suitable solution.
What Are the Main Advantages of Trickle Vents?
There are several reasons why trickle vents are popular in residential and commercial projects.
1. Controlled Fresh Air
A trickle vent allows fresh air to enter without opening a full window. This gives users greater control over the amount of air entering the room.
2. Easy Operation
Most designs are simple to operate. A small slider or cover allows the user to adjust the opening when required.
3. Suitable for Many Buildings
Trickle vents can be used in houses, flats, offices and other suitable buildings. Their compact design makes them a practical choice for many window systems.
4. Compact Design
These vents are much smaller than a traditional open window. Therefore, they can provide a useful air path while keeping the window mostly closed.
5. Useful During Everyday Living
Cooking, washing, sleeping and general household activity can affect indoor air quality. A suitable VENTILATION solution can help maintain a more comfortable space.
You can also read more about airflow to understand how air moves through indoor and outdoor spaces.
How Do Trickle Vents Work?
The basic idea is simple. A small opening is created in the window or frame. The vent then provides a controlled path for outside air to enter the room.
When the vent is open, air can pass through the channel. When it is closed, the opening is reduced or sealed, depending on the design.
This simple process makes trickle vents useful where occupants want some fresh air without leaving a large window opening.
However, the correct product still matters. Different windows may require different vent sizes and fitting methods. Always check the product specifications before shopping or buying.
Can Trickle Vents Help With Condensation?
Indoor air can contain water vapour from normal activities such as cooking, bathing and drying clothes. When warm air meets a cold surface, condensation can occur.
Suitable VENTILATION can help reduce the build-up of stale indoor air and support better air exchange. However, trickle vents should not be viewed as the only solution for serious damp or condensation problems.
For persistent issues, it is important to identify the cause and consider the complete ventilation strategy of the property.
You can learn more about condensation before selecting products for your home improvement project.
Where Should You Install Trickle Vents?
The best location depends on the building and window design. They are commonly considered for rooms where a regular supply of fresh air is useful.
Bedrooms are a common example because windows may remain closed for security, noise or weather reasons. Living rooms and other occupied spaces may also benefit.
Bathrooms and kitchens may need a wider VENTILATION approach because these areas can produce higher levels of warm, humid air.
If you are replacing windows, adding suitable trickle vents at the planning stage can make installation easier. For existing windows, check whether the frame is suitable before making any changes.
What Should You Check Before Buying Trickle Vents?
If you want to shop for trickle vents, consider these points first:
- Size: Check the required length and dimensions.
- Material: Choose a durable material suitable for the intended location.
- Colour: White is common, but other finishes may be available.
- Window type: Make sure the product suits your window or door system.
- Installation: Check how the vent is designed to fit.
- Adjustability: Consider whether you need an adjustable opening.
- Quantity: Measure how many windows require vents before you buy.
- Application: Select products that match your project requirements.
Buying the correct product first can save time and reduce installation problems later.
Why Shop for Ventilation Products Online?
Online shopping makes it easier to compare different VENTILATION products in one place. You can review sizes, product types and specifications before placing an order.
If you need window or door vents, you can shop for trickle vents and ventilation products from TradeBoxDirect. The category includes products designed for practical building and improvement projects.
A clear product description also helps trade customers make faster buying decisions. Therefore, always review the product details before you buy.
Are Trickle Vents Suitable for New Windows?
Yes, trickle vents can be considered when planning new windows, provided the selected window system supports them.
They can also be useful when replacing older windows where improved control of fresh air is required. However, the installer should check the window design and installation requirements before work begins.
Good planning helps ensure that the selected VENTILATION products work well with the rest of the building.
Can Homeowners Buy Trickle Vents?
Yes. Homeowners, landlords, builders, installers and maintenance teams can buy trickle vents for suitable projects.
Before shopping, measure the required opening and identify the window type. If you are unsure, ask a qualified installer to check the requirements.
For larger projects, it can also help to order all required vents together. This keeps the products consistent and may make installation more straightforward.
Frequently Asked Questions
How do trickle vents work?
Trickle vents provide a small, controlled opening in a window or door. They allow fresh outside air to enter without requiring the main window to remain open.
Are trickle vents worth buying?
They can be useful when a building needs controlled fresh air. They are compact, simple to operate and suitable for many window systems.
Can I install trickle vents myself?
Installation depends on the window design and product. Some projects may require specialist tools or knowledge. If you are unsure, use a qualified window or building professional.
Do trickle vents stay open all the time?
Not always. Many products have an adjustable opening, allowing users to control the amount of air entering the room.
Where can I buy trickle vents?
You can shop for trickle vents through specialist building supply websites. Always compare product dimensions and specifications before placing an order.
Do trickle vents replace extractor fans?
No. They serve a different purpose. Trickle vents provide a controlled air path, while extractor fans actively remove air from areas such as kitchens and bathrooms.
What makes a good ventilation product?
A good product should match the application, window type, size and installation requirements. It should also be durable and easy to operate.
Conclusion
Trickle vents offer a simple way to introduce controlled fresh air into suitable rooms. They are compact, practical and easy to operate, making them useful for many homes and commercial buildings.
When planning VENTILATION, consider the size, material, design and compatibility of each product. Also, think about where the vents will be installed and how they will work with other systems.
If you are ready to shop, compare the available VENTILATION products and choose trickle vents that match your project needs. By selecting the right product and installing it correctly, you can create a more practical and comfortable indoor environment.
Furniture Accessories Guide: Corner Protectors, Modesty Blocks and Fittings
What Are FURNITURE ACCESSORIES?
FURNITURE ACCESSORIES are small parts used to build, repair and improve furniture.
They include corner protectors, furniture fittings, furniture hardware, modesty blocks and other useful parts.
These items may be small. However, they can make a big difference.
For example, a corner protector can cover a sharp furniture corner. A modesty block can help join two panels. Furniture hardware can also help doors, shelves and cabinets work well.
So, the right accessory can make furniture safer, stronger and neater.
If you are planning a furniture project, you can shop the FURNITURE ACCESSORIES range at TradeBoxDirect and compare suitable products.
What Are Corner Protectors Used For?
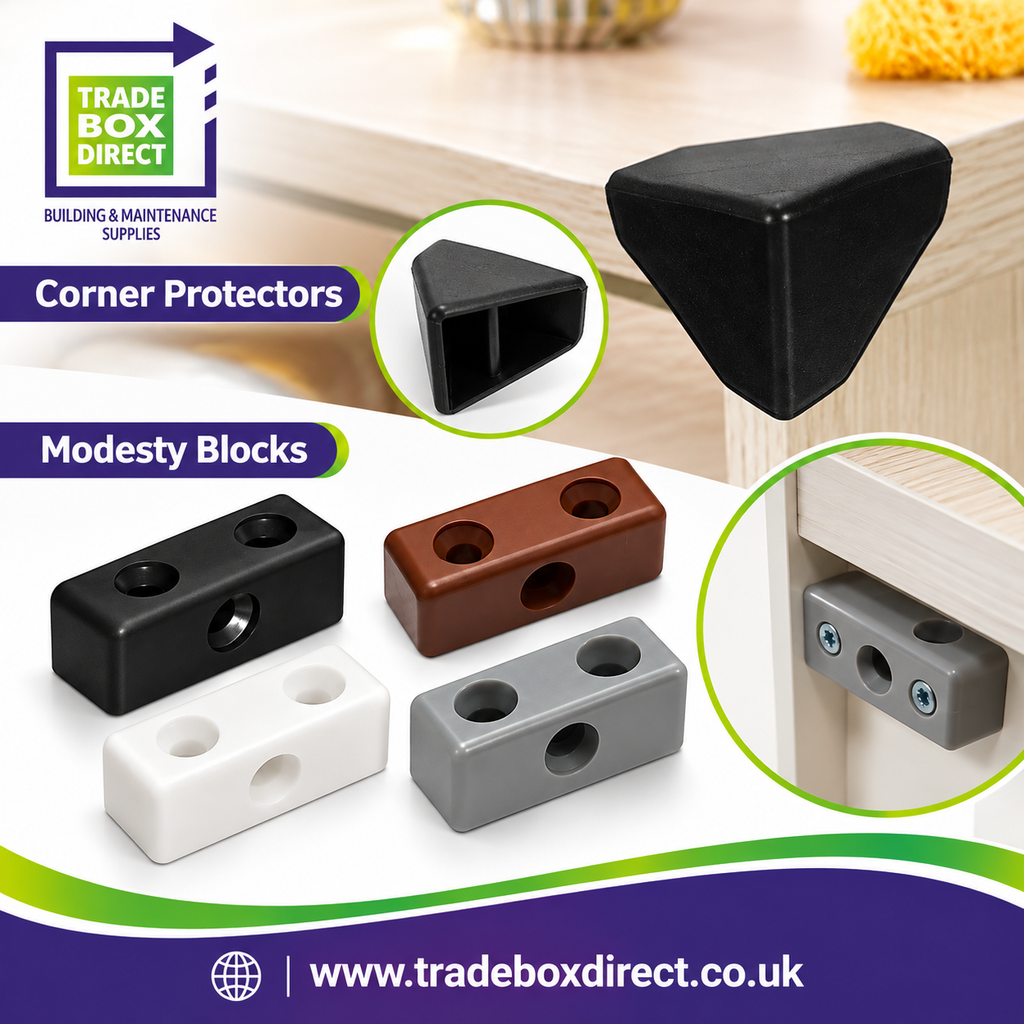
Corner protectors help cover exposed furniture corners.
Furniture corners can get damaged during daily use. Sharp corners can also cause bumps or small injuries.
A plastic corner protector offers a simple way to cover an exposed corner.
You can use one on tables, cabinets, cupboards and furniture boards. A furniture corner protector can also give the item a cleaner look.
The right size is important, though. Therefore, measure the corner before you buy.
What Is a Plastic Corner Protector?
A plastic corner protector is a small fitting made from plastic.
It covers a furniture corner and helps protect it from knocks. Plastic is light, simple to handle and suitable for many indoor jobs.
The Black Plastic Corner Protector is one example.
You can view the Black Plastic Corner Protector and check the product details before you shop.
Before you buy, check the size and shape. This helps ensure a good fit.
What Are Corner Guards?
Corner guards have a similar purpose.
They help protect exposed corners from knocks, marks and daily wear.
You can use them in homes, offices, shops and workshops. They can also suit cabinets, tables and other furniture panels.
However, each product can have a different size and design.
So, measure the corner first. Then choose a suitable guard for the job.
What Are Furniture Fittings?
Furniture fittings are parts that help build, join or improve furniture.
They can include brackets, blocks, hinges, screws and other small parts.
These fittings help different furniture pieces work together.
For example, a Hinge lets a cabinet door open and close.
Other fittings can join panels or support a shelf.
Therefore, furniture fittings are useful for both new furniture and repair work.
What Is Furniture Hardware?
Furniture hardware includes many small parts used in furniture projects.
These parts can include hinges, handles, brackets and joining pieces.
The right hardware can make furniture easier to use. It can also improve the final look.
For example, a good hinge can help a door open smoothly.
Likewise, the right joining part can help hold furniture panels together.
When you shop, think about both the job and the finish you want.
What Is a Modesty Block?
A modesty block is a small fitting used to join furniture panels.
It is common in desks, cupboards, cabinets and kitchen units.
The block gives you a simple fixing point between two panels.
You can then use suitable screws to secure the panels.
This creates a neat and useful joint.
Before fitting one, check the panel thickness. Also, use the correct screws for the material.
How Do Modesty Blocks Work?
Modesty blocks sit where two furniture panels meet.
The block helps hold the panels together. Screws then secure the block to the furniture.
This method is simple and useful for many furniture projects.
Mod blocks are often used in kitchen units, desks and cabinets.
They can also help during furniture repairs.
However, the correct fitting method depends on the product.
Therefore, always check the instructions before you start.
MODESTY BLOCKS KITCHEN MOD BLOCK – VARIOUS PACKS
The MODESTY BLOCKS KITCHEN MOD BLOCK – VARIOUS PACKS product is designed for furniture and kitchen work.
It can help join furniture panels and create a firm joint.
Different pack options can also help you choose the right amount for your project.
You can shop for MODESTY BLOCKS KITCHEN MOD BLOCK – VARIOUS PACKS and check the available product details.
Before you buy, check the pack size and fitting method.
How Are FURNITURE ACCESSORIES Made?
FURNITURE ACCESSORIES can use different materials.
Plastic is common for corner protectors. Metal is common for many types of furniture hardware.
The material depends on the job.
Plastic parts can be made using moulds. This process helps create the required shape.
Metal parts can be cut, pressed or formed.
After that, the parts can receive a finish or coating.
The final product is then checked for size and quality.
Because products vary, always read the product details before you buy.
What Are the Benefits of FURNITURE ACCESSORIES?
FURNITURE ACCESSORIES can offer many useful benefits.
First, they can make furniture easier to build.
Next, they can help protect exposed areas.
They can also support joints and improve the final finish.
For example, corner protectors can cover exposed corners. Modesty blocks can join furniture panels.
Furniture hardware can also help doors and other moving parts work better.
So, small parts can make a big difference to a furniture project.
How Do You Choose the Right FURNITURE ACCESSORIES?
Start by looking at your furniture.
Then, decide what you need the part to do.
Do you need to protect a corner? If so, look for corner protectors or corner guards.
Do you need to join two panels? A modesty block or mod blocks may work well.
Do you need to replace a fitting? Look for suitable furniture hardware.
Next, measure the area.
Then, check the product size and fitting method.
Finally, compare products before you buy.
This simple process can help you choose the right part.
Where Can You Use Furniture Accessories?
FURNITURE ACCESSORIES can be useful in many places.
You can use them in kitchens, bedrooms, offices, shops and workshops.
For example, modesty blocks can help join cabinet panels.
Corner protectors can cover tables, cupboards and boards.
Furniture fittings can also help when you repair old furniture.
A Shelf may also need the right supports or fittings.
Therefore, the best accessory depends on the furniture and the job.
Why Shop for FURNITURE ACCESSORIES Online?
Online shopping makes it easy to compare furniture parts.
You can check sizes, materials, colours and pack quantities before you buy.
You can also compare different fittings in one place.
TradeBoxDirect offers a range of furniture products.
You can shop the FURNITURE ACCESSORIES category and find products for furniture repairs and projects.
However, price should not be your only concern.
First, check the size and purpose. Then, make sure the product suits your furniture.
This can help you avoid buying the wrong part.
What Should You Check Before Buying?
Before you buy, check the product size.
Next, check the material.
Then, look at the colour and finish if they matter to your project.
You should also check how the product fits.
Some items may need screws or other fixings.
Pack size is important too. A larger project may need several pieces.
Finally, read the product details before you order.
Good planning can save both time and money.
Frequently Asked Questions
What are FURNITURE ACCESSORIES?
FURNITURE ACCESSORIES are small parts used to build, repair, protect or improve furniture.
What are corner protectors used for?
Corner protectors cover exposed furniture corners. They can help reduce damage and improve safety.
What is a plastic corner protector?
It is a plastic part designed to cover and protect a furniture corner.
What are furniture fittings?
Furniture fittings are parts used to join, support or improve furniture.
What is furniture hardware?
Furniture hardware includes parts such as hinges, handles, brackets and joining fittings.
What is a modesty block?
A modesty block is a small fitting that helps join furniture panels.
What are mod blocks used for?
Mod blocks are often used in desks, cabinets, kitchen units and other furniture.
Can I use corner guards on cabinets?
Yes. Suitable corner guards can work on many cabinets and furniture panels. Always check the size first.
Where can I buy furniture accessories?
You can shop online for corner protectors, furniture fittings, furniture hardware and modesty blocks.
Conclusion
FURNITURE ACCESSORIES may be small, but they have an important role.
Corner protectors can protect exposed areas. Furniture fittings can help join parts. Furniture hardware can improve function. Modesty blocks can help secure panels.
The Black Plastic Corner Protector and MODESTY BLOCKS KITCHEN MOD BLOCK are useful examples for different furniture jobs.
Before you buy, check the size, material, pack quantity and fitting method.
Also, think about the room conditions. For example, moisture, airflow and condensation can affect some materials in certain areas.
Finally, choose products that match your furniture and project.
For a range of furniture fittings and protective products, shop the FURNITURE ACCESSORIES category at TradeBoxDirect.
How to Choose the Right Screws for Wood and Construction Projects
What Are SCREWS Used For?
SCREWS are simple but important fixing products. They join two or more materials and help hold them firmly in place.
They are used in homes, workshops, furniture projects and building work. However, different jobs need different types.
For example, wood screws work well with timber. Construction screws suit many building tasks. Meanwhile, countersunk screws can give a neat finish because the head sits level with the material.
Therefore, choosing the right fixing is important. The correct size, head shape and drive type can make the job easier.
If you are planning a project, you can shop for SCREWS at TradeBoxDirect and compare suitable options before you buy.
What Are Countersunk Screws?
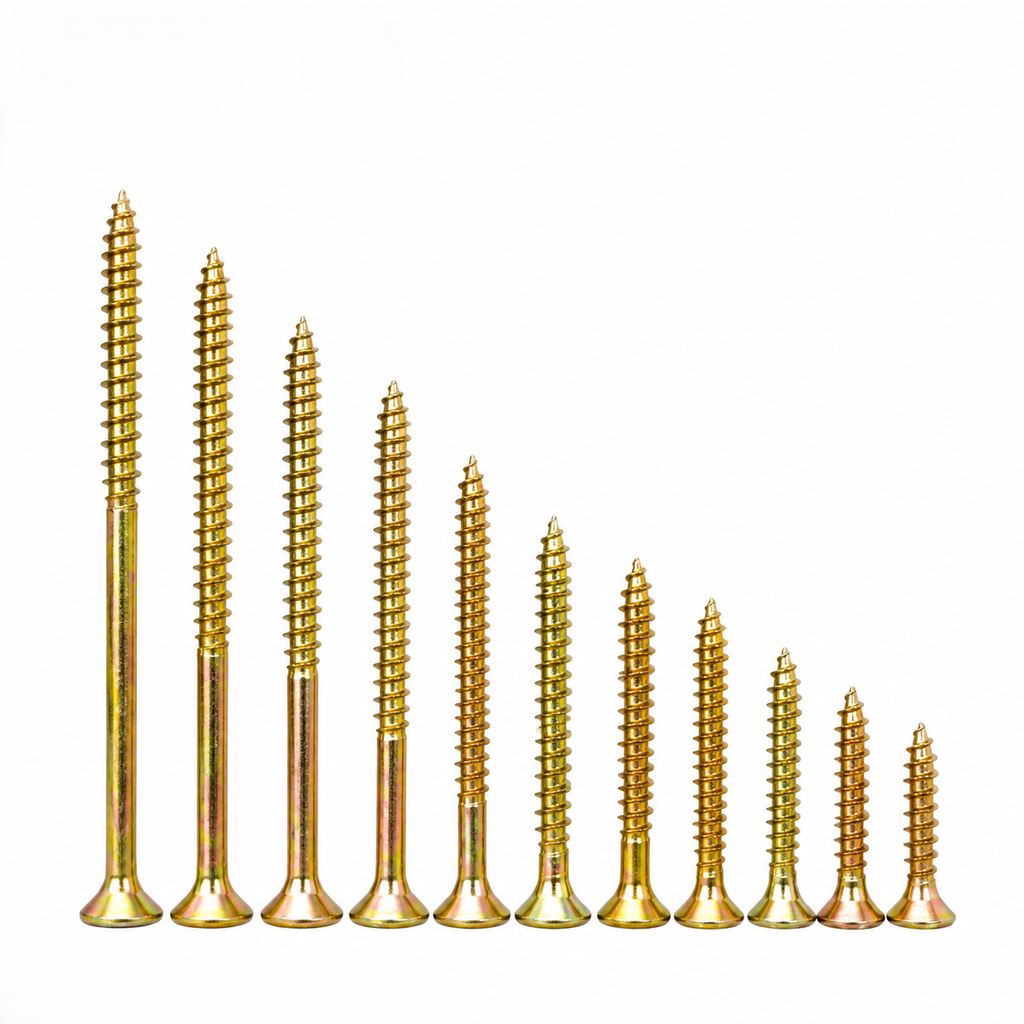
Countersunk screws have a head that slopes down towards the shaft. This shape lets the head sit inside a prepared hole.
As a result, the finished surface can look neat and smooth.
They are often used in timber, furniture and general building work. They can also help when you want the fixing head to sit below or level with the material.
Before fitting them, check the material and screw size. A suitable pilot hole may also help prevent damage to timber.
What Are Wood Screws?
Wood screws are made for fixing timber and wood-based materials.
They usually have a sharp point and a thread that helps the screw grip the material.
You can use them for many home and trade projects. These include shelves, wooden frames, cabinets and general repairs.
However, wood type can affect the fitting process. Hard timber may need a pilot hole, while softer wood may be easier to fix directly.
So, always choose a suitable size for the material.
What Are Pozi Screws?
Pozi screws have a Pozidriv drive in the head. This drive is designed to work with a matching Pozidriv screwdriver or bit.
The correct bit can help you fit the screw with better grip.
This makes them useful for many timber and general fixing jobs.
When shopping, check the drive size. Using the wrong bit can damage the head and make removal harder later.
Therefore, match the driver to the screw before you start.
What Are Construction Screws?
Construction screws are made for building and repair work.
They can be used for tasks such as timber framing, joining wood and fixing building materials.
These products often have strong threads and durable finishes. However, the exact design can vary.
Before you buy, check the length, diameter, head type and material.
You should also check if the product suits indoor or outdoor use.
For larger projects, buying the correct fixing in the right pack size can also save time and money.
What Are Countersunk Wood Screws?
Countersunk wood screws combine a timber-friendly thread with a countersunk head.
This makes them useful when you want a strong fixing with a clean finish.
They are often used for wooden furniture, frames, panels and other timber projects.
The screw head can sit into the wood when fitted correctly. This can help create a smooth final surface.
However, do not force the screw too deep. Always use the correct driver and choose a suitable length.
How Are SCREWS Made?
SCREWS are usually made from metal. Steel is a common choice because it offers strength and durability.
Some products have a special coating. This coating can help protect the fixing and may also improve its appearance.
The manufacturing process starts with metal wire or another suitable metal form. The material is shaped to create the shaft and head.
Next, threads are formed along the shaft. The head is then shaped to match the required drive.
Finally, the product may receive a coating or finish.
Different materials and finishes suit different jobs. Therefore, always read the product details before you buy.
What Is the MULTI-PURPOSE GOLDEN POZI COUNTERSUNK WOOD SCREWS Product?
The MULTI-PURPOSE GOLDEN POZI COUNTERSUNK WOOD SCREWS are designed for a range of timber fixing jobs.
They combine a golden finish with a Pozi drive and countersunk head.
This gives the product both a practical and neat appearance.
The multi-purpose design can make it useful for many wood projects around the home or workshop.
You can shop the MULTI-PURPOSE GOLDEN POZI COUNTERSUNK WOOD SCREWS and check the product details before you buy.
Always choose the correct size for your project.
What Are the Benefits of the Golden Pozi Countersunk Design?
First, the Pozi drive gives you a matching drive point for fitting.
Next, the countersunk head can help create a neat finish in timber.
The golden finish can also give the fixing an attractive look.
In addition, the multi-purpose design can make it useful for many common wood projects.
However, the product must still match the material and job.
So, check the product size and specifications before shopping.
How Do You Choose the Right SCREWS?
Choosing the right fixing starts with the material.
For timber, wood screws or countersunk wood screws may be suitable.
For general building work, construction screws may offer the features you need.
Next, check the length. The fixing should provide enough grip without passing too far through the material.
Then, check the head type. A countersunk head may be useful when you want a smooth finish.
Finally, check the drive type. A Pozi head needs the right Pozi bit.
This simple process can help you buy the right product first time.
Can Outdoor Conditions Affect Screw Choice?
Yes. Outdoor conditions can affect the life of a fixing.
For example, moisture can affect some metals over time.
You should also consider the location and material. Outdoor timber may need a fixing with a suitable protective finish.
In areas with poor airflow, damp conditions can also affect some materials.
Likewise, condensation may occur in some indoor or outdoor settings.
Therefore, always check the manufacturer’s advice before choosing a product for a demanding location.
Why Should You Shop for SCREWS Online?
Online shopping makes it easy to compare fixing products.
You can check sizes, finishes, head types and pack options before you buy.
TradeBoxDirect has a dedicated category for fixing products. You can shop the SCREWS category and compare options for different projects.
However, do not choose only by price.
Instead, check the material, size and intended use first. Then compare suitable products.
This can help you avoid buying the wrong fixing for your job.
Frequently Asked Questions
What are SCREWS used for?
They are used to join and secure materials. They are common in woodworking, furniture, home repairs and construction.
What are countersunk screws?
They have a sloped head. This lets the head sit inside a prepared hole for a neater finish.
Are wood screws suitable for timber?
Yes. Wood screws are designed for many timber fixing jobs. However, you should choose the correct size and type.
What are Pozi screws?
They have a Pozidriv drive. A matching Pozi bit helps fit them correctly.
What are construction screws used for?
They are made for many building and repair tasks. Their exact use depends on the product design.
What are countersunk wood screws?
They are wood-fixing screws with a countersunk head. They are useful when you want a clean finish in timber.
How do I choose the correct screw length?
Choose a length that gives good grip without passing too far through the material. Always consider the thickness of the materials being joined.
Can I use the same screws for every project?
No. Different materials and jobs need different fixing types. Always check the product specifications before you buy.
Conclusion
Choosing the right fittings can make a project easier and help create a strong finish.
Countersunk fittings are useful when you want a neat head. Wood fittings are designed for timber. Pozi fittings work with Pozidriv drivers, while construction fittings suit many building jobs.
The MULTI-PURPOSE GOLDEN POZI COUNTERSUNK WOOD SCREWS can be a useful choice for suitable timber projects.
Therefore, check the material, length, head and drive before you buy. Then, compare products and choose the fixing that matches your project.
For a range of fixing products, shop the SCREWS category at TradeBoxDirect and review the available options.
Tile Levelling Guide: Spacers, Tools and Floor Tiling
What Is a Tile Leveling System?
A tile leveling system helps keep tiles even during fitting. It is useful for floor and wall tiling.
Tiles can move while the adhesive sets. As a result, one tile can sit higher than the next one. This can leave an uneven finish.
A tile leveling system helps reduce this problem. It holds nearby tiles in a more even position while the adhesive dries.
The system can be useful for DIY jobs and trade work. It can also help save time during larger tiling projects.
If you plan to shop for tiling products, you can browse the flooring and tiles range at TradeBoxDirect.
How Does a Tile Leveling System Work?
A tile leveling system normally uses spacers, screws, clips, caps or nuts. The exact parts depend on the design.
First, you apply adhesive to the prepared area. Next, you place the tile in position.
You then add the levelling parts around the tile joints. These parts help keep nearby tiles at a similar height.
After that, you place the next tile. The parts hold the tiles in place while the adhesive sets.
Once the adhesive is ready, you remove the levelling parts.
This simple process can help create a neat finish.
What Are Tile Leveling Spacers?
Tile leveling spacers help create an even gap between tiles. They can also help keep the tile faces at a similar height.
The gap is important because it allows grout to fill the joint. It also gives the tiles room to sit correctly.
A spacer can come in different sizes. For example, 2mm spacers are common for some tile jobs.
Before you buy, check the tile size and the joint width you need.
What Are Tile Spacers Used For?
Tile spacers are small pieces placed between tiles. They help create a neat and even joint.
They are simple to use. However, choosing the right size is important.
For example, a narrow joint needs a smaller spacer. A wider joint needs a larger one.
Floor tile spacers can be used when fitting tiles on floors. They help keep the tile layout neat from one row to the next.
Therefore, check your tile design before you shop for spacers.
How Do You Use a Tile Leveling System?
Using a tile leveling system is quite simple when the tiles and base are ready.
First, clean and prepare the surface.
Next, spread the tile adhesive in the right way. Then, place the first tile.
Add the correct levelling spacer or clip near the tile joint. Place the next tile beside it.
Continue across the area. Use the levelling parts as you work.
Check the tiles as you go. Make sure the tile faces remain even.
Once the adhesive has set, remove the parts as directed by the product maker.
Always follow the instructions supplied with your chosen product.
Why Are Tiling Tools Important?
Good tiling tools can make a tiling job easier.
A tile cutter helps you cut tiles to size. A notched trowel helps spread adhesive. Tile spacers help create even joints.
A tile levelling system can then help keep tile faces even.
Together, these tools can make the job faster and cleaner.
However, the right tool depends on the tile type and project size. So, check the product details before you buy.
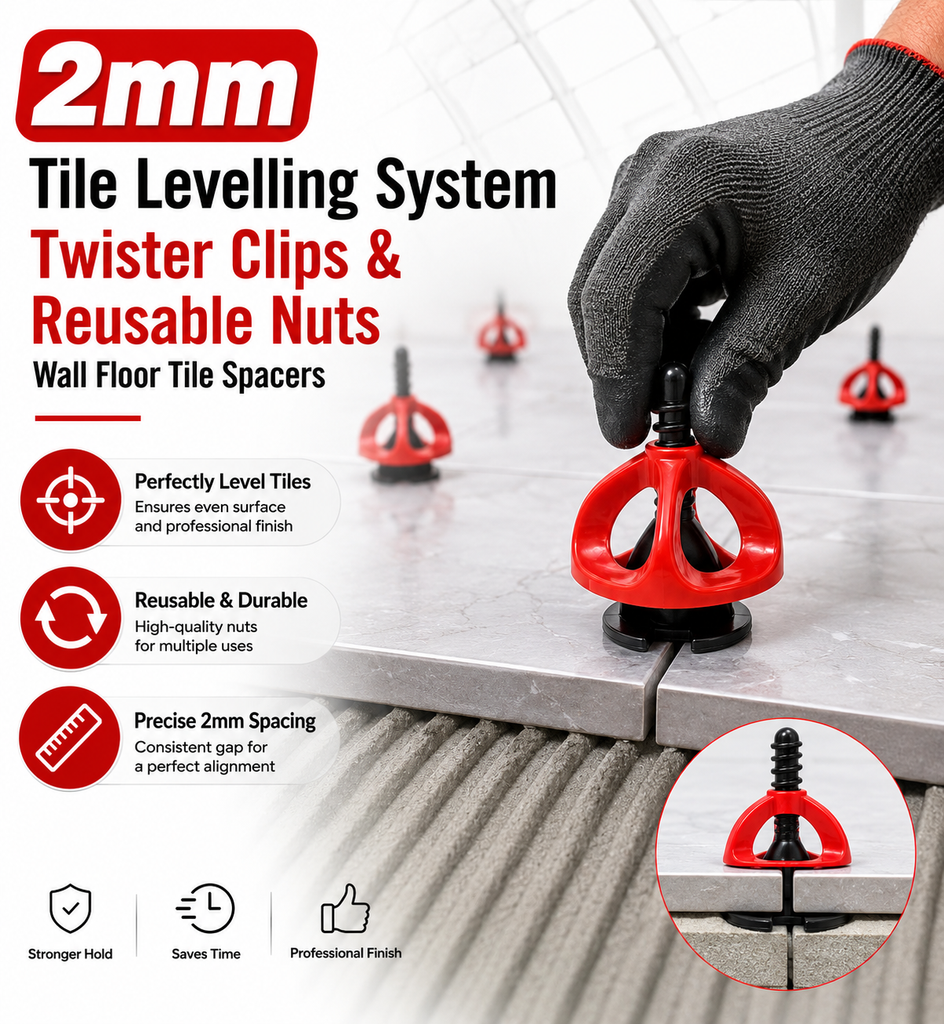
What Is the Tile Spacer Levelling System 2mm Floor Twister?
The Tile Spacer Levelling System 2mm Floor Twister Spacer Screws + Red Twister Nuts is designed to help keep tiles level during installation.
The system uses 2mm spacing. It also uses twister spacer screws and red twister nuts.
The parts work together to hold nearby tiles in position.
This can help reduce differences between tile heights. It can also help create a more even tiled area.
You can shop for the Tile Spacer Levelling System 2mm Floor Twister and check the product information before you buy.
Always make sure the product is Compatible with your tile size and installation method.
What Are the Benefits of a Tile Leveling System?
A tile leveling system can offer several benefits.
First, it can help keep tiles at a similar height.
Next, it can help create a cleaner tile layout.
It can also make it easier to keep rows straight while working.
For large floors, this can save time. It can also make the fitting process easier for new users.
However, the system does not replace good tile preparation. The base must still be clean and suitable.
You should also use the correct adhesive and follow the tile maker’s instructions.
How Do Tile Levelling Systems Help With Large Tiles?
Large tiles can be harder to fit because even a small height difference can be easy to see.
A tile levelling system can help hold large tiles in a more even position.
This is useful for floors and walls where a smooth finish is important.
You should still check the tile maker’s fitting advice. Large tiles may need special adhesive methods or extra support.
Also, take care around each tile edge.
How Are Tile Levelling Systems Made?
Most levelling kits use strong plastic parts.
Some designs also use threaded parts, screws or nuts. The parts are made to fit together during tile installation.
The design is simple. Yet, each part has a clear job.
The spacer creates the joint. The screw or cap helps hold the tiles. After the adhesive sets, the parts can be removed as directed.
Different products may use different shapes and materials. Therefore, always check the product details before shopping.
Can You Buy a Tile Levelling System for DIY Work?
Yes. Many systems are suitable for DIY tiling projects.
However, you should understand the basic tiling process first.
Start with a clean base. Plan the layout. Use the correct adhesive. Then fit the tiles and levelling parts.
Take your time during the first few rows. A good start can make the rest of the job much easier.
If the project is large or complex, you may prefer help from a professional tiler.
How Should You Choose the Right Product?
Start by checking your tile size.
Next, check the required joint width. Then choose suitable tile spacers or tile leveling spacers.
Think about the type of tiles you are fitting too.
For example, floor tiles may need a strong and suitable levelling method. Large tiles may also need more care during fitting.
Then, check the kit contents. Make sure you have enough spacers and levelling parts for the job.
Finally, compare products before you buy.
Why Shop for Tiling Products Online?
Online shopping makes it easy to compare products.
You can check sizes, pack contents and product features before buying.
TradeBoxDirect offers a range of flooring and tile products. You can shop the flooring and tiles category to find useful tiling products.
You can also compare tiling tools, tile spacers, floor tile spacers and levelling products in one place.
Therefore, online shopping can save time when planning a tiling job.
Frequently Asked Questions
What does a tile leveling system do?
A tile leveling system helps keep nearby tiles at a similar height. It can help create a smoother and more even finish.
Are tile leveling spacers the same as tile spacers?
They are related, but they can have different jobs. Basic tile spacers mainly create an even joint. Levelling spacers can also help reduce height differences.
Can I use a tile leveling system on floor tiles?
Yes. Many systems are made for floor tiles. Always check the product details before use.
Are 2mm tile spacers suitable for every tile?
No. The right joint size depends on the tile and the design. Check the tile maker’s advice before choosing.
How long should a tile levelling system stay in place?
It depends on the adhesive and product instructions. Remove the parts only when the adhesive has set enough.
Can beginners use a tile leveling system?
Yes. Many products are easy to use. However, beginners should read the instructions and practise with care.
What other tiling tools do I need?
You may need a tile cutter, trowel, spacers, adhesive tools, grout tools and a suitable levelling kit.
Where can I buy tile levelling products?
You can shop online for tile spacers, tile leveling spacers and other tiling tools. Check the product size and pack contents before you buy.
Why Choose the Right Tile Leveling System?
A tile leveling system can make tile fitting easier and more precise.
It helps keep tiles even. It can also help create clean and straight joints.
Still, good results need more than a levelling kit. You also need the right adhesive, tools and tile layout.
Before you start, check the temperature, working conditions and product instructions.
Use the correct frequency of checks as you lay each row. Keep checking the tile position as you work.
Good control during installation can help you achieve a better finish.
Conclusion
A tile leveling system is a useful tool for modern tiling work.
It can help keep tiles at a similar height. It can also help create clean joints and a neat finish.
Tile leveling spacers, tile spacers, floor tile spacers and other tiling tools can all play a useful role.
The Tile Spacer Levelling System 2mm Floor Twister is one option for suitable projects. Before you buy, check the tile size, joint width and product instructions.
Finally, take your time and work one row at a time. With the right tools and good preparation, you can create a clean and even tiled finish.
How Do THERMOSTATS Work and Which Type Is Best for Your Heating System?
What Do THERMOSTATS Do?
THERMOSTATS help you manage home heating.
They tell your heating system when to heat your home. They can also tell it when to stop.
You choose the temperature you want. The thermostat then checks the room.
If the room is too cool, the heating can start. Once the room is warm enough, the heating can stop.
This makes heating simple.
There are many types of thermostats. You can buy a programmable thermostat, wireless thermostat, RF thermostat, smart thermostat or OpenTherm thermostat.
Each type has a different use. So, always check your heating system before you buy.
You can shop for THERMOSTATS at TradeBoxDirect and compare the available options.
What Is a Programmable Thermostat?
A programmable thermostat lets you set heating times.
For example, you can set the heating to start in the morning. You can then lower the heating while you are out.
Later, you can set it to come on again before you get home.
This can make your daily routine easier.
It can also help you avoid heating an empty home.
When you shop for one, check its features. Look at the display and timer settings.
Most importantly, check that it works with your heating system.
How Does a Wireless Thermostat Work?
A wireless thermostat uses a receiver.
The thermostat sends a signal to the receiver. The receiver then sends the message to the heating system.
There is no need for a long cable between the thermostat and receiver.
This can make fitting easier in some homes.
A wireless room thermostat can also give you more choice over where you place the unit.
For example, you may want it in your main living room.
A wireless heating thermostat can be useful for this type of setup.
However, always check that the thermostat and receiver work together.
What Is an RF Thermostat?
An rf thermostat uses radio signals.
RF means radio frequency.
The thermostat sends a signal to a matching receiver. The receiver then talks to the heating system.
This lets the thermostat work without a long wire.
A programmable rf thermostat adds timer settings too.
You can set heating times for the day. This makes it useful for homes with set routines.
Before you buy, check the product details.
Also, check the frequency details given by the maker.
What Is a Smart Thermostat?
A smart thermostat can offer extra features.
Some smart models can connect to a phone app. Others can work with smart-home systems.
This means you may be able to change your heating settings from your phone.
Smart models can be useful if you want more options.
However, you may not need all these features.
If you only want set heating times, a programmable model may be enough.
So, think about your needs before you shop.
What Are Heating Controls?
Heating controls help you manage your heating system.
A thermostat is one type of heating control.
You can use heating controls to set heating times. You can also use them to set the heat level.
Some systems have simple controls. Others have more advanced options.
For example, a programmable model can follow a set daily plan.
A wireless model can give you more choice over its location.
An OpenTherm model can work with a compatible boiler.
The right control depends on your heating system.
What Is an OpenTherm Thermostat?
An opentherm thermostat works with a heating system that supports OpenTherm.
It can talk to a compatible boiler.
This is different from a simple on-and-off thermostat.
The thermostat can send more information to the boiler. The boiler can then change how it works.
This can help the system respond to heating needs.
However, not every boiler supports OpenTherm.
So, check your boiler before you buy.
If you are unsure, ask a heating expert for help.
EPH – CP4D OpenTherm Programmable RF Thermostat
The EPH – CP4D OpenTherm Programmable RF Thermostat combines several useful features.
It is programmable.
Uses RF communication.
It also supports OpenTherm.
This makes it a useful option for compatible heating systems.
The programmable feature lets you set heating times.
The RF feature allows wireless communication with the receiver.
The OpenTherm feature allows communication with a suitable boiler.
You can shop for the EPH CP4D OpenTherm Programmable RF Thermostat and check its full product details.
Always check compatibility before you buy.
What Are the Benefits of This Product?
This product has several useful features.
First, it has a programmable function.
This lets you set heating times.
Next, it uses RF communication.
This can reduce the need for long cables.
It also supports OpenTherm.
This allows it to work with suitable OpenTherm boilers.
Therefore, it may be a good choice for the right heating system.
Still, you should check your boiler first.
How Are Modern THERMOSTATS Made?
Modern THERMOSTATS use small electronic parts.
They often have a sensor.
They may also have a screen and buttons.
Wireless models have parts that send radio signals.
The outer case is often made from plastic.
This keeps the unit light and strong.
Programmable models also have memory.
This lets them save heating times.
Smart models can have extra parts for app use.
Each model can have a different design.
So, always read the product information before you buy.
What Are the Benefits of the Right THERMOSTATS?
The right THERMOSTATS can make heating easier.
A programmable model can help set a daily plan.
A wireless model can give you more choice over where you place it.
An RF model can use wireless signals.
A smart model can offer app features.
An OpenTherm model can work with a compatible boiler.
You do not always need the most advanced model.
Instead, choose the model that meets your needs.
How Do You Choose the Right Thermostat?
Start with your boiler.
Check which types it supports.
Next, decide if you want a wired or wireless product.
Then think about your daily routine.
Do you want set heating times?
If yes, a programmable thermostat may suit you.
Do you want a wireless setup?
If yes, look at a wireless thermostat or wireless room thermostat.
Do you want app features?
If yes, a smart thermostat may be a good option.
Does your boiler support OpenTherm?
If yes, an opentherm thermostat may be suitable.
Always check the product details before you buy.
Why Shop for Thermostats Online?
Online shopping makes it easy to compare products.
Can check features.
You can check sizes.
Also check system compatibility.
You can compare prices before you buy.
TradeBoxDirect has a dedicated category for heating products.
You can shop the THERMOSTATS category and compare suitable options.
Do not choose only by price.
First, make sure the product works with your heating system.
Then check the features you need.
This can help you avoid buying the wrong product.
Frequently Asked Questions
What does a thermostat do?
It helps manage your heating.
It tells the heating system when to start and stop.
What is a programmable thermostat?
It lets you set heating times.
You can create a daily heating plan.
What is a wireless thermostat?
It sends a signal to a receiver.
It does not need a long cable between the thermostat and receiver.
What is an RF thermostat?
It uses radio signals to communicate with a matching receiver.
What is a smart thermostat?
It can offer extra features.
Some models can connect to apps and smart-home systems.
What is an OpenTherm thermostat?
It works with heating systems that support OpenTherm.
Always check your boiler before buying one.
Is a wireless heating thermostat a good choice?
It can be a good choice when you want flexible placement.
However, the product must work with your heating system.
Where can I buy heating thermostats?
You can shop online for programmable, wireless, RF, smart and OpenTherm models.
Always check the product details first.
Conclusion
THERMOSTATS make home heating easier to manage.
There are many types to choose from.
A programmable model can set heating times.
A wireless model can give you more choice over placement.
An RF model can use radio signals.
A smart model can offer app features.
An OpenTherm model can work with a suitable boiler.
So, check your heating system first.
Then choose the features you need.
For a range of heating products, shop the THERMOSTATS category at TradeBoxDirect.
How Does VENTILATION Work and Which Air Vents Are Best for Your Home?
How Does VENTILATION Work in a Home?
Good VENTILATION helps fresh outdoor air enter a property while stale indoor air leaves. This simple process can make rooms feel fresher and more comfortable. It can also help manage moisture, smells and warm indoor air.
There are many ways to improve the air supply in a property. For example, an air brick vent can provide a permanent opening through a wall. A ventilation air brick can allow air to move through an external wall while giving the opening a neat finish.
A terracotta airbrick is another popular choice. It can suit traditional brickwork and older properties. Meanwhile, modern homes often use plastic air bricks because they are light, practical and easy to maintain.
For a wide choice of products, you can shop ventilation at TradeBoxDirect.
What Are the Main Vent Products?
Different areas of a home need different types of vents. Therefore, it is important to choose the right product for the job.
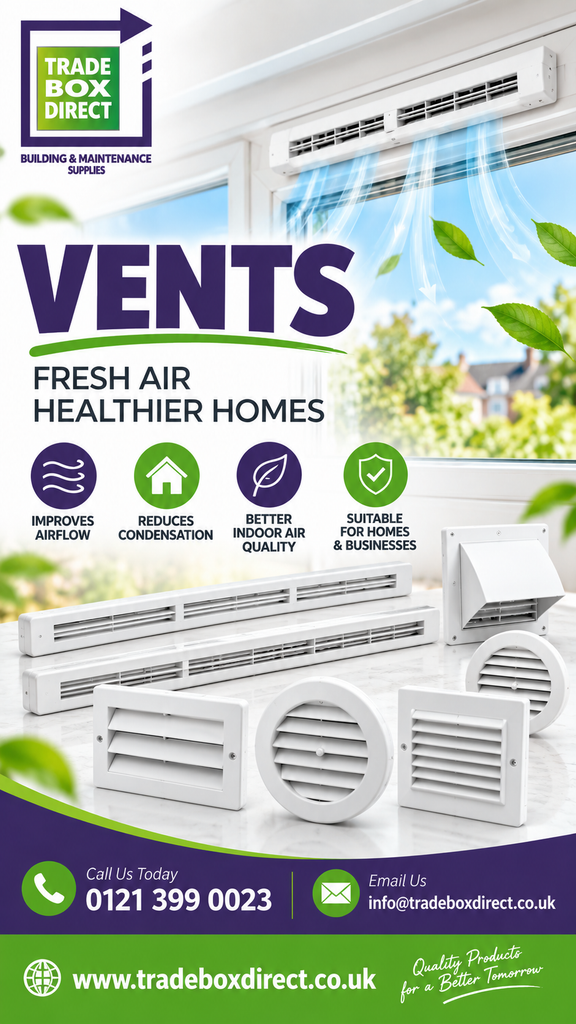
Window vents and window air vents are useful for providing fresh air through a window system. They can support window ventilation without requiring the main window to stay open.
Similarly, house window vents can help improve air movement in rooms where fresh air is needed. These products are often small, simple and easy to operate.
For walls, ventilation grilles and a ventilation grille can cover openings while still allowing air to pass through. Vent covers can also give the installation a cleaner look.
There are also specialist products such as ventilation grilles – axia, which can be considered when a reliable branded grille is required.
How Are Air Bricks and Ventilation Grilles Made?
Air bricks and grilles are usually made from plastic, clay or other durable materials. Plastic products are light and can suit many modern building projects. They are also available in several shapes and colours.
A terracotta airbrick is normally formed from clay and then fired at a high temperature. This process gives the product a strong and traditional finish. As a result, it can blend well with brick walls.
Plastic grilles are usually moulded into a louvred shape. The openings allow air to pass through while the grille covers the hole. This makes them useful for walls, rooms, cupboards and other areas.
A vent box can also be used for selected installations where a boxed opening or connection is required.
When choosing a product, check its size, material, colour and intended use before you buy.
How Do Trickle Vents for Windows Work?
Trickle vents for windows are small vents fitted into or around window frames. They provide a controlled opening for fresh outdoor air.
Window trickle vents can be useful because the main window does not need to stay open. This can make them practical for bedrooms, living rooms, kitchens and other areas.
There are also trickle vents for upvc windows that are designed for uPVC window systems. Upvc trickle vents are commonly available in white and other colours to match modern frames.
For suitable doors, trickle vents for doors can provide a similar controlled opening. However, you should always check the product specifications before buying to make sure the vent suits the frame.
Plastic window vents are also popular because they are lightweight and simple to clean. Likewise, upvc windows with air vents can provide a neat solution for homes that need regular fresh air.
What Are the Benefits of Trickle Vents?
The main advantage of trickle vents is controlled air entry. Instead of opening a full window, the small vent provides a steady route for fresh air.
This can be useful during colder months when you may not want to keep a window wide open. It can also support better indoor comfort throughout the day.
When you shop for air box trickle vents, check the size and fitting method carefully. Window systems differ, so the correct measurement is important.
The term airflow describes the movement of air through a space. Good air movement can help a room feel less stale and more comfortable.
Why Are Air Vent Covers Important?
An air vent cover can give an opening a finished appearance while helping protect it from dirt and debris. Some products also include mesh protection.
An air vent cover with fly screen is useful where insects may be a concern. The fixed mesh helps stop insects from entering while still allowing air to pass through.
The same idea applies to a louvred cover. A louvred air vent cover with fixed flyscreen fly mesh, plastic ventilation grille can combine a neat finish with insect protection.
Before you buy a cover, measure the opening carefully. Then compare the measurements with the product description.
How Can VENTILATION Help a House?
Good VENTILATION can make indoor spaces feel fresher. It allows stale air to leave and fresh air to enter. Therefore, it is an important part of comfortable house ventilation.
A basic system may use wall vents, air bricks and window vents. However, larger properties may need a more complete home ventilation system.
An air ventilation system for home use can vary from simple passive openings to more advanced mechanical systems. The correct choice depends on the property, room layout and required air exchange.
It is also important to keep vents clear. Do not cover them with furniture, paint or heavy dust. Regular cleaning can help products work as intended.
What Should You Check Before You Buy?
Before shopping for vents, first measure the opening. Next, check the product size and fixing method. Then consider the material and finish.
For windows, compare window air vents, window trickle vents, upvc trickle vents and other suitable products. For walls, look at air bricks, air brick vent designs and ventilation grilles.
You should also think about where the product will be fitted. A wall vent may need a different design from a window product. Likewise, a door vent may need a different fitting method.
If you are unsure, speak with a qualified installer before cutting or changing a wall, door or window frame.
Popular Products to Shop and Buy
If you want to shop online for building products, TradeBoxDirect has several useful options.
The 5000 AirFlow UPVC Trickle Vent for Windows & Doors | White is designed for suitable window and door applications. Shop the 5000 AirFlow UPVC Trickle Vent to check its product details and specifications.
For wall applications, the Vent Axia – Double Louvred Airbrick Terracotta – 220x90mm offers a traditional terracotta appearance. Buy the Vent Axia Double Louvred Airbrick for suitable building projects.
For window projects, the trickle vents for windows Ventilation Real PVC Plastic 300mm 400mm provides different size options. Shop the PVC trickle vents for windows and check which size suits your installation.
You can also consider the LOUVRED AIR VENT COVER WITH FIXED FLYSCREEN FLY MESH, PLASTIC VENTILATION GRILLE. Buy the louvred air vent cover with flyscreen for suitable openings where mesh protection is useful.
How Does VENTILATION Reduce Common Indoor Problems?
Good VENTILATION supports a healthier and more pleasant indoor environment. When air cannot move well, rooms may feel warm, stale or uncomfortable.
Moisture can build up in indoor spaces from cooking, washing and everyday activities. Good air exchange helps move damp indoor air away.
Condensation can also appear on cold surfaces when warm indoor air meets them. Suitable vents can support better air exchange, although they are not a complete solution for every building problem.
For this reason, it is wise to think about air movement when planning a home improvement project.
Choosing the Right VENTILATION Product
The best VENTILATION product depends on the location, opening size and purpose.
For external walls, an air brick vent, ventilation air brick or terracotta airbrick may be suitable. Windows, trickle vents for windows, plastic window vents and window air vents can provide controlled fresh air.
For larger openings, ventilation grilles, vent covers, air vent covers and louvred products may provide a neat finish.
Always check measurements before shopping. Also, read the product information carefully and make sure the item suits your installation.
For a broad selection, shop the VENTILATION category at TradeBoxDirect.
FAQs
What is an air brick vent used for?
An air brick vent creates an opening that allows air to pass through a suitable wall. It is commonly used where permanent air exchange is required.
What are trickle vents used for?
Trickle vents provide a small, controlled opening in a window or door. They allow fresh air to enter without opening the main window fully.
Are UPVC trickle vents suitable for modern homes?
Yes. Upvc trickle vents are commonly designed for suitable uPVC window systems. Always check the size and fitting details first.
What is the advantage of a terracotta airbrick?
A terracotta airbrick offers a traditional appearance and can blend well with brickwork. It can be a good option for properties where appearance matters.
Why use an air vent cover with fly screen?
An air vent cover with fly screen can help prevent insects from entering through the opening while still allowing air to pass through.
How do I choose the right window vent?
Start by measuring the available space. Then check the vent length, colour, fitting method and compatibility with your window frame.
Can I buy ventilation products online?
Yes. You can shop online for air bricks, window vents, trickle vents, grilles and vent covers. Always check the product specifications before you buy.
Conclusion
Good VENTILATION is an important part of a comfortable home. From air bricks and terracotta vents to window trickle vents and louvred grilles, each product has a specific purpose.
Therefore, choose the correct size, material and style for your project. Whether you need house window vents, vents, an air vent cover, a vent box or a complete home ventilation system, careful product selection can make installation easier.
With the right product and correct fitting, you can improve fresh air movement and create a more comfortable indoor space.
How Can Knauf Loft Roll 44 – Combi Cut Improve Loft Insulation?
Good INSULATION can help a home stay warmer in winter and more comfortable throughout the year. Heat naturally rises, so a poorly insulated loft can allow warmth to escape through the ceiling. As a result, a heating system may need to work harder.
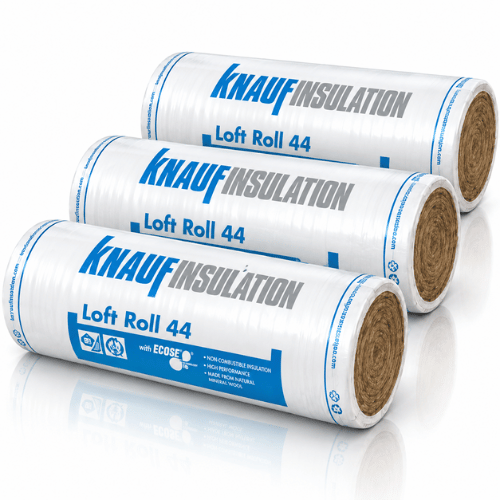
For homeowners, landlords, builders and trade buyers, choosing the right product is important. Knauf Loft Roll 44 – Combi Cut is designed for suitable loft applications and can support an effective energy saving insulation plan. This guide explains how it is made, how it works, its main benefits and what to check before you buy.
What Is Loft Insulation?
Loft insulation is fitted at ceiling level to slow heat loss. It can create a thermal barrier between the living space and the colder loft. Therefore, rooms below may stay warmer for longer.
When you shop for insulation for loft areas, look at product thickness, width, coverage and thermal conductivity. Also, check the condition of the roof and the space around pipes, cables and ventilation paths.
How Does Roof Insulation Work?
Roof insulation helps reduce heat movement through a roof structure. However, insulating a loft floor is different from insulating a pitched roof. The correct INSULATION system depends on whether the loft remains a cold storage area or becomes a living space.
Before you buy, identify the type of project. That simple step can help you choose a product that suits the building rather than buying only on price.
What Makes Knauf Loft Roll 44 – Combi Cut Useful?
Knauf Loft Roll 44 – Combi Cut is a mineral wool product made for suitable loft applications. Its roll format allows broad areas to be covered efficiently. The Combi Cut design can also make cutting and fitting more convenient around common loft layouts.
Knauf loft insulation is useful for projects where thermal performance and practical installation both matter. The product has a stated thermal conductivity of 0.044 W/mK. This value describes how well the material resists heat flow. Actual INSULATION performance also depends on thickness, coverage and correct fitting.
How Is Knauf Insulation Made?
Knauf insulation is based on mineral wool technology. Mineral wool is formed from mineral-based raw materials that are melted and made into fine fibres. These fibres create a structure that traps air.
Trapped air helps slow the movement of heat. The material is then formed into useful roll products for transport, cutting and installation.
During handling, follow the manufacturer’s instructions. Suitable protective clothing and safe working methods are important when fitting mineral wool products.
What Are the Benefits of Thermal Insulation?
Thermal insulation can reduce unwanted heat transfer. In a loft, this can help keep warmth inside the rooms below.
There are several practical INSULATION benefits:
- It can reduce heat loss through the ceiling.
- It can support a more comfortable indoor temperature.
- It may reduce heating demand and support lower energy use.
- Roll products can cover large areas with fewer joints.
- Suitable insulation can support a wider energy efficiency plan.
However, insulation works best as part of a complete approach. Windows, doors, walls, heating controls and ventilation can also affect energy use.
Is Attic Insulation the Same as Loft Insulation?
Attic insulation is a common term for insulating the upper part of a home. In the UK, the word loft is used more often. The basic aim is similar: reduce heat transfer and improve energy efficiency.
Still, the INSULATION method matters. A loft floor may need insulation between and above joists. A converted loft may instead need insulation within the roof slope and walls.
For this reason, check the building design before shopping. A product that suits a loft floor may not be the right choice for a roof conversion.
What Should You Check Before Buying Insulation for Loft Areas?
Insulation for loft projects should be planned before materials arrive. First, measure the floor area. Then, check joist spacing and note any pipes, cables, hatches or storage areas.
Next, inspect the roof space for leaks or moisture. Do not cover an active damp problem with insulation. Find and fix the source first.
You should also protect suitable airflow. Ventilation paths must remain clear where the building design requires them.
Likewise, condensation needs attention. Warm, moist air can meet a cold surface and create water droplets. Correct ventilation, moisture control and good installation practice can help reduce this risk.
Can a Loft Insulation Roll Save Energy?
A loft insulation roll can form an important thermal layer. When fitted correctly, it slows heat movement through the ceiling. Consequently, less heat may escape from rooms below.
However, energy savings vary. The property size, existing insulation, heating system, weather and installation quality all matter. Therefore, buyers should view insulation as one part of a wider energy efficiency plan.
Why Choose Energy Saving Insulation?
Energy saving insulation can be a sensible home improvement for properties with poor loft coverage. By reducing heat loss, it may help a heating system maintain a comfortable temperature more efficiently.
If you are planning a larger project, compare product coverage and required thickness before you shop. Buying the correct amount can reduce waste and prevent delays during installation.
Product Focus: Knauf Loft Roll 44 – Combi Cut
Knauf Loft Roll 44 – Combi Cut is the key product in this guide. It is a mineral wool roll designed for suitable loft applications. The material helps provide thermal insulation, while the roll format makes it practical for covering larger areas.
The INSULATION format is useful when installers need to cut material to fit the layout. Even so, careful measurement is essential. Gaps can reduce the value of the finished system, so the material should be fitted carefully according to the product instructions.
Trade buyers can compare the required coverage with the available roll size before ordering. Homeowners can use INSULATION planning to do the same when preparing a smaller project. If you need several rolls, calculate the total area first, then allow for the product’s stated coverage.
Can You Shop and Buy Knauf Loft Roll 44 Online?
Yes, online shopping can make product comparison easier. Before you buy, check the product specification, coverage, dimensions and delivery details.
For trade projects, ordering the right INSULATION from a specialist supplier can also help you plan quantities. Check stock before starting work, especially when a job has a fixed schedule.
The product page for Knauf Loft Roll 44 – Combi Cut provides a useful starting point for buyers who want to review the product before placing an order.
Frequently Asked Questions
How Is Knauf Loft Roll 44 – Combi Cut Made?
It is a mineral wool product made by forming mineral-based materials into fine fibres. The fibre structure traps air, helping reduce heat transfer.
What Are the Advantages of Using This Product?
It can help reduce heat loss, support indoor comfort and improve the thermal performance of a suitable loft area. Its roll format can also make larger areas easier to cover.
How Much Material Should I Buy?
Measure the area first, then compare it with the product’s stated coverage. Allow for the layout, cutting and installation method. Avoid guessing, as too little material can delay the project.
Can I Use This Product for Every Roof?
No. Loft-floor insulation and pitched-roof insulation are different applications. Always check the product guidance and choose a system that matches the building design.
Does Insulation Stop Condensation?
Not by itself. Good insulation can help keep some surfaces warmer, but suitable ventilation and moisture control remain important. Keep required airflow routes clear.
Conclusion
Choosing the right INSULATION can improve comfort and help reduce heat loss. Knauf Loft Roll 44 – Combi Cut offers a practical mineral wool option for suitable loft projects, especially when buyers want a roll product that is easy to measure, cut and install.
Before you shop or buy, measure the space, inspect the roof and check the product specification. Also, consider moisture, airflow and condensation. With careful planning and correct installation, this type of product can support a warmer, more energy-efficient home.
How Do Trickle Vents for Windows Improve Home Ventilation?
Good indoor air is important for a healthy and comfortable home. However, modern homes are often well sealed to save energy. While this can reduce heat loss, it can also reduce fresh air. As a result, moisture, stale air and condensation may build up indoors.
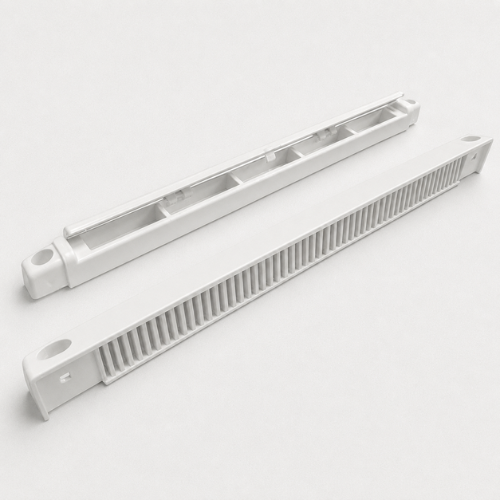
One simple solution is to install trickle vents for windows. These small vents allow a steady flow of fresh air without requiring the window to stay open. Therefore, they can support better VENTILATION while helping maintain a comfortable indoor environment.
If you are planning to shop for window vents, it is useful to understand how they work, where they are used and what features to look for before you buy.
What Are Trickle Vents for Windows?
Trickle vents for windows are small adjustable openings fitted to a window frame. They allow outdoor air to enter the room at a controlled rate. At the same time, they help stale indoor air move out.
Unlike opening a window fully, a trickle vent provides a smaller and more controlled opening. Therefore, it can offer fresh air while keeping the window closed.
These vents are commonly used in homes, flats, offices and other buildings. They can also be useful in bedrooms, kitchens, bathrooms and living areas where indoor air can become stale.
For anyone looking to shop for practical window ventilation products, trickle vents for windows can be a useful category to explore.
Why Is VENTILATION Important in a Home?
Good VENTILATION helps replace stale indoor air with cleaner outdoor air. It can also help control humidity and reduce the build-up of unwanted moisture.
Everyday activities create moisture. Cooking, showering, drying clothes and even breathing can add water vapour to the air. If that damp air cannot escape, it may settle on colder surfaces.
You can learn more about moisture and how it affects indoor spaces before choosing a suitable ventilation product.
With suitable VENTILATION, fresh air can enter while stale air can leave. This simple air exchange can make rooms feel fresher and more comfortable.
How Do Trickle Vents for Windows Work?
The main purpose of trickle vents for windows is to provide a controlled path for fresh air.
A vent usually contains an external opening and an internal cover. The user can normally adjust the opening to control the amount of air entering the room.
As fresh outdoor air comes in, stale indoor air can move towards other ventilation outlets. This creates a gentle air exchange instead of the strong draught that can happen when a window is opened wide.
The level of airflow depends on the vent design, opening position and conditions around the building.
Because of this, choosing the correct vent size and style is important when you buy window ventilation products.
Trickle Vents for Windows and Condensation
One of the main reasons people shop for trickle vents for windows is to help manage condensation.
Condensation happens when warm, moist air comes into contact with a colder surface. You may notice water droplets on windows, mirrors or walls, especially during colder weather.
You can read more about condensation to understand why it forms and how indoor humidity plays a role.
Suitable VENTILATION can help remove humid air before too much moisture settles on cold surfaces. Therefore, installing the right trickle vent can be a useful part of a wider moisture control plan.
However, window vents should not be seen as the only solution. Regular cleaning, suitable heating, extractor fans and sensible indoor habits can also help.
Why Shop for Trickle Vents for Windows?
There are several reasons to shop for trickle vents for windows instead of relying only on opening windows.
First, they provide a more consistent source of fresh air. Secondly, they can work while the window remains closed. This can be useful during colder months when homeowners do not want to open windows for long periods.
They can also be useful in busy homes where cooking, bathing and laundry create more humidity.
For landlords, builders, installers and homeowners, buying suitable window vents can be a practical way to improve indoor air management.
When shopping online, check the vent size, colour, material, fitting method and compatibility with the window type. This can help you choose a product that matches the installation.
Choosing the Right Trickle Vents for Windows
Before you buy trickle vents for windows, consider where the product will be installed.
1. Check the Window Type
Different windows may require different vent designs. Check whether your window is uPVC, timber, aluminium or another material.
2. Measure the Available Space
Measure the area where the vent will be fitted. A suitable size helps ensure a neat installation and effective air movement.
3. Consider the Colour
White vents are popular because they can blend with many modern window frames. However, other finishes may be available for different window styles.
4. Look at Adjustability
An adjustable vent gives you more control over the amount of air entering the room. This can make the product more useful throughout the year.
5. Consider Installation
Some products are designed for straightforward installation, while others may require a professional installer. Always follow the manufacturer’s fitting instructions.
Trickle Vents for Windows for Homes and Businesses
The benefits of trickle vents for windows are not limited to houses.
Offices, rental properties, flats, classrooms and commercial buildings can also need controlled fresh air. Good indoor VENTILATION can help create a more pleasant environment for people who spend many hours inside.
In rental properties, window vents may also form part of a wider approach to managing humidity and indoor air quality.
For installers and trade buyers, shopping for reliable ventilation products in one category can make product selection easier. It is worth comparing specifications before placing an order.
Can Trickle Vents Help Reduce Damp Problems?
Trickle vents for windows can support moisture control, but they do not fix every damp problem.
For example, a leaking roof, damaged pipe or rising damp needs a different solution. Likewise, serious mould growth should be investigated rather than simply covered up.
Still, poor air exchange can contribute to excess indoor humidity. Good VENTILATION can therefore be part of a sensible approach to reducing moisture-related issues.
Use window vents alongside extractor fans in kitchens and bathrooms where possible. Also, avoid drying large amounts of laundry in poorly ventilated rooms.
Buying Trickle Vents for Windows Online
When you are ready to shop, look for a supplier that provides clear product information. Product dimensions, materials, colour, fitting details and suitable applications can all help you make the right choice.
Trade buyers may also want to compare pack sizes and product options before they buy. Homeowners should focus on compatibility and installation requirements.
A dedicated VENTILATION product category can make it easier to compare window vents and related products in one place.
Remember that the cheapest product is not always the best choice. A suitable vent should match the window, room and intended use.
Benefits of Trickle Vents for Windows
The main benefits include:
- Provides a steady source of fresh air.
- Helps support better indoor VENTILATION.
- Can help manage humid indoor air.
- May reduce moisture build-up when used correctly.
- Can support condensation control.
- Allows windows to remain closed.
- Offers adjustable air entry on many models.
- Works well as part of a wider ventilation system.
- Suitable for homes, offices and other buildings.
- Provides a practical option for homeowners and trade installers.
Final Thoughts
Trickle vents for windows are a simple and practical way to support fresh air movement inside a property. They allow controlled outdoor air to enter without needing to leave the main window open.
When selected and installed correctly, they can support VENTILATION, help manage indoor humidity and reduce the conditions that can lead to condensation.
Therefore, if you are planning to shop for window ventilation products, check the window type, measurements, vent design and installation requirements first. A suitable product can provide a useful improvement to everyday indoor air management.
For homeowners, landlords, builders and installers, buying the right window vent can be a small step towards a fresher and more comfortable indoor space.
FAQs
Are trickle vents for windows necessary?
They can be useful in homes where controlled fresh air is needed. They are particularly helpful in well-sealed properties where natural air exchange may be limited.
Do trickle vents stop condensation?
They can help reduce condensation by allowing humid indoor air to escape and fresh air to enter. However, they cannot solve every condensation or damp problem on their own.
Can I close a trickle vent?
Many models have an adjustable opening. However, you should follow the manufacturer’s instructions and avoid blocking required ventilation without good reason.
Are trickle vents suitable for uPVC windows?
Yes, many trickle vents for windows are designed for uPVC windows. Always check the product specifications before you buy.
Do trickle vents make rooms cold?
They allow a controlled amount of outdoor air into a room, so some temperature change may occur. However, they generally provide a gentler air exchange than leaving a window open.
Where should I install window trickle vents?
They are commonly installed in suitable window frames in rooms where fresh air is needed. The exact position depends on the window design and the product instructions.
Can I use trickle vents with extractor fans?
Yes. In many buildings, trickle vents and extractor fans can work together. The window vent provides background air while the extractor helps remove humid or stale air.
Where can I buy trickle vents for windows?
You can shop for suitable window ventilation products from a dedicated supplier such as TradeBoxDirect. Compare the dimensions, design and application before you buy.
How Do You Choose the Right Attic Insulation for Your Home?
Choosing the right insulation for your attic can make your home warmer in winter and cooler in summer. It can also help reduce heat loss and improve energy efficiency. However, with many products available, it can be hard to know what to buy.
Fortunately, choosing attic insulation becomes easier when you understand the main product types, materials and installation needs. Whether you are upgrading an old loft or working on a new project, the right solution can provide long-term benefits.
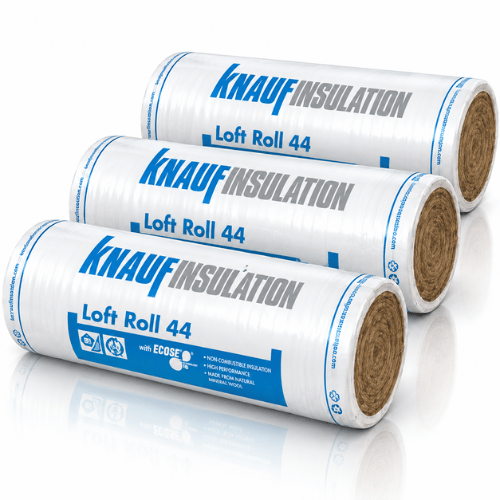
If you are ready to shop for suitable products, explore the insulation range at TradeBoxDirect.
What Is Attic Insulation?
Attic insulation is a material fitted within a loft or attic area to slow the movement of heat. In winter, it helps keep heat inside your living space. During warmer months, it can also reduce the amount of heat entering your home from above.
Good insulation can therefore support a more comfortable indoor temperature throughout the year. Moreover, it may reduce the need to use heating for long periods.
Common products include mineral wool rolls, glass mineral wool, loft rolls, rigid boards and foil-based products. Each option has different features, so it is important to select one that suits your property.
Why Is Attic Insulation Important?
A large amount of household heat can escape through the roof if the loft has poor thermal protection. As a result, your heating system may need to work harder.
Installing suitable attic insulation creates a thermal barrier between your living space and the colder roof area. Therefore, your home can retain warmth more effectively.
It can also support:
- Better indoor comfort
- Lower heat loss
- Improved energy efficiency
- More consistent room temperatures
- Reduced demand on heating systems
- Better use of household energy
However, insulation should not block essential ventilation. A balanced loft needs both thermal protection and suitable airflow.
Understanding Moisture, Airflow and Condensation
Moisture control is an important part of any attic project. Warm air from inside a home can move into a colder loft space. If that warm air meets a cold surface, water vapour may turn into droplets.
This process is known as condensation.
You should also understand moisture, because excess moisture can affect building materials over time.
At the same time, suitable airflow helps fresh air move through the roof space. Good ventilation can reduce the risk of damp conditions.
For this reason, do not simply cover every part of the loft without considering ventilation routes. Instead, check the roof design and follow the product manufacturer’s installation guidance.
Which Type of Attic Insulation Should You Buy?
When you shop for insulation, start by looking at the area you need to cover. Then consider the thickness, thermal performance, material and installation method.
Mineral Wool Rolls
Mineral wool rolls are a popular choice for loft floors. They are easy to handle and can fit between timber joists.
They are often suitable for homeowners and tradespeople who want a practical solution for improving thermal performance.
Glass Mineral Wool
Glass mineral wool provides another useful option. It is lightweight and can be supplied in rolls or batts.
Before you buy, check the dimensions carefully. The product should suit the spacing between the joists and the required installation depth.
Loft Roll Products
Loft rolls are designed specifically for use in roof and attic spaces. For example, products such as Knauf Loft Roll can provide a practical option where a roll-based system is preferred.
When shopping online, always check the product specifications, thickness, width and coverage area before ordering.
Foil Insulation
Foil-based insulation products can provide a different approach to thermal protection. They are often used where space, construction type or installation requirements make a thinner reflective material useful.
However, foil products should always be installed according to the manufacturer’s instructions. The correct air gaps and fixing method may be important for the system to perform properly.
Rigid Insulation Boards
Rigid boards can offer high thermal performance in a relatively compact thickness. They may suit specific roof, wall or loft applications.
However, cutting boards accurately is important. Gaps around the edges can reduce the effectiveness of the finished installation.
What Should You Check Before You Shop?
Before you buy attic insulation, measure the area carefully. This helps you calculate how much material you need.
Next, check:
- The loft floor or roof area.
- The distance between joists.
- The required insulation thickness.
- The product’s thermal performance.
- The coverage provided by each pack.
- The manufacturer’s installation guidance.
- Whether additional ventilation is required.
Also, check whether the product is intended for the exact application you have in mind.
Buying the cheapest product is not always the best approach. Instead, compare the specification, coverage and intended use. A suitable product can provide better value over the long term.
How Much Insulation Do You Need?
The required amount depends on the size of the attic and the design of the installation.
For example, a small loft may need only a few rolls, while a larger property may require several packs. Measure the length and width of the area first, then calculate the total coverage.
It is also sensible to allow for cutting waste. However, avoid buying large amounts without checking the product coverage.
If you are unsure, a qualified installer can assess the space and recommend a suitable thickness and installation method.
Shop Attic Insulation Online
Online shopping makes it easier to compare different insulation products in one place. You can review product sizes, materials, coverage and specifications before placing an order.
For homeowners, landlords, builders and tradespeople, choosing the correct product can save time during installation.
You can shop for insulation at TradeBoxDirect and compare products for different applications.
Before you buy, always read the product information carefully. In addition, check delivery details, pack quantities and dimensions.
Common Mistakes to Avoid
Even good-quality attic insulation may not work as expected if it is installed incorrectly.
Avoid these common mistakes:
- Blocking roof ventilation paths
- Leaving large gaps between sections
- Compressing products unnecessarily
- Installing the wrong thickness
- Ignoring moisture problems
- Covering electrical equipment without suitable guidance
- Buying too little material
- Failing to follow installation instructions
Furthermore, do not use insulation to hide an existing damp or roof problem. Any leaks or moisture issues should be addressed first.
Is Attic Insulation Worth Buying?
For many homes, attic insulation can be a useful improvement because the roof area plays an important role in heat loss.
A well-planned installation can help your home retain heat more effectively. It can also support better comfort and energy efficiency.
However, the result depends on the product, installation quality, building condition and ventilation.
Therefore, focus on the complete system rather than choosing a product based only on price.
FAQs About Attic Insulation
1. What is the best attic insulation?
The best option depends on the building, available space and installation method. Mineral wool, glass mineral wool, loft rolls, foil products and rigid boards can all have useful applications.
2. Can I install attic insulation myself?
Some loft floor products are suitable for careful DIY installation. However, you should follow the manufacturer’s instructions and take care around electrical equipment and ventilation areas.
3. Does attic insulation stop condensation?
It can help control heat movement, but insulation alone does not solve every condensation problem. Proper ventilation and moisture control are also important.
4. How do I choose insulation for a loft?
Measure the space first. Then compare thickness, thermal performance, coverage, material and installation requirements. Choose a product designed for your specific application.
5. Where can I buy attic insulation?
You can shop online for different insulation products, compare specifications and select the right option for your project. TradeBoxDirect provides a range of insulation products for building and improvement work.
6. Does insulation need ventilation?
Insulation should not block required roof ventilation. Good airflow can help manage moisture and reduce the risk of condensation in suitable roof constructions.
Conclusion
Choosing the right attic insulation starts with understanding your property and the area you want to improve. From mineral wool rolls and glass mineral wool to foil products and rigid boards, there are several options to consider.
Most importantly, look beyond price. Check the product specification, thickness, coverage and intended application before you shop or buy.
Good planning can help you create a warmer, more comfortable and energy-efficient home. Therefore, take accurate measurements, consider moisture and airflow, and follow the manufacturer’s guidance during installation.
If you are ready to compare products, visit the insulation category at TradeBoxDirect and choose a solution suited to your project.