






Which Is Better: South-Facing or West-Facing Solar Panel Mounting?
Introduction
Choosing the right direction is one of the most important steps when installing solar panels. In the UK, roof direction can change how much sunlight your panels receive during the day. Therefore, homeowners often ask whether a south-facing or west-facing roof is better.
In most cases, south-facing panels produce more energy across the whole day. However, west-facing panels can be a smart choice for homes that use more electricity in the afternoon and evening. So, the best option depends on your roof, energy use, and installation goals.
The right Mounting setup also matters. A strong system keeps panels secure, stable, and correctly positioned. As a result, good planning can help your solar system work well for many years.
South-Facing Solar Panels: The Traditional Choice
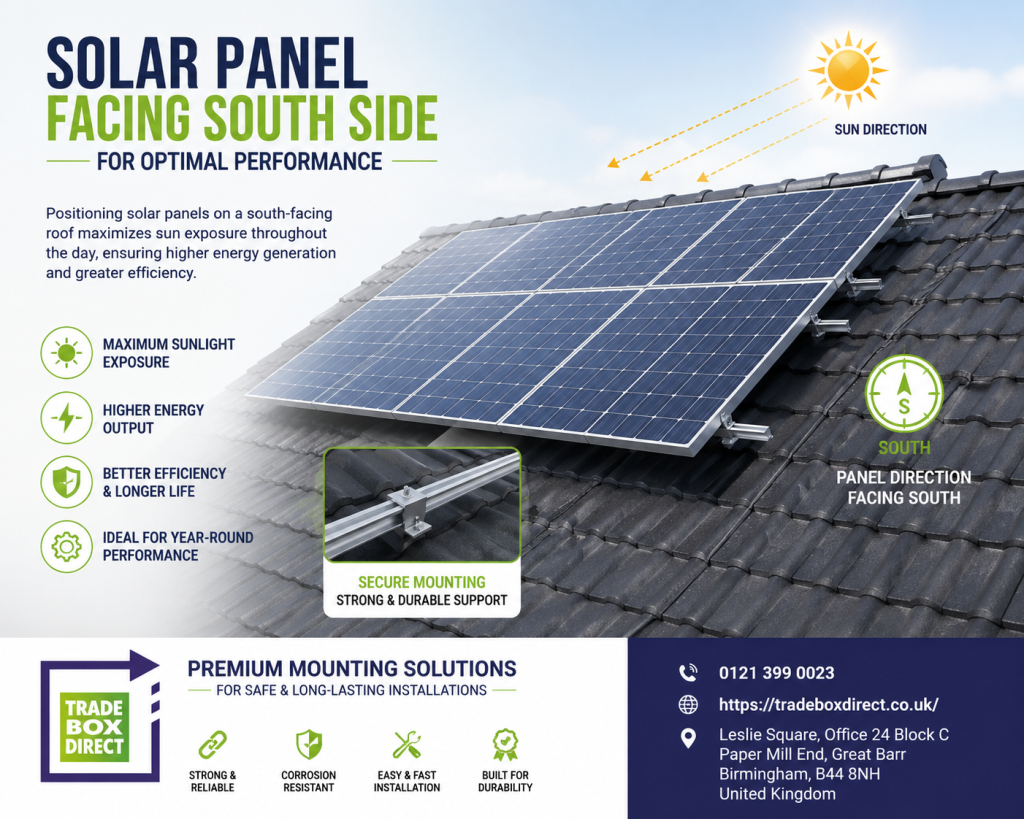
A south-facing roof is often seen as the best option for solar panels in the UK. This is because the sun moves across the southern part of the sky during the day. Therefore, south-facing panels can receive strong sunlight for a long period.
With suitable Mounting, the panels can capture sunlight from late morning through the afternoon. As a result, they often deliver strong total daily generation.
South-facing systems can be useful for homes that want to produce as much electricity as possible during daylight hours. They are also a common choice where the roof has a clear view of the sky.
However, a south-facing roof is not automatically the best roof. Trees, chimneys, nearby buildings, roof angles, and shade can reduce solar output. Therefore, the whole roof should be checked before a final decision is made.
West-Facing Solar Panels: A Useful Alternative
West-facing panels receive more sunlight later in the day. This can be especially useful for households that use electricity after work or school.
For example, a family may use more power between 3 pm and 8 pm. During this period, appliances, cooking equipment, computers, and lighting may be running. Therefore, west-facing solar panels can produce electricity closer to the time when household demand is higher.
Although a west-facing roof may produce slightly less energy over the full day than a similar south-facing roof, the difference is not always large. In addition, your local roof conditions can change the result.
A suitable Mounting arrangement can also help panels sit at a useful angle. The installer should consider the roof pitch, panel layout, wind exposure, and available roof space.
South vs West: Which Produces More Energy?
Generally, south-facing panels produce more total energy than west-facing panels when both roofs have similar conditions. South-facing panels usually receive useful sunlight for more hours across the day.
However, energy production is only one part of the decision.
West-facing panels can provide stronger output later in the day. Therefore, they may match the electricity use of some homes better. If your household uses most power in the evening, this timing can be valuable.
For instance, a south-facing system may generate more power at midday. Meanwhile, a west-facing system may generate more power during the later afternoon. So, your electricity habits should be considered along with total generation.
How Roof Angle Affects Solar Performance
Roof angle can have a major effect on solar performance. A well-positioned panel can receive more direct sunlight, while a poor angle may reduce generation.
Still, there is no need to worry if your roof is not at a perfect angle. Modern solar systems can work across a range of roof pitches. Instead, the installer should assess the roof and choose the most practical design.
This is where solar mounting systems become important. They can help installers secure panels and create a suitable layout for different roof types.
A good system should also allow the panels to remain firmly attached during strong weather. In addition, it should be suitable for the roof material.
The Role of Solar Mounting Rails
Rails provide a strong base for many rooftop solar installations. Panels are attached to the rails, while the rails are fixed to suitable roof supports.
For example, solar mounting rails can help create a neat and stable panel layout. They are commonly used with brackets, hooks, clamps, and other components.
The rail length and design should match the panel arrangement. Furthermore, the installer needs to check the load requirements before installation.
For a professional installation, a product such as the Fastensol Black Mounting Rail 3.55m can form part of a suitable rail-based system. The correct components should always be selected for the specific roof and panel design.
Roof Hooks for Tiled Roofs
Tiled roofs need suitable fixing methods. A roof hook can connect the rail system to the roof structure while working around the existing tiles.
A pantile roof hook is designed for roofs that use pantile-style tiles. Therefore, it can be useful when a solar installation is planned on this type of roof.
The Fastensol Pantile Roof Hook-Portrait is one product designed for this type of application. However, compatibility should always be checked before installation. Roof construction and tile shape can vary, so the correct hook is essential.
Similarly, a solar roof hook should be selected according to the roof type and the installation design. A secure fixing helps keep the panels stable and reduces the risk of movement.
Solar Brackets and Panel Fixings
Brackets are another key part of a rooftop solar installation. They connect different parts of the system and help create a secure structure.
For example, solar brackets may be used with rails and roof hooks to build a complete support arrangement. Each part needs to work correctly with the others.
Likewise, solar panel mounting brackets can help secure panels to the rail system. Correct clamps and brackets should be used because panels need to remain firmly fixed during wind and changing weather.
The installer should also check the manufacturer’s instructions. This helps ensure that the brackets, rails, hooks, and panels are compatible.
Does West-Facing Mounting Make Sense for Evening Energy Use?
Yes, it can.
West-facing panels may be useful when a home has high afternoon or evening electricity use. Instead of producing most of their energy around midday, these panels can continue producing useful power later in the day.
Therefore, west-facing Mounting may suit homes where people return from work or school in the afternoon.
Still, the final decision should not be based on direction alone. Battery storage can also change the picture. A battery can store surplus daytime electricity and release it later when demand increases.
As a result, a south-facing system with battery storage may still be a strong option for a household that needs evening power.
What About East and West Roofs Together?
Some homes have roofs that face both east and west. In such cases, panels can sometimes be installed on both sides.
East-facing panels can generate more power in the morning. West-facing panels can produce more later in the day. Together, they can create a wider generation pattern.
This arrangement can be useful for households with electricity demand throughout the day. However, the installer should check roof space, shade, structural conditions, and system design before choosing this option.
A solar mounting rail can help create an organised panel layout when the roof design allows it.
Important Factors Beyond Direction
Roof direction is important, but it is not the only factor.
First, check for shade. Trees, chimneys, and buildings can block sunlight. Even a well-facing roof may perform poorly if it remains shaded for long periods.
Next, consider roof condition. Solar panels can remain in place for many years, so the roof should be checked before installation.
You should also consider panel spacing and access. Good Mounting should provide enough room for secure fixing and future maintenance.
Finally, think about your household energy use. If you consume more electricity in the evening, west-facing panels may offer a useful production pattern.
Which Option Should You Choose?
For maximum yearly solar generation, south-facing is usually the better choice. It generally receives strong sunlight for more of the day.
On the other hand, west-facing can be better for some households. If afternoon and evening electricity use is high, later solar production can be helpful.
Therefore, there is no single answer for every home.
A professional installer can compare roof direction, pitch, shade, panel capacity, energy use, and available space. They can then create a system that suits the property.
The quality of Mounting components should also be considered. Strong rails, suitable hooks, reliable brackets, and correct clamps all contribute to a secure installation.
Why Quality Components Matter
Solar panels may receive most of the attention, but the support system is just as important. Panels need a stable structure underneath them.
For example, rails must be strong enough for the planned panel arrangement. Roof hooks must suit the roof type. Brackets must fit the system correctly. Clamps must hold the panels securely.
Together, these parts create the physical support for the solar array.
Good Mounting can also help create a clean and professional finish. Furthermore, using compatible components can make installation easier and reduce avoidable problems.
Final Verdict: South or West?
South-facing solar panels are usually the better choice when the main goal is maximum annual energy production. They offer strong sunlight exposure across much of the day.
West-facing panels, however, should not be ignored. They can be a smart option for homes with high afternoon and evening electricity use. In some cases, the timing of energy generation can matter more than a small difference in total output.
Therefore, choose based on the complete picture rather than roof direction alone.
A good Mounting design should match the roof, panel layout, weather conditions, and fixing requirements. With suitable components and careful planning, both south-facing and west-facing solar systems can provide valuable renewable energy.
Frequently Asked Questions
1. Is south-facing always better for solar panels?
No. South-facing is generally better for maximum yearly generation, but west-facing can work very well. Household energy use, shade, roof angle, and panel layout should also be considered.
2. Can west-facing solar panels produce enough energy?
Yes. West-facing panels can produce strong energy, especially during the afternoon. They can be useful for homes that use more electricity later in the day.
3. What is the best roof direction for solar panels in the UK?
South-facing is usually considered the best direction for total yearly output. However, east- and west-facing roofs can also provide good results when the system is planned correctly.
4. Do solar roof hooks work on tiled roofs?
Yes, suitable hooks can be used on many tiled roofs. However, the hook must match the tile and roof construction. A professional installer should check compatibility before installation.
5. What are solar panel mounting brackets used for?
They help connect solar panels and rails to the supporting structure. The correct brackets provide a secure connection and help keep the panels stable.
6. Does the roof angle matter?
Yes. Roof pitch affects how sunlight reaches the panels. However, solar panels can work well across many roof angles when the system is designed correctly.
7. Are solar mounting rails important?
Yes. Rails provide a stable base for attaching solar panels. They also help installers create a neat and secure panel layout.
8. Can I use both south-facing and west-facing panels?
Yes. A system can sometimes use more than one roof direction. This can spread electricity generation across different times of the day.
9. Which is better for evening electricity use?
West-facing panels can be useful because they tend to generate more electricity later in the day. However, a south-facing system with battery storage can also provide strong evening support.
10. What should I check before installing solar panels?
Check roof direction, shade, roof condition, pitch, available space, panel size, electrical demand, and the fixing system. The installer should also select compatible hooks, rails, brackets, and clamps.
Conclusion
South-facing and west-facing roofs can both support effective solar installations. South-facing usually wins for total yearly generation, while west-facing can offer better timing for afternoon and evening energy use.
Most importantly, the system should be designed around the property. Roof condition, shade, panel position, energy habits, and fixing components all matter.
With the right products and a carefully planned Mounting system, homeowners can build a secure solar array that performs reliably for years. Whether you choose south, west, or a combination of directions, professional planning remains the key to getting the best result.
What Is the Most Effective Mounting System for Rooftop Solar Panels?
Introduction
Choosing the right Mounting system is one of the most important steps when installing rooftop solar panels. A good system keeps panels secure, stable, and well aligned. It also helps protect the roof and supports long-term solar performance. However, the best option depends on the roof type, panel layout, weather, and installation needs.
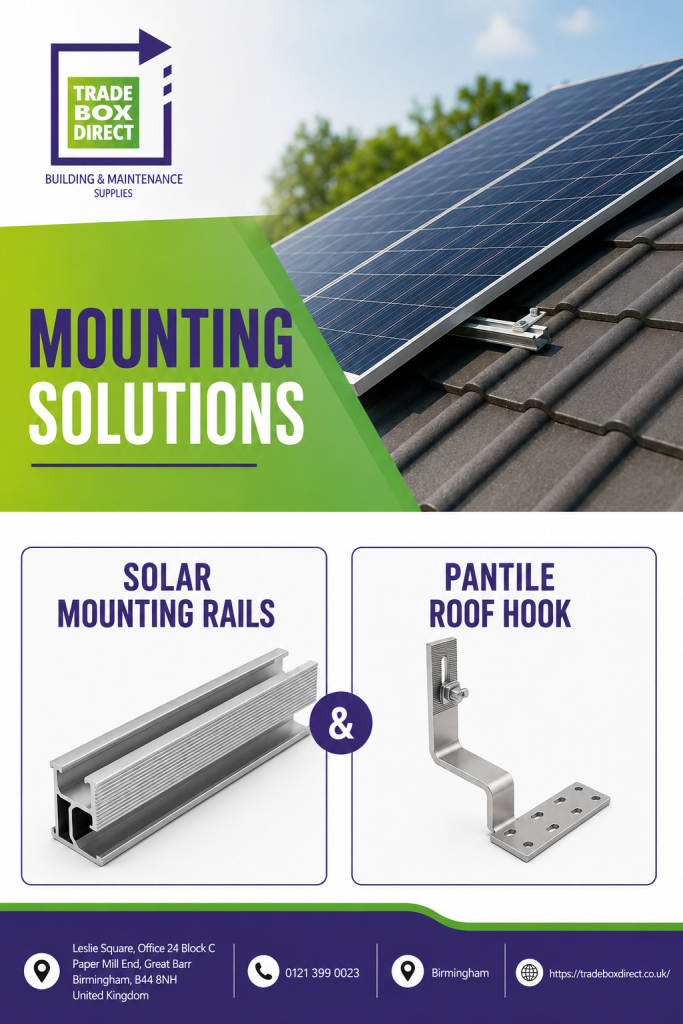
For most homes, a strong and well-designed Mounting setup includes roof hooks, rails, clamps, and suitable brackets. In addition, the system should match the roof material. For example, tiled roofs need different parts from flat roofs or metal roofs. Therefore, installers should always check the roof before choosing the parts.
What Makes a Rooftop Mounting System Effective?
An effective Mounting system should do more than hold solar panels in place. It should provide strength while allowing the panels to sit at the right angle. At the same time, it should help installers create a neat and secure array.
A good system should offer:
- Strong support for solar panels
- Good resistance to wind and rain
- Easy panel alignment
- Simple installation
- Suitable roof compatibility
- Durable materials
- Safe load distribution
- Space for cable management
Moreover, quality components can make installation faster. They can also reduce the risk of movement or damage during bad weather.
The roof itself also matters. A tiled roof, for instance, needs hooks that can sit safely beneath the tiles. Meanwhile, a metal roof may need different fixings. As a result, there is no single system that works perfectly for every building.
Solar Mounting Systems for Different Roof Types
Today, several solar mounting systems are available for residential and commercial projects. Each design serves a different roof and installation style.
For pitched tiled roofs, roof hooks and rails are common choices. The hooks connect to the roof structure, while rails provide a secure base for the panels. Furthermore, this design allows panels to be positioned in straight rows.
A flat roof usually needs a different approach. Ballasted frames or fixed brackets can support the panels without using the same type of roof hooks. However, the roof structure must still handle the added load.
Metal roofs may use special clamps or brackets. These parts connect to suitable roof sections and can provide strong panel support. Therefore, installers should choose parts based on the roof design rather than simply selecting the cheapest option.
Why Solar Mounting Rails Matter
Solar mounting rails form an important part of many rooftop systems. They create a strong track where solar panels can be fixed. Also, they help installers keep several panels level and evenly spaced.
The rails should have enough strength for the expected panel load. They must also suit the roof hooks and clamps used in the project. Otherwise, the parts may not connect correctly.
A solar mounting rail can be cut to the required length when the system design allows it. This makes rail-based systems flexible for different panel layouts. In addition, good rails can simplify installation and future maintenance.
Another useful option is a solar panel rail. It provides a practical connection point between the roof structure and solar panels. When the correct clamps are used, panels can remain firmly secured while still allowing installers to make small alignment adjustments.
Fastensol Pantile Roof Hook-Portrait
For tiled roofs, the Fastensol Pantile Roof Hook-Portrait can be a useful component within a suitable solar installation. A pantile roof hook is designed to work with pantile-style roofing while providing a fixing point for the rail system.
Before installation, the roof structure should be checked carefully. The hook must sit correctly without putting unnecessary pressure on the tile. Furthermore, the installer should make sure that the fixing point connects securely to the supporting roof structure.
Using the right pantile roof hook can help create a clean and stable panel layout. It also makes the rail connection easier when the complete system has been planned correctly.
Fastensol Black Mounting Rail 3.55m
The Fastensol Black Mounting Rail 3.55m is another useful product for rooftop solar projects. A rail of this type provides a mounting track for solar panels and can help create a neat panel arrangement.
Its black finish may also give the installation a clean appearance, especially when used with dark panels and matching components. However, installers should always confirm that the rail length, strength, and fixing system match the project requirements.
Using suitable solar mounting rails with compatible hooks and clamps can make the installation process more organised. As a result, installers can spend less time adjusting individual panels.
How Solar Roof Hooks Support Panels
A solar roof hook connects the rail system to the roof structure. For tiled roofs, it normally sits beneath or around the roofing material while connecting to a suitable structural point.
The hook must be positioned correctly. If it sits too high, it may affect the tile. If it sits too low, the rail may not align correctly. Therefore, careful installation is essential.
Different roof tiles have different shapes. Consequently, the hook style should match the roof. A pantile roof, for example, may need a hook designed for its specific profile.
Good installation also reduces unnecessary pressure on roof tiles. This can help protect the roof while providing a strong base for the panels.
The Role of Solar Brackets
Solar brackets help connect the different parts of a rooftop system. Depending on the design, brackets may support rails, connect panels, or provide additional fixing points.
For example, solar panel mounting brackets can help hold panels securely against the rail system. They are usually used with clamps or other compatible fixing parts.
Brackets should be made from suitable materials that can handle outdoor conditions. They should also match the rest of the system. Mixing incompatible components can create installation problems. Therefore, checking product specifications before installation is always important.
What Is the Most Effective Mounting Design?
In many pitched-roof installations, a hook-and-rail design offers a practical balance between strength, flexibility, and ease of installation. The roof hooks connect to the roof structure. Then, rails connect to the hooks. Finally, clamps secure the panels to the rails.
This design works well because each part has a clear purpose. Also, installers can adjust the rail layout to suit different panel sizes and roof shapes.
However, the most effective Mounting system is always the one that suits the building. A system that works well on one roof may not be suitable for another. Roof pitch, tile type, wind exposure, panel size, and structural strength all matter.
For this reason, professional assessment should come before installation.
Key Benefits of a Good Mounting System
A properly selected Mounting system can offer several benefits.
First, it provides a secure base for the panels. This is especially important in areas that experience strong winds.
Second, it helps keep panels correctly aligned. Good alignment can support a neat installation and make the solar array easier to maintain.
Third, a suitable system can protect the roof. Correct hooks and fixings reduce unnecessary pressure on tiles and other roof materials.
Finally, quality components can support long-term reliability. Since solar panels can remain on a roof for many years, the supporting system should also be built for long-term outdoor use.
How to Choose the Right System
Before buying any solar fixing parts, consider the following points:
Roof type: Identify whether the roof uses pantiles, flat tiles, slate, metal, or another material.
Roof structure: Check where the hooks or brackets can be fixed safely.
Panel size: Larger panels may require different rail spacing and fixing arrangements.
Weather conditions: Wind and snow loads should be considered where relevant.
Component compatibility: Make sure hooks, rails, clamps, and brackets work together.
Installation layout: Plan the number of panels and the position of each rail.
In addition, always follow the manufacturer’s installation instructions. Local building requirements should also be considered.
Can DIY Installation Be a Good Idea?
Some people may consider installing solar panel supports themselves. However, rooftop work can be dangerous. In addition, incorrect fixing can damage tiles or create an unsafe panel structure.
Therefore, trained installers should normally handle rooftop solar work. They can assess the roof, select suitable components, and install the system correctly.
A professional can also check whether the chosen brackets and rails suit the panel manufacturer’s requirements. This step can prevent costly mistakes later.
Final Thoughts
The most effective rooftop solar system combines strong roof fixings, reliable rails, suitable brackets, and secure panel clamps. Most importantly, every component should match the roof and the solar panel design.
For tiled roofs, products such as the Fastensol Pantile Roof Hook-Portrait can form part of a suitable hook-and-rail setup. Likewise, the Fastensol Black Mounting Rail 3.55m can provide a useful rail option when its specifications match the installation.
Ultimately, good planning is the key. By choosing compatible parts and using correct installation methods, homeowners can create a secure and tidy solar panel array that is built to last.
Frequently Asked Questions
1. What is the best mounting system for rooftop solar panels?
A hook-and-rail system is often a practical choice for pitched tiled roofs. However, the best option depends on the roof type, structure, panel size, and local conditions.
2. Are mounting rails necessary for solar panels?
Many rooftop systems use rails because they provide a strong and adjustable connection between roof fixings and panels. However, some systems use alternative fixing designs.
3. What is a pantile roof hook?
A pantile roof hook is a fixing component designed to connect a solar rail to a pantile-style roof structure. It should be selected to match the roof profile.
4. Can solar brackets damage roof tiles?
Incorrectly selected or poorly installed brackets can put pressure on roof tiles. Therefore, installers should use compatible products and follow the correct installation method.
5. Are black solar mounting rails suitable for rooftop systems?
Yes. Black rails can be used when their specifications match the solar installation. They can also provide a neat appearance with many modern solar panels.
6. How long can a solar mounting system last?
The lifespan depends on the materials, installation quality, roof conditions, and weather exposure. High-quality components and correct installation can support long-term use.
7. Should I install solar panel mounting brackets myself?
Rooftop solar work involves height and structural risks. Therefore, it is usually better to use a qualified installer who can check the roof and install the components safely.
8. Why is correct Mounting important for solar panels?
Correct Mounting keeps panels secure, supports proper alignment, and helps reduce stress on the roof. As a result, the complete solar installation can remain safer and more reliable over time.
What Mounting Bracket for Wood Cabinets?
Introduction
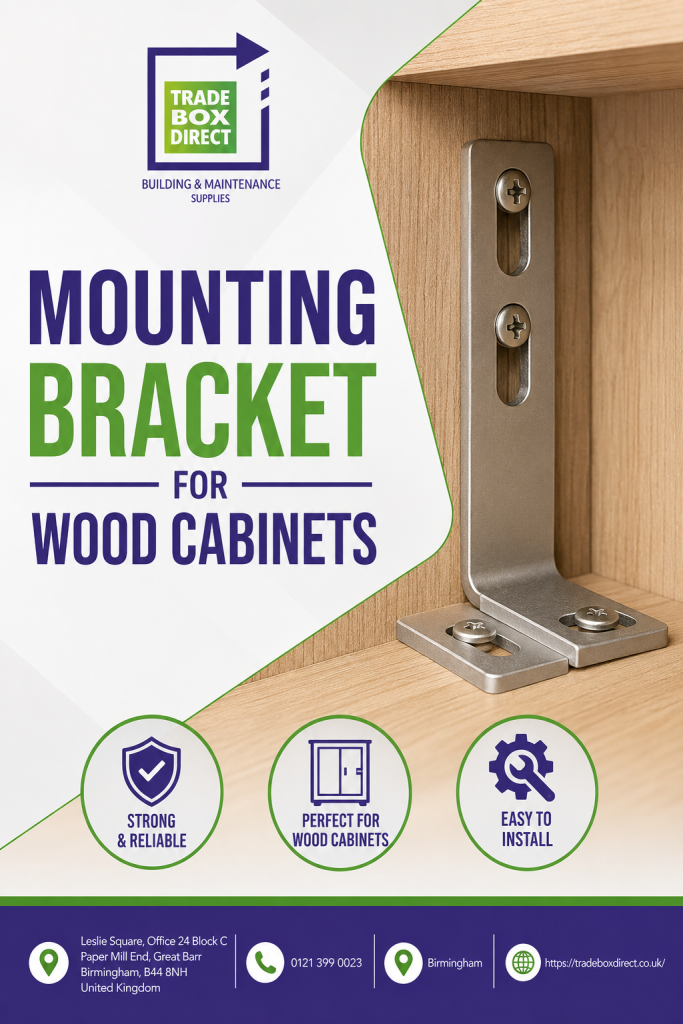
Choosing the right bracket for a wood cabinet can make a big difference. A good bracket keeps the cabinet steady, spreads the weight, and gives a neat finish. However, the best option depends on the cabinet size, wall type, weight, and intended use.
If you are fitting a wall cabinet, kitchen cabinet, storage unit, or display cabinet, you need hardware that can handle the load. You also need the right screws and wall fixings. This guide explains the main bracket types in simple language. It also explains how to choose, install, and maintain them safely.
Why Do Wood Cabinets Need Brackets?
Wood cabinets can become heavy when you add shelves, books, dishes, tools, or other items. Therefore, a strong bracket helps hold the cabinet in place. It also reduces movement and helps keep the cabinet level.
The right Mounting bracket should match both the cabinet and the wall. For example, a small display cabinet may need light-duty support. On the other hand, a large kitchen cabinet may need a stronger system with several fixing points.
Before buying a bracket, check the cabinet weight and the expected load. Then check the wall material. Brick, concrete, timber studs, and plasterboard all need different types of fixings.
What Types of Brackets Work for Wood Cabinets?
Several bracket types can work well with wood cabinets. Each type has a different purpose, so choosing the right design is important.
1. L-Shaped Brackets
L-shaped brackets are simple and popular. They have two flat sides that meet at a right angle. One side attaches to the wall, while the other side supports the cabinet.
These brackets work well for smaller cabinets, shelves, panel and storage units. They are also easy to install. For heavier cabinets, choose a thicker metal bracket with a suitable load rating.
2. Heavy-Duty Angle Brackets
Heavy-duty angle brackets provide extra support. They suit large wood cabinets and units that carry heavier items. The wider design can spread the load over a larger area.
For better results, use more than one bracket on a long cabinet. Place the supports near strong points in the cabinet. Also, make sure the wall fixing solar can handle the full load.
3. Concealed Cabinet Brackets
Concealed brackets sit behind or inside the cabinet. As a result, they keep the outside clean and neat. This option works well when appearance matters.
Many modern wall cabinets use concealed support systems. They can provide strong support while keeping the hardware out of sight. However, installation must be accurate because the bracket and wall fixings need to line up correctly.
4. Corner Brackets
Corner brackets provide support at cabinet corners. They can help strengthen joints and reduce movement. They are useful for cabinet frames, storage boxes, and DIY furniture projects.
When using corner brackets, select screws that suit the wood thickness. Avoid screws that are too long because they may come through the cabinet surface.
What Should You Look for in a Cabinet Bracket?
The first thing to check is load capacity. Never choose a bracket only because it looks strong. Instead, check its rated capacity and compare it with the cabinet and its contents.
Next, consider the material. Steel brackets are common because they offer good strength. Stainless steel can be useful in areas where moisture may be present.
Size also matters. A bracket should have enough surface area for secure fixing. At the same time, it should fit neatly inside or behind the cabinet.
You should also check the wall. A strong bracket cannot solve a weak wall fixing. For brick or concrete, use suitable masonry fixings. For timber, fix into a solid stud where possible. For plasterboard, use a fixing designed for the board and expected load.
How to Choose the Right Mounting Bracket
Start by measuring the cabinet. Note its width, depth, and weight. Then estimate the weight of the items you plan to store.
Next, inspect the wall. Find studs if the wall uses timber framing. If you have a masonry wall, choose a suitable masonry anchor.
After that, select the bracket size. A larger cabinet often needs more support points. A heavy cabinet may need heavy-duty brackets instead of basic L-shaped supports.
Also, think about the final look. Visible brackets can add an industrial style. Concealed brackets provide a cleaner finish. Therefore, choose a design that suits both the cabinet and the room.
Do Solar Mounting Keywords Relate to Cabinet Brackets?
The word Mounting appears in many hardware categories, including solar products. However, solar hardware is designed for solar panels and roof structures, not wood cabinets.
For example, solar mounting systems support solar equipment on roofs or other structures. Solar mounting rails create a secure rail system for panel installation. A pantile roof hook is made for tiled roof applications, while a solar roof hook connects solar support structures to the roof.
Solar brackets and solar panel mounting brackets also serve a different purpose. Likewise, a solar mounting rail and solar panel rail are designed to hold solar panels rather than furniture.
These terms can appear in a wider hardware category, but you should not use a solar bracket as a substitute for a cabinet bracket. Always choose hardware for its intended application.
What Makes Mounting Safe and Reliable?
Good Mounting depends on more than the bracket itself. The wall, screws, fixings, and cabinet material all play a role.
A strong cabinet can still become unsafe if it has weak wall fixings. Similarly, a strong wall bracket may fail if the screws cannot grip the cabinet properly.
Therefore, check every part before installation. Look at the bracket rating, screw size, fixing type, cabinet thickness, and wall condition.
It is also useful to leave a safety margin. If your cabinet and contents weigh close to the bracket’s maximum rating, choose a stronger option.
Installation Tips for Wood Cabinet Brackets
Before installation, gather a drill, level, pencil, tape measure, suitable screws, wall fixings, and the correct drill bit.
First, mark the cabinet position. Use a level to keep the cabinet straight. Then mark the bracket holes.
Next, check the marks again. This small step can prevent uneven installation. Drill the holes with the correct bit for the wall type.
After that, install the wall fixings. Attach the brackets and tighten the screws firmly. Do not overtighten them because this can damage the wood or fixing.
Finally, place the cabinet on the brackets or attach it to the support system. Check the level again. Add the remaining screws or safety fixings if the bracket design requires them.
For large cabinets, ask another person to help. A second person can hold the cabinet while you align and secure the hardware.
Common Bracket Installation Mistakes
One common mistake is choosing a bracket based only on price. A cheap bracket may not offer enough strength for a heavy cabinet.
Another mistake is using the wrong wall plug. A fixing that works in brick may not work in plasterboard. Therefore, always match the fixing to the wall.
Some people also use too few brackets. Long or heavy cabinets may need several support points. Follow the bracket instructions and consider the load across the full cabinet.
Do not ignore the cabinet material either. Thin wood or weak board may not hold a screw well. In such cases, fix through a stronger section or use a suitable reinforcement method.
Why Does Bracket Placement Matter?
Good bracket placement helps spread weight. It also reduces stress on cabinet joints. Place brackets close to strong areas, such as solid sides, rails, or reinforced sections.
For a wide cabinet, avoid placing all supports in the middle. Spread them across the width instead. This approach helps reduce bending.
A level check is also important. Even a strong cabinet can look poor if it sits at an angle. Therefore, measure twice and drill once.
Correct Mounting also helps prevent unwanted movement. When the supports sit in the right positions, the cabinet can stay more stable during daily use.
When Should You Use Heavy-Duty Brackets?
Heavy-duty brackets are a good choice when a cabinet will carry a high load. They can suit kitchen storage, tool storage, books, and other heavy items.
However, the bracket is only one part of the system. The screws, wall plugs, cabinet material, and wall must also support the load.
If you are unsure, choose a system with a suitable safety margin. For a very heavy cabinet, professional installation may be the safest option.
How to Maintain Cabinet Brackets
Once installed, check the brackets from time to time. Look for loose screws, cracks, bending, rust, or movement.
If a screw becomes loose, tighten it carefully. If the wood hole has become damaged, do not simply force in a larger screw without checking the structure.
For metal brackets, clean away dust and moisture. In damp areas, inspect the metal more often. Early checks can help prevent bigger problems.
Regular Mounting checks are especially useful for cabinets that hold heavy items. A quick inspection can help you find problems before they become serious.
FAQs
1. What is the best bracket for a wood cabinet?
The best bracket depends on the cabinet weight, wall type, size, and design. Heavy-duty angle brackets suit heavier cabinets, while L-shaped brackets can work well for smaller units.
2. Can I use L brackets for wall cabinets?
Yes, L brackets can support some wall cabinets. However, choose a suitable load rating and use enough brackets. The wall fixings must also match the wall material.
3. How many brackets does a wood cabinet need?
There is no single number for every cabinet. A small unit may need two supports, while a wider or heavier cabinet may need three or more. Follow the bracket instructions and consider the total load.
4. Can I install a cabinet on plasterboard?
Yes, but you need the correct plasterboard fixings. For heavier cabinets, fixing into wall studs is often a better option when possible.
5. Should cabinet brackets be hidden?
That depends on your preferred style. Concealed brackets give a clean look, while visible brackets can add character and make the hardware easy to inspect.
6. What screws should I use for wood cabinets?
Use screws that match the bracket, cabinet material, and fixing method. The screw should provide enough grip without being so long that it damages the cabinet.
7. Are solar brackets suitable for wood cabinets?
No. Solar brackets are designed for solar panel support. They are not a replacement for furniture or cabinet brackets.
8. Can a Mounting bracket support a heavy cabinet?
Yes, but only when the bracket, screws, wall fixings, and cabinet structure can handle the total load. Always check the product rating before installation.
Conclusion
The right Mounting bracket can make a wood cabinet safer, stronger, and more stable. Start by checking the cabinet size, load, wall type, and fixing points. Then choose a bracket that matches those needs.
L-shaped brackets offer a simple option. Heavy-duty angle brackets provide more support. Concealed brackets suit clean designs, while corner brackets can strengthen cabinet joints.
Most importantly, do not focus on the bracket alone. The wall, screws, fixings, and cabinet material all matter. With careful measurements and the correct hardware, you can create a secure and neat cabinet installation.
What Mounting Bracket for Wood Door? A Simple Guide to Choosing the Right One
Introduction
Choosing the right Mounting bracket for a wood door is important for safety, strength, and smooth use. A suitable bracket can help support the door and keep the wooden parts firmly connected. However, the right choice depends on the door size, weight, thickness, and type of installation.
Wood doors come in many styles. Some doors are light and simple, while others use thick hardwood and can be quite heavy. Therefore, the bracket must match the job. A small bracket may work well for a light door, but a heavy door may need stronger hardware.
This guide explains the main types of brackets, how to choose one, how to install it, and what mistakes to avoid. The language is simple, so beginners and experienced DIY users can follow it with ease.
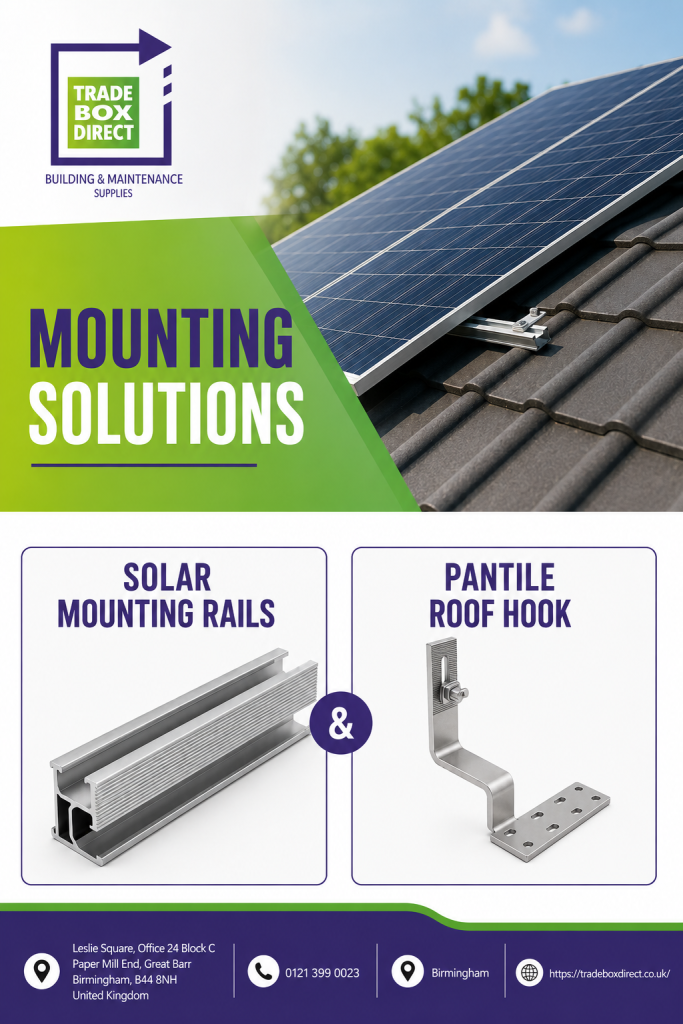
What Is a Mounting Bracket for a Wood Door?
A Mounting bracket is a hardware part that helps connect, support, or strengthen two parts. For a wooden door, it may connect the door to another wooden part, a frame, or a support structure.
The bracket needs to provide enough strength for the intended use. It should also fit neatly without stopping the door from opening or closing.
For example, a light interior door may need simple hardware. In contrast, a solid hardwood door may require heavy-duty brackets and stronger screws.
Before choosing a bracket, always check the door’s size and weight. Also, look at the area where you plan to install the bracket. Strong wood provides better screw grip than damaged or thin wood.
What Type of Bracket Is Best for a Wood Door?
There is no single bracket that works for every wood door. The best option depends on the purpose and weight of the door.
L-Shaped Brackets
L-shaped brackets have two sides that meet at a right angle. They can strengthen joints and support wooden sections.
These brackets work well for many basic wood projects. They are also easy to position and fix with screws.
Flat Brackets
Flat brackets provide support across a joint. They can help keep two wooden parts aligned.
These brackets suit smaller repair jobs and light wooden structures. However, always check the load rating before using one on a heavy door.
Corner Brackets
Corner brackets can strengthen corners and reduce unwanted movement. They are useful when a wooden frame needs extra support.
The bracket should sit in a position that does not interfere with the door’s movement.
Heavy-Duty Brackets
Heavy-duty brackets provide stronger support for larger applications. They often use thicker steel and stronger fixing points.
A solid wood door may benefit from this type of bracket. Still, you should always compare the bracket’s load rating with the door’s weight.
How Do You Choose the Right Bracket?
Choosing the right Mounting bracket starts with a few simple checks.
First, measure the door. Record its height, width, and thickness. Next, estimate or check its weight. A heavier door puts more pressure on the hardware.
Then, inspect the fixing area. The screws need enough solid wood to grip securely. If the wood is cracked, soft, or damaged, repair the area before fitting the bracket.
Material also matters. Steel brackets offer strong support for many indoor projects. Stainless steel can work well in areas where moisture is present. Zinc-coated steel can also provide useful protection against rust.
Finally, check the bracket’s dimensions. A bracket that is too small may not provide enough support. Meanwhile, a very large bracket may not fit the available space.
Mounting and Solar Products
Different types of Mounting hardware serve different purposes. For example, solar mounting systems support solar panels on roofs or other suitable structures.
Likewise, solar mounting rails provide a rail system where solar panels can be secured. These products are designed for solar installations rather than wooden doors.
Understanding the difference is important when searching for hardware online. A wood door bracket and solar hardware may both provide support, but they have different designs and uses.
What Material Should a Wood Door Bracket Use?
The bracket material can affect its strength, life, and appearance.
Steel is a popular choice because it offers good strength. It can work well for many indoor door projects.
Stainless steel is useful where moisture may be a concern. It offers strong corrosion resistance and can keep its appearance for longer.
Zinc-plated steel can also be a practical option. It provides a protective coating and can suit many general applications.
You should also consider the finish. Black brackets can suit modern doors, while silver or brass finishes may work better with traditional designs.
Therefore, choose the material based on strength, location, appearance, and budget.
Do Roof Brackets Work for Wood Doors?
Not usually. Brackets made for roofs have a different purpose and design.
For example, a pantile roof hook is designed to connect solar equipment to a suitable pantile roof. It needs to work with the shape and structure of the roof tiles.
A solar roof hook also serves a different purpose. It helps provide a fixing point for solar mounting equipment.
These products should not replace a wood door bracket. Always choose hardware that matches the application.
How Many Brackets Does a Wood Door Need?
The number of brackets depends on the door and the hardware being used.
A small and light door may need less support than a large solid-wood door. Heavy doors create more stress, so they need stronger fixing points.
Instead of guessing, follow the product instructions. The manufacturer’s guide should explain how many fixing points you need and how to position them.
You should also spread the load across strong areas of the wood. This approach can reduce pressure on one small section.
Can You Screw a Bracket Directly Into Wood?
Yes, many brackets can be fixed directly into wood. However, you must choose the right screws.
A screw that is too short may not grip enough wood. On the other hand, a screw that is too long may pass through the door or damage another part.
Hardwood can also make screw installation harder. A small pilot hole can make the process easier and reduce the risk of splitting.
Before drilling, mark the fixing points carefully. Measure twice and drill once.
Step-by-Step Guide to Installing a Wood Door Bracket
A careful Mounting process can help create a strong and neat installation.
Step 1: Measure the Door
Measure the door’s height, width, and thickness. Also, check its weight if possible.
Step 2: Inspect the Wood
Look for cracks, holes, soft sections, or other damage. Use a strong area for the bracket.
Step 3: Position the Bracket
Place the bracket where you want it. Make sure it sits flat against the wood.
Step 4: Mark the Holes
Use a pencil to mark each fixing hole. A level can help you keep the bracket straight.
Step 5: Drill Pilot Holes
Drill small pilot holes if required. This step can help guide the screws and reduce wood splitting.
Step 6: Insert the Screws
Use suitable screws for the bracket and wood. Tighten them firmly, but do not use excessive force.
Step 7: Test the Door
Open and close the door slowly. Check for rubbing, movement, gaps, or unusual sounds.
If the door moves correctly, check the screws one more time before finishing the job.
What Are Solar Brackets Used For?
It is useful to understand the difference between door hardware and solar hardware.
Solar brackets help support solar panels and related equipment. They are made for solar installation and must suit the roof or mounting structure.
Similarly, solar panel mounting brackets are designed to hold solar panels in a secure position. Their design considers panel size, roof type, fixing points, and installation conditions.
These brackets are not suitable substitutes for wood door brackets. Although both products provide support, their load requirements and designs are different.
What Should You Avoid When Fitting a Bracket?
Several common mistakes can reduce the strength of a bracket.
First, avoid using screws that are too short. They may not grip enough wood.
Next, do not place the bracket on cracked or damaged timber. Weak wood can reduce the strength of the whole installation.
You should also avoid drilling too close to the edge. Doing so may cause the wood to split.
Another mistake is choosing a bracket without checking its load rating. A small bracket may not support a heavy wooden door.
Finally, avoid overtightening screws. Too much force can damage the wood and reduce the screw’s grip.
Does Door Weight Matter?
Yes. Door weight is one of the most important factors when choosing a Mounting bracket.
A lightweight internal door puts less pressure on its hardware. A solid oak or hardwood door can weigh much more.
You should also consider how often the door is used. A door that opens and closes many times each day creates repeated stress on its fixings.
For busy areas, strong hardware and secure fixings can provide better long-term performance.
What Is a Solar Mounting Rail?
A solar mounting rail is a component used in solar panel installations. It provides a support path for securing solar panels to a suitable mounting structure.
This type of rail has nothing to do with wood door brackets. However, both products use the basic idea of providing a secure fixing point.
When buying hardware, always read the product description carefully. This helps you avoid purchasing a product designed for a completely different application.
Can a Bracket Damage a Wooden Door?
Incorrect installation can damage wood.
For example, a screw that is too long may pass through the material. A screw that is too thick may cause splitting. Excessive tightening can also crush the wood around the fixing.
Drilling too close to an edge can create cracks. In addition, installing a heavy bracket on weak timber can cause stress.
Fortunately, careful planning can prevent most of these problems. Measure the area, choose suitable hardware, and use the correct screws.
How Can You Make the Installation Stronger?
A strong Mounting setup begins with a strong fixing surface.
Solid timber usually gives screws better grip than damaged wood. Therefore, choose a healthy section of the door or frame whenever possible.
Use good-quality screws that match the bracket and wood. Keep the bracket level and make sure every fixing point sits correctly.
For heavier doors, choose hardware designed for higher loads. If the door has unusual construction, professional advice may be useful.
Regular checks can also help. Over time, screws may loosen because of repeated movement. Checking the hardware can help you spot problems early.
How Do Solar Panel Rails Differ From Door Brackets?
A solar panel rail is designed to support solar panels. It normally works as part of a wider solar mounting setup.
By contrast, a wood door bracket supports or strengthens a wooden door or frame.
The two products may look similar in some cases because both use metal fixing parts. However, their dimensions, load requirements, fixing methods, and applications are different.
For this reason, never choose hardware only because it looks strong. Always check what the product is designed to support.
Choosing Brackets for Different Wood Doors
Different wooden doors may need different types of hardware.
A lightweight interior door may suit a basic steel bracket. A thick hardwood door may need stronger hardware with more secure fixings.
For an outdoor wooden door, moisture resistance becomes more important. Stainless steel or protected steel may provide better protection.
Decorative doors also need attractive hardware. In this case, consider the bracket’s finish and shape as well as its strength.
Sliding wood doors can need special track hardware. Therefore, identify the door style before choosing your bracket.
Why Quality Matters
Good-quality hardware can provide reliable support for a long time. Poor-quality brackets may bend, rust, crack, or lose strength.
However, quality does not always mean buying the most expensive product. Instead, look for suitable material, correct dimensions, strong fixing holes, and a suitable load rating.
A well-made bracket can also make installation easier. As a result, you may spend less time making repairs later.
Final Thoughts
Choosing the right Mounting bracket for a wood door becomes much easier when you understand the door’s needs.
Start by checking the door size, weight, thickness, and fixing surface. Then choose a bracket with the right material, dimensions, and load rating.
L-shaped, flat, corner, and heavy-duty brackets can all have useful applications. However, the correct choice depends on the job.
Also, use suitable screws and avoid weak areas of the wood. Follow the product instructions and test the door after installation.
Remember that products such as solar mounting systems, solar mounting rails, pantile roof hook, solar roof hook, solar brackets, solar panel mounting brackets, solar mounting rail, and solar panel rail serve solar installation needs. They should not be confused with brackets designed for wooden doors.
With the right hardware and careful installation, you can create a strong, stable, and reliable wooden door setup.
FAQs
1. What is the best bracket for a wooden door?
The best bracket depends on the door’s size, weight, thickness, and application. A heavy-duty steel bracket may suit a heavy door, while a smaller bracket can work for a light door.
2. Can I use an L-shaped bracket on a wood door?
Yes. An L-shaped bracket can provide useful support for wooden joints and structures. Make sure its size and load rating match the application.
3. What screws should I use for a wood door bracket?
Choose screws that match the bracket and wood type. They should provide enough grip without passing through or damaging the door.
4. Do heavy wooden doors need stronger brackets?
Yes. Heavy doors place more stress on their hardware. Stronger brackets and secure fixing points can provide better support.
5. Can I install a wood door bracket myself?
Many simple installations can be completed as a DIY project. However, heavy doors or complex installations may need professional help.
6. How can I stop a bracket from becoming loose?
Use suitable screws and fix the bracket into solid wood. Check the screws from time to time, especially if the door receives frequent use.
7. Does bracket material matter?
Yes. Steel offers good strength, while stainless steel provides better resistance to moisture and rust. Choose the material based on the installation area.
What Mounting Bracket for Wood Panels? A Complete Guide
Choosing the right mounting bracket for wood panels is important when you want a strong, safe, and neat installation. Wood panels can be used for walls, roofs, sheds, garden buildings, and other projects. However, the best bracket depends on the panel type, fixing surface, weight, and purpose of the installation.
For solar projects, the choice becomes even more important. A suitable bracket helps secure the panel system while reducing movement and supporting long-term performance. This is why installers often use different solar mounting systems, rails, hooks, and brackets based on the roof or mounting surface.
What Is a Mounting Bracket for Wood Panels?
A mounting bracket is a fixing component used to connect a panel or structure to a supporting surface. For wood panels, brackets can be fixed directly to timber using suitable screws or bolts.
The bracket needs to match the application. For example, a lightweight wall panel may need a simple L-bracket. A heavier structure may need a stronger metal bracket with several fixing points.
For solar installations, the bracket is normally part of a complete mounting system. The system may include hooks, rails, clamps, and other fixing parts.
Which Mounting Bracket Is Best for Wood Panels?
There is no single bracket that works for every wood panel. The right option depends on the job.
Common choices include:
- L-shaped metal brackets
- Flat joining plates
- Corner brackets
- Heavy-duty angle brackets
- Timber-to-metal brackets
- Adjustable mounting brackets
- Solar mounting brackets
For simple wood panel projects, a galvanised steel or stainless-steel bracket can provide good strength and durability. Outdoor projects need brackets that can handle moisture and changing weather.
If the wood panel is being used as part of a solar installation, however, you should use a bracket designed for the specific solar mounting system rather than a general furniture bracket.
Can Solar Mounting Brackets Be Used With Wood?
Yes, in some installations, solar mounting brackets can be fixed to suitable timber structures. However, the timber must be strong enough to support the system and the expected loads.
The fixing method is also important. Screws or bolts must have the correct length, diameter, and material for the timber and bracket.
For solar installations, the complete structure must also be designed to handle wind and other loads. Therefore, simply attaching a solar bracket to a piece of wood is not enough.
Understanding Solar Mounting Rails
Solar mounting rails are long metal sections used to support solar panels. They provide a secure fixing surface between the roof mounting points and the panels.
A typical system may work like this:
Roof or support structure → mounting hook/bracket → solar mounting rail → panel clamp → solar panel
The rail helps spread the fixing points along the panel installation area. It also makes panel positioning easier.
A solar mounting rail can be used with different roof mounting components, depending on the roof type and installation design.
What Is a Solar Panel Rail?
A solar panel rail is another common term for the rail used to support solar panels. These rails are usually made from strong, lightweight metal, such as aluminium.
The rail is attached to roof hooks or other mounting components. Solar panels are then secured to the rail with suitable clamps.
The exact rail size and fixing method should always match the solar mounting system and panel specifications.
What Is a Pantile Roof Hook?
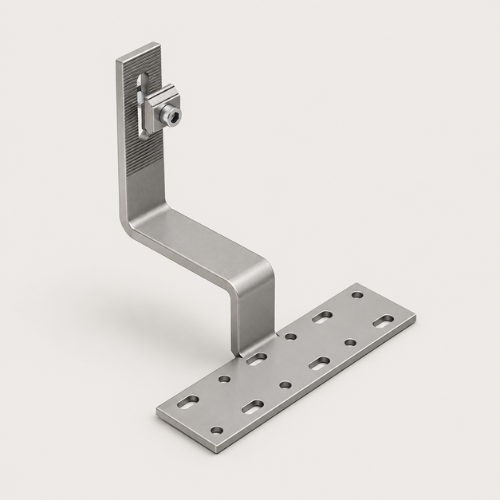
A pantile roof hook is designed for tiled roofs where pantiles are used. It provides a fixing point between the roof structure and the solar rail.
Pantile roofs have a different shape from plain tiled or slate roofs. Therefore, the hook needs to be suitable for the tile profile and roof construction.
The hook is normally secured to the underlying roof structure rather than relying only on the tile. The solar rail is then attached to the hook.
This creates a strong connection for the solar panel system.
What Is a Solar Roof Hook?
A solar roof hook is a mounting component used to connect solar rails to a roof structure. Different roof types require different hook designs.
For example, a solar installation on a tiled roof may use tile-compatible hooks. A pantile roof may require a dedicated pantile roof hook.
The correct hook should provide enough clearance between the roof covering and the rail. It should also allow the panels to sit securely without putting unnecessary pressure on the tiles.
How Do Solar Panel Mounting Brackets Work?
Solar panel mounting brackets connect the solar mounting system to the roof or supporting structure.
Depending on the roof type, a bracket may attach to:
- Timber rafters
- Roof trusses
- Metal structures
- Ground-mounted frames
- Other approved support structures
For tiled roofs, brackets are often combined with roof hooks and rails. The hook connects to the roof structure, while the rail provides the surface for mounting the solar panels.
This arrangement makes the system more flexible and easier to install.
Why Are Solar Mounting Systems Important?
A good solar mounting systems setup does more than hold panels in place. It also helps maintain the correct panel position and provides a stable connection to the building.
A suitable system should consider:
- Roof type
- Panel dimensions
- Panel weight
- Wind conditions
- Roof structure
- Rail compatibility
- Bracket spacing
- Fixing requirements
Using compatible components is essential. Mixing parts that were not designed to work together can create installation problems.
Choosing the Right Bracket for a Timber Structure
If your panels are mounted on a wooden structure, first check the strength and condition of the timber.
Avoid fixing heavy equipment to damaged, weak, or unsuitable wood. The bracket should connect to a strong structural section rather than only a thin decorative panel.
You should also consider the environment. Outdoor timber can experience moisture, temperature changes, and movement. Therefore, the bracket and fasteners should be suitable for outdoor use.
For solar projects, follow the mounting manufacturer’s instructions and make sure the timber structure is suitable for the intended load.
What About Solar Brackets?
Solar brackets are available in many designs. Some are made for tiled roofs, while others are designed for metal roofs, flat roofs, walls, or ground-mounted systems.
The best choice depends on the installation.
For a tiled roof, a roof hook and rail system may be suitable. For a timber frame, a different bracket or fixing method may be required.
The key is to select components that are compatible with the structure and the solar panels.
Common Mistakes to Avoid
Choosing a bracket based only on appearance can lead to problems. Strength and compatibility matter more than looks.
Avoid these common mistakes:
- Using a bracket that is too small
- Fixing into weak timber
- Using unsuitable screws
- Ignoring roof structure
- Mixing incompatible mounting components
- Applying excessive pressure to roof tiles
- Failing to consider wind loads
- Using indoor brackets outdoors
- Installing rails without checking panel compatibility
A professional installer can help determine the correct fixing method for larger or more complex solar projects.
Final Thoughts
So, what mounting bracket is best for wood panels? The answer depends on the panel, timber structure, weight, location, and intended use.
For general wood projects, strong angle or L-brackets can be useful. For solar installations, it is better to use a complete system made from compatible solar panel mounting brackets, hooks, rails, and clamps.
Products such as a solar mounting rail, solar roof hook, pantile roof hook, and suitable solar brackets can work together to create a secure installation when selected correctly.
Whether you are working with timber panels or planning a solar installation, always check the structure first. Then choose mounting components that are designed for the specific application. This approach can improve safety, stability, and long-term performance.
How Do Modesty Blocks Work? A Simple Guide for Furniture Projects
Introduction
When you build or repair furniture, small parts can make a big difference. One useful part is the modesty block. It is a simple fitting that helps join furniture panels and keep them in place. You may find these blocks in desks, cabinets, shelves, tables, and other furniture accessories.
For this reason, furniture accessories are not only about looks. They also help furniture stay strong, neat, and safe. Modesty blocks are a good example of a small part that can improve the way furniture is built.
What Is a Modesty Block?
A modesty block is a small plastic fitting used to join two furniture panels. It is often used where one panel meets another at a right angle. The block gives extra support at the joint.
Most modesty blocks have holes for screws. One side is fixed to one panel, while the other side is fixed to another panel. Once the screws are tightened, the two panels are held together.
Because the block is small, it can often be hidden inside the furniture. This gives the finished item a clean look. At the same time, it adds support without taking up much space.
Modesty blocks are also known as mod blocks. They are common in flat-pack furniture and home assembly projects.
How Do Modesty Blocks Work?
The basic idea is very simple. A modesty block creates a strong connection between two panels.
First, the panels are placed in the correct position. Next, the modesty block is placed against the inside corner of the joint. Screws are then used to attach the block to both panels.
Once the screws are tightened, the block helps stop the panels from moving. It also helps keep the joint square.
For example, imagine a desk top meeting a side panel. Without extra support, the joint may move when the desk is used. A modesty block can be fixed inside the joint. It then helps hold the two pieces together.
As a result, furniture accessories such as modesty blocks can make assembly easier and improve the stability of the finished item.
Why Are Modesty Blocks Used?
There are several reasons why modesty blocks are popular.
1. They Add Support
The main purpose is to add support to a joint. The block helps reduce movement between panels. This can make furniture feel more solid.
2. They Make Assembly Easy
Modesty blocks are simple to use. They do not need complex tools or special skills. In many cases, a screwdriver is enough.
3. They Save Space
A modesty block takes up very little room. It can be fitted inside a cabinet, desk, or unit without affecting the outside design.
4. They Give a Neat Finish
The block can often be hidden from view. Therefore, the furniture can look clean after assembly.
5. They Help With Repairs
If a furniture joint becomes loose, a modesty block can sometimes provide extra support. However, the panel should still be checked for damage before a new fitting is added.
These benefits show why furniture accessories have an important role in furniture construction and repair.
Where Are Modesty Blocks Used?
Modesty blocks can be used in many types of furniture. Their exact use depends on the design and panel material.
Common examples include:
- Desks
- Tables
- Cabinets
- Wardrobes
- Shelving units
- Storage units
- Kitchen cabinets
- Office furniture
- Bookcases
- Flat-pack furniture
They can be useful in both home and commercial furniture. For instance, office desks often need strong joints because they are used every day.
Kitchen furniture can also benefit from small joining parts. A suitable block can help keep panels aligned and supported.
When choosing furniture accessories, it is important to match the fitting with the panel size and type.
What Are Modesty Blocks Made From?
Many modesty blocks are made from plastic. Plastic is light, easy to shape, and suitable for many indoor furniture jobs.
A good plastic block can provide useful support while keeping the fitting lightweight. It can also be easy to handle during assembly.
The quality of the plastic still matters. A block should be suitable for the job and strong enough for the joint. Screws should also match the panel and the fitting.
Some designs may use other materials. However, plastic modesty blocks are widely used because they are practical and easy to fit.
This is one reason furniture hardware and plastic fittings are often used together in modern furniture projects.
Modesty Blocks and Furniture Fittings
A modesty block is one type of furniture fitting. Furniture fittings include many other small parts used to build, connect, adjust, or protect furniture.
For example, hinges help doors open and close. Shelf supports hold shelves in place. Drawer runners help drawers move. Joining blocks help connect panels.
Each fitting has a different job. Still, they work together to create a useful and stable piece of furniture.
The right furniture fittings should be chosen based on the furniture design. A fitting that works well for a small cabinet may not be suitable for a large or heavy unit.
Related Category: Corner Protectors
Another useful group of furniture accessories is corner protectors.
Corner protectors help cover sharp or exposed furniture corners. They can be useful in homes, offices, workshops, and other areas.
A plastic corner protector is often lightweight and easy to fit. It may help reduce damage to a furniture corner and protect people from sharp edges.
A furniture corner protector can also help protect the edge of a panel from small knocks.
You may also see the term corner guards used for similar products. These products can be helpful where furniture is used often or where exposed corners may cause problems.
Although corner protectors and modesty blocks have different jobs, both belong to the wider furniture hardware market.
How to Fit a Modesty Block
Fitting a modesty block is usually simple. However, care should still be taken during assembly.
Start by placing the furniture panels in the correct position. Check that the edges meet properly. Make sure the joint is square before fixing the block.
Next, place the modesty block on the inside of the joint. Mark the screw positions if required.
After that, use suitable screws to secure the block. Avoid using screws that are too long. A screw that is too long may damage the visible side of a panel.
Tighten the screws firmly, but do not over-tighten them. Too much force may damage a plastic block or the furniture panel.
Finally, check the joint. Make sure the panels do not move more than expected.
With the right furniture accessories, even a basic furniture assembly job can be easier to manage.
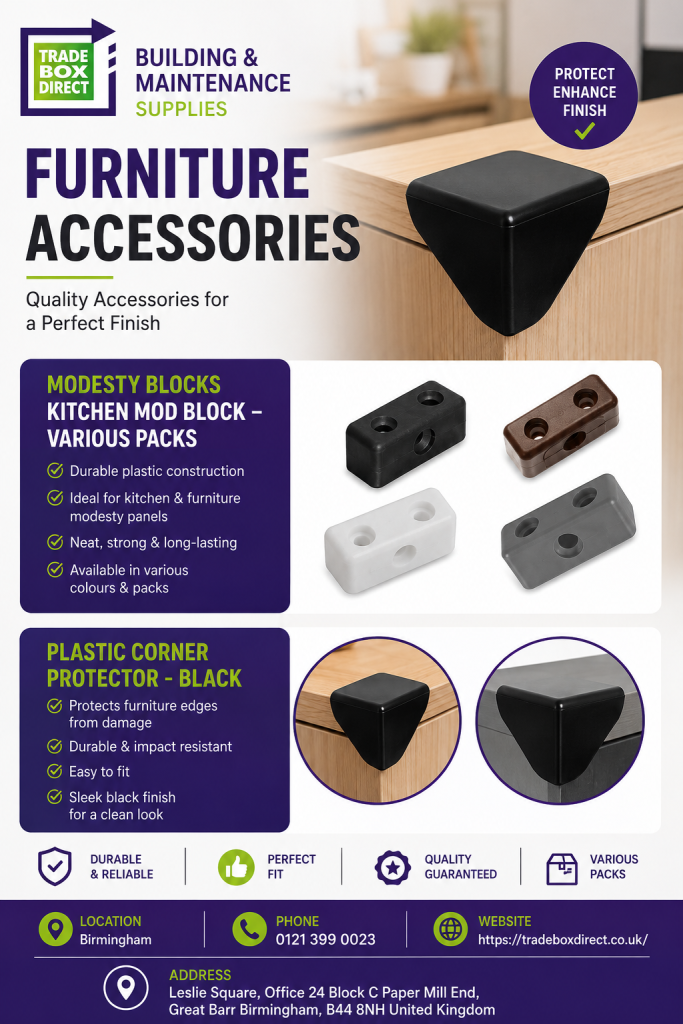
Product Example: MODESTY BLOCKS KITCHEN MOD BLOCK – VARIOUS PACKS
The MODESTY BLOCKS KITCHEN MOD BLOCK – VARIOUS PACKS is designed for furniture assembly and joining work. Modesty blocks like these can be useful for kitchen units, cabinets, desks, and similar furniture.
Different pack sizes can also be useful for different projects. A small repair may need only a few blocks. A larger furniture project may need more.
Before buying, check the block size, screw holes, pack quantity, and the type of furniture you plan to build.
Using the correct fitting can help reduce problems during assembly.
Product Example: Plastic Corner Protector – Black
The plastic corner protector – Black is another useful item for furniture projects. Unlike a modesty block, its main purpose is to cover and protect a furniture corner.
The black finish can suit many furniture designs. It can also provide a simple way to protect exposed edges.
For furniture projects, it can be useful to keep both joining and protection products available. Modesty blocks can support joints, while corner protectors can help protect exposed corners.
Together, these types of furniture accessories can support a more practical furniture setup.
What Are the Benefits of Using Modesty Blocks?
There are many practical benefits.
First, they can improve joint stability. A properly fitted block helps keep panels together.
Second, they can make furniture assembly easier. The design is simple, so fitting usually does not take much time.
Third, they are useful for repairs. A loose joint may sometimes be strengthened with a suitable block.
Also, they are compact. This means they can be placed inside furniture without taking up much room.
Finally, they can help create a neat result. The block can often be hidden inside the unit.
Therefore, furniture accessories such as modesty blocks can offer both practical and long-term value.
Choosing the Right Modesty Block
Not every block is right for every project. A few points should be checked before purchase.
Check the Size
Make sure the block fits the joint. A block that is too large may not sit correctly.
Check the Material
Plastic blocks are common for many indoor furniture projects. However, the material should match the intended use.
Check the Screw Holes
The screw holes should work with the screws you plan to use. The screws must also suit the panel material.
Check the Furniture Type
Consider where the block will be used. A kitchen unit, office desk, and light shelf may have different needs.
Check the Pack Size
Think about how many blocks your project needs. Buying a suitable pack can help avoid delays.
Good furniture hardware should always be selected with the complete project in mind.
Modesty Blocks vs Other Joining Methods
Furniture can be joined in many ways. Screws, dowels, brackets, cam fittings, and other connectors are often used.
A modesty block has one clear advantage: it is simple. It can be fixed to the inside of a joint and can provide extra support without changing the outside appearance.
However, it is not a replacement for every type of connector. Some furniture designs need stronger or more specialised fittings.
For this reason, the design of the furniture should always guide the choice of furniture fittings.
Common Mistakes to Avoid
Using a modesty block is easy, but a few mistakes should be avoided.
Do not use screws that are too long. They can damage the panel.
Do not place the block over a damaged or weak section of board. The joint should be checked first.
Avoid over-tightening the screws. Excess pressure can damage the fitting or panel.
Also, do not ignore alignment. If the panels are not square before fixing, the final furniture may not sit correctly.
Finally, choose the right size of fitting. A small fitting may not provide enough support for a larger joint.
Careful use of furniture accessories can help prevent simple assembly problems.
Are Modesty Blocks Suitable for DIY Projects?
Yes. Modesty blocks are often suitable for basic DIY furniture work.
They are easy to understand and simple to fit. Most small projects can be completed with basic tools.
However, users should still follow the furniture instructions where they are available. The fitting should also be used for its intended purpose.
If a piece of furniture carries a heavy load, the full structure should be considered. One small block cannot replace a correctly designed joint.
FAQs About Modesty Blocks
What does a modesty block do?
A modesty block joins and supports two furniture panels. It is usually fixed inside a corner joint with screws.
Are modesty blocks strong?
They can provide useful support when the correct block and screws are used. Their strength depends on the design, material, screws, and furniture panels.
Can modesty blocks be used on kitchen cabinets?
Yes. They can be used in many kitchen furniture applications when the fitting is suitable for the panels and joint.
Are mod blocks and modesty blocks the same?
Yes. “Mod blocks” is a common short term for modesty blocks.
Can I use a modesty block to repair furniture?
In some cases, yes. A suitable block can add support to a loose joint. However, damaged panels may need more than a new fitting.
Final Thoughts
So, how do modesty blocks work? They work by creating a simple support point between two furniture panels. Once fitted with suitable screws, the block helps hold the panels together and can reduce unwanted movement.
Their small size makes them useful in many projects. They are often used in desks, cabinets, kitchen units, tables, and flat-pack furniture.
At the same time, other products such as a plastic corner protector, furniture corner protector, and corner guards can help protect furniture from damage.
Whether you are building new furniture or repairing an old unit, choosing the right furniture accessories can make the work easier. Always check the fitting size, panel type, screw length, and intended use before installation.
With simple planning and the right products, even small fittings can help create furniture that looks neat, feels stable, and lasts longer.
What Are Furniture Corner Protectors Used For?
Introduction
Furniture corner protectors are small but useful items that can help protect furniture, people, and rooms. Sharp furniture corners can cause bumps, scratches, and damage. Therefore, adding a simple protector can make a big difference in furniture accessories.
Today, many homes, offices, shops, schools, and workshops use furniture accessories to improve the safety and life of furniture. Among these accessories, corner protectors are one of the easiest products to use.
A corner protector can cover a sharp edge on a table, cabinet, shelf, desk, or other furniture. As a result, it can reduce the risk of injury and help keep furniture looking neat.
This guide explains what furniture corner protectors are used for, where they can be fitted, and how to choose the right type.
What Are Furniture Corner Protectors?
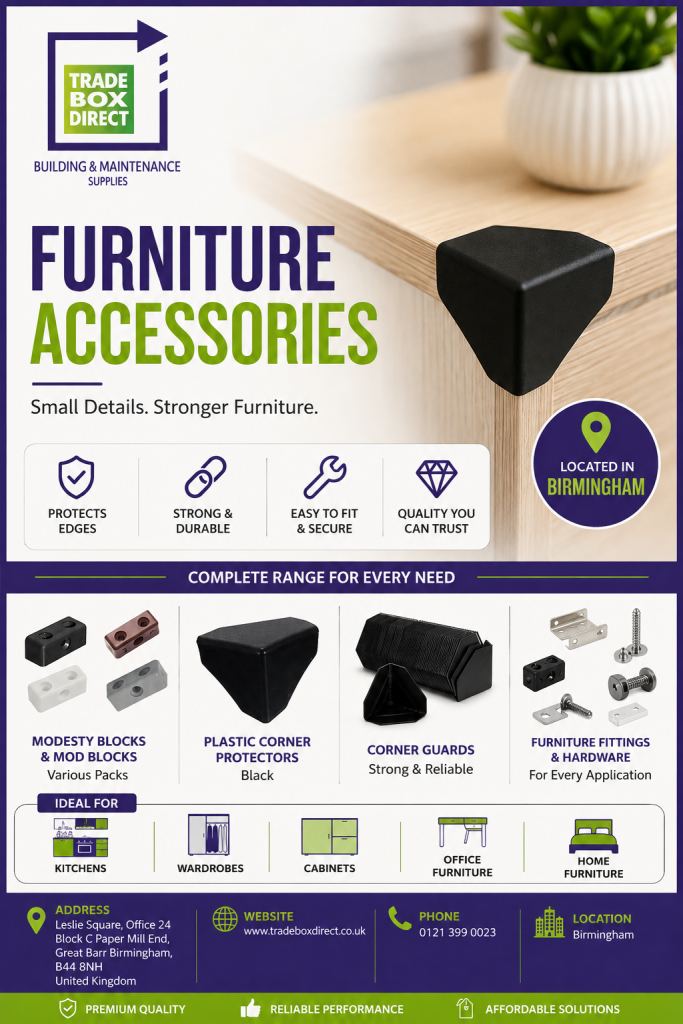
Furniture corner protectors are small covers that fit over the corners or edges of furniture. They are often made from plastic, rubber, foam, or other soft materials.
The main purpose is simple. A protector creates a safer surface around a sharp or exposed corner. At the same time, it can help protect the furniture from small knocks and scratches.
For example, a sharp wooden table corner can cause pain if someone walks into it. A plastic corner protector can cover that edge and make it less harmful.
Many protectors are easy to fit. Some use adhesive backing, while others can be fixed with screws or other fittings. Therefore, the best choice depends on the furniture and the level of protection needed.
Why Are Furniture Corner Protectors Important?
Furniture corners can create several problems in busy spaces. People may walk into them, children may bump into them, and objects may hit them during daily use.
For this reason, corner protectors are useful in many settings.
First, they can improve safety. A covered corner is less likely to cause a sharp impact. Next, protectors can help reduce visible damage caused by regular knocks.
In addition, they can help furniture stay in good condition for longer. This makes them a practical part of furniture accessories for homes and workplaces.
A protector may also improve the look of older furniture. Instead of replacing a table because its corners are damaged, a suitable protector can provide a simple and affordable solution.
Where Can Furniture Corner Protectors Be Used?
There are many places where these products can be useful.
1. Tables and Desks
Tables and desks often have exposed corners. These areas can receive frequent knocks, especially in busy rooms.
A furniture corner protector can cover the exposed point. Therefore, it can help reduce the chance of cuts, bumps, and surface damage.
Desks in offices can also benefit from corner protection. Chairs, bags, equipment, and people can all come into contact with desk edges during the day.
2. Cabinets and Cupboards
Cabinets may have sharp corners and edges. This can be a concern in kitchens, bedrooms, offices, and storage areas.
Corner protectors can help cover these points. Furthermore, they can protect the cabinet finish from minor impacts.
For this reason, furniture fittings and protective products are often used together when building or maintaining cabinets.
3. Shelves
Shelves can also have exposed corners. A protector can make these areas safer while helping to reduce small marks.
This can be especially useful for shelves in children’s rooms, classrooms, and shared spaces.
4. Office Furniture
Office furniture receives regular use. Desks, cabinets, counters, and storage units can all experience daily knocks.
Using suitable furniture hardware and protective components can help keep office furniture safe and functional.
5. Children’s Furniture
Children often move quickly and may not notice sharp furniture corners. Therefore, corner protection can be helpful in playrooms, bedrooms, nurseries, and schools.
A soft or rounded protector may reduce the impact if a child bumps into a corner.
However, corner protectors should not replace proper supervision or other safety measures.
How Do Corner Protectors Protect Furniture?
Corner protectors work by creating a barrier between the furniture edge and outside objects.
Imagine a wooden table with a sharp corner. If a chair hits the corner, the impact may leave a dent. If a person walks into it, the sharp edge may cause pain.
A protector adds a protective layer around that point. As a result, the furniture corner receives less direct contact.
Some products also help prevent scratches. This can be useful for furniture that receives heavy daily use.
Therefore, corner guards can provide both safety and basic surface protection.
What Is a Plastic Corner Protector?
A plastic corner protector is a protective piece made from plastic. It is commonly used on furniture corners, cabinet edges, shelves, and other surfaces.
Plastic is popular because it is light, easy to handle, and suitable for many indoor applications. It can also be available in different shapes and colours.
For example, a plastic corner protector – Black can provide protection while giving furniture a clean and simple appearance.
Black protectors can work well with dark furniture. They can also create a subtle contrast on lighter surfaces.
Before fitting one, check the corner size and shape. A protector should fit securely without creating another sharp or loose point.
What Is a Furniture Corner Protector?
A furniture corner protector is designed specifically to protect furniture corners. It can be used on tables, desks, cabinets, counters, shelves, and other furniture items.
The right product depends on several factors. These include the size of the corner, the furniture material, the location, and the level of protection required.
For light indoor use, a simple plastic protector may be enough. For areas with frequent impacts, a stronger or softer design may be more suitable.
As a result, choosing the right furniture accessories can make furniture safer and easier to maintain.
Can Corner Protectors Improve Furniture Life?
Yes, corner protectors can help reduce minor damage. Furniture corners often receive more impact than flat surfaces.
Over time, repeated knocks can cause chips, dents, scratches, or worn edges. A protector can reduce direct contact with these areas.
This does not mean that a protector will prevent every type of damage. However, it can provide an extra layer of protection.
For businesses, this can be useful because replacing furniture can cost more than adding simple protective products.
Likewise, homeowners can use protectors to keep furniture looking better for longer.
How Do You Choose the Right Corner Protector?
Choosing the right product does not need to be difficult. Start by checking the furniture corner.
Measure the width and depth of the corner if required. Then, check the product size before purchasing.
Next, consider the material. Plastic can be a good option for general protection. Softer materials may be better where impact protection is a higher priority.
You should also think about fitting. Some protectors can be attached quickly, while others may need additional furniture hardware.
Finally, consider the colour and appearance. A black protector may suit dark furniture, while another colour may blend better with a lighter finish.
Good furniture accessories should offer useful protection without making the furniture look untidy.
Corner Protectors and Other Furniture Accessories
Corner protection is only one part of furniture maintenance. Other components can help with furniture construction, strength, and stability.
For example, modesty blocks are commonly used to join and support furniture panels. They are useful in cabinets, desks, cupboards, and other furniture projects.
You may also see the terms modesty block and mod blocks when searching for these products. Although the names can vary, they are used for furniture assembly and panel joining.
One useful product is MODESTY BLOCKS KITCHEN MOD BLOCK – VARIOUS PACKS. It can be used for suitable furniture assembly tasks where panel support and joining are needed.
Therefore, corner protectors and modesty blocks have different jobs. One focuses on protection, while the other helps with furniture construction.
Both can be useful parts of a wider range of furniture accessories.
Why Are Corner Protectors Useful in DIY Projects?
DIY furniture projects often involve cutting, joining, and assembling panels. After construction, some corners may remain exposed.
A corner protector can provide a simple finishing touch. It can also help cover an exposed edge and reduce the chance of damage.
DIY users may combine corner protectors with suitable furniture fittings and furniture hardware to create a stronger and safer finished product.
Before installation, always make sure the surface is clean. Follow the fitting instructions supplied with the product. In addition, check that the protector sits firmly after fitting.
Are Corner Guards Only for Safety?
No. Safety is an important reason, but it is not the only benefit.
Corner guards can also help protect furniture from scratches, chips, and minor impact damage. They can provide a cleaner finish on exposed edges as well.
For older furniture, a protector may also hide a small damaged corner. This can improve the appearance without the need for a full repair.
As a result, corner guards can be useful for both practical and visual reasons.
How Can Businesses Benefit From Corner Protectors?
Businesses often use furniture every day. Offices, schools, hotels, shops, workshops, and other workplaces may have furniture that receives heavy use.
Protecting exposed corners can help reduce small repairs. It may also improve safety for staff, customers, and visitors.
Furthermore, businesses can use protective furniture accessories when setting up new workspaces or maintaining existing furniture.
A small protective product can therefore support a larger furniture maintenance plan.
Final Thoughts
Furniture corner protectors are simple products, but they can provide useful protection. They can help cover sharp corners, reduce minor impacts, and protect furniture from everyday wear.
They are suitable for many items, including tables, desks, cabinets, cupboards, shelves, and counters. Moreover, they can be useful in homes, offices, schools, shops, and DIY projects.
A plastic corner protector can be a practical choice for many indoor applications. Meanwhile, a furniture corner protector can help create a safer and cleaner furniture finish.
When choosing products, always check the size, material, fitting method, and intended use. Also, use suitable furniture fittings, furniture hardware, modesty blocks, and mod blocks where your furniture project needs them.
Overall, the right furniture accessories can make furniture safer, stronger, and easier to maintain. Even a small corner protector can make a noticeable difference when furniture is used every day.
Frequently Asked Questions
1. What are furniture corner protectors used for?
Furniture corner protectors are used to cover exposed furniture corners. They can help reduce sharp edges, minor impacts, scratches, and everyday wear.
2. Are plastic corner protectors suitable for tables?
Yes. Plastic corner protectors can be suitable for tables, desks, cabinets, and shelves. However, you should choose a size and design that fits the furniture corner correctly.
3. Can corner protectors be used on cabinets?
Yes. They can be used on many types of cabinets and cupboards. They may help protect exposed corners from knocks and small surface damage.
4. Are corner guards useful for children?
Corner guards can reduce the impact of sharp furniture corners. However, they should be used alongside proper supervision and other suitable safety measures.
5. What is the difference between corner protectors and modesty blocks?
Corner protectors are mainly used to protect exposed furniture corners. Modesty blocks, also called mod blocks or modesty blocks, are mainly used to join or support furniture panels.
How Do I Choose the Right Furniture Fittings?
Introduction
Choosing the right parts for furniture accessories can make a big difference. Good fittings help furniture stay strong, safe, and easy to use. They can also improve the look of a cabinet, shelf, table, or cupboard. However, with so many options available, choosing the right ones can feel hard.
This is where furniture accessories can help. They include many useful parts that support furniture during daily use. These parts can protect corners, join panels, add strength, and improve safety. Therefore, it is important to know what you need before you buy.
Whether you are building new furniture or repairing an old cabinet, the right fittings can save time and money. So, how do you choose the best options? Let us look at the key points in a simple way.
1. Know What Your Furniture Needs
First, look at the type of furniture you are working on. A kitchen cabinet may need different parts from a bookcase or office desk. Therefore, start by checking the design, size, and purpose of the furniture.
For example, cabinets often need parts that hold panels together. Shelves may need supports to carry weight. Tables may need strong joints. In addition, furniture used by children may need extra safety protection.
Before buying furniture accessories, ask a few simple questions:
- What type of furniture am I working on?
- How much weight will it hold?
- Which parts need extra support?
- Are there sharp corners that need protection?
- Do I need parts for joining panels?
- Will the furniture be used often?
These questions can help you avoid buying the wrong products.
2. Choose the Correct Size
Size is one of the most important factors when choosing furniture fittings. A fitting that is too small may not provide enough support. On the other hand, a fitting that is too large may not fit correctly.
For this reason, measure your furniture before ordering anything. Check the thickness of panels, the size of corners, and the space available for installation.
For example, if you need a pipe or panel insert, check its exact size first. Similarly, when buying brackets or joining parts, make sure the fixing points match your furniture.
Good furniture accessories should fit the furniture without forcing or damaging the material.
3. Think About Strength and Durability
Furniture is used every day. Doors open and close. Drawers move in and out. Shelves carry books, dishes, or other items. Therefore, fittings must be strong enough for regular use.
When choosing furniture hardware, look at the material and build quality. Strong plastic, metal, and other durable materials can provide reliable support when used correctly.
For heavy furniture, choose fittings that can handle the expected load. Also, consider how often the furniture will be used. A fitting for a cupboard used once a week may have different needs from one used several times each day.
In addition, good quality parts can reduce the need for frequent repairs.
4. Consider Safety
Safety is another major part of choosing furniture fittings. Sharp furniture corners can cause bumps and injuries. This can be a bigger concern in homes with young children or older people.
Corner protectors can help cover sharp furniture edges. They can be useful on tables, cabinets, shelves, desks, and other furniture.
A plastic corner protector is a simple option for many indoor furniture projects. It can cover an exposed corner and create a softer surface.
Likewise, a furniture corner protector can help reduce the risk caused by sharp edges. Before buying one, check the corner shape and size. The protector should sit securely and should not come loose during normal use.
Good furniture accessories should not only improve furniture. They should also help make it safer.
5. Look at the Material
The material of a fitting affects its strength, appearance, and lifespan. Therefore, always check what the product is made from.
Plastic fittings are often light and easy to handle. They can work well for many furniture protection and joining tasks. Metal fittings, meanwhile, can provide strong support for some applications.
However, the best material depends on the job. A small protective part may not need heavy metal construction. A joint that supports a large panel may need a stronger option.
Also, consider where the furniture will be used. Kitchen furniture may face moisture and regular cleaning. Office furniture may have heavy daily use. As a result, the material should suit the environment.
6. Use Corner Guards for Extra Protection
Corners are often overlooked during furniture design. Yet, they can become damaged over time. They may also create a safety risk.
Corner guards can protect exposed furniture corners from small impacts. They can also help reduce damage caused by regular knocks.
For example, a cabinet placed in a busy hallway may be hit by bags, boxes, or other objects. A suitable corner guard can add a layer of protection.
When selecting corner guards, check their shape, size, and fixing method. Some products may suit flat surfaces, while others are made for specific corner shapes.
As a result, choosing the correct guard is better than simply choosing the cheapest option.
7. Check How the Fitting Will Be Installed
Installation is another important point. Some fittings are easy to install with basic tools. Others may need screws, adhesives, or more careful positioning.
Before buying, check the installation method. Make sure you have the right tools and fixing materials.
For example, furniture fittings that require screws should match the panel thickness. Using screws that are too long may damage the surface. Similarly, poor positioning can weaken a joint.
Therefore, always read the product instructions when available. A simple installation can work well when the fitting is correctly positioned.
8. Use Modesty Blocks for Panel Support
When working with cabinets, desks, and other panel furniture, joining parts can be very useful. One popular option is a modesty block.
A modesty block can help connect panels and add support to furniture structures. It is often useful when two panels need to be joined in a simple and practical way.
Modesty blocks are commonly used in furniture assembly. They can help create a neat connection while adding stability.
You may also see the term mod blocks used for these products. The exact design can vary, so always check the product size and fixing method before installation.
When choosing furniture accessories, think about both appearance and function. A fitting should support the furniture while also working well with its design.
9. Match the Fitting With the Furniture Style
Function is important, but appearance also matters. Some fittings are hidden inside furniture. Others can be seen after installation.
If a fitting is visible, choose one that matches the furniture. For example, a black fitting may work well with darker furniture. A white fitting may blend better with light cabinets.
However, do not choose appearance over strength or safety. The fitting must first perform its main job.
A well-designed combination of furniture hardware and protective parts can make furniture look neat and professional.
10. Think About Long-Term Use
Furniture fittings should be chosen with future use in mind. A fitting may look suitable today, but will it still work after years of use?
Consider daily movement, weight, cleaning, moisture, and possible impacts. These factors can affect how long a fitting lasts.
For example, a cabinet door may be opened hundreds of times each year. Therefore, its fittings need to handle repeated movement.
Likewise, furniture placed in busy areas may need stronger protection. By thinking ahead, you can reduce repairs and replacement costs.
Good furniture accessories can help extend the useful life of furniture when they are correctly selected and installed.
11. Do Not Ignore Panel Thickness
Panel thickness can affect whether a fitting works correctly. This is especially important for joining blocks, brackets, screws, and other fixing parts.
Before installation, measure the panel. Then compare the measurement with the fitting requirements.
If the fitting does not match the panel, the connection may be weak. In some cases, it can also damage the furniture.
Therefore, measuring first is always a good idea. It takes only a few minutes and can prevent unnecessary problems later.
12. Choose Quality Over Price Alone
Price is important, especially when you need many fittings. However, the cheapest option is not always the best choice.
A low-cost fitting may wear out quickly or fail to provide enough support. This can lead to extra repair costs later.
Instead, compare quality, material, size, design, and intended use. Look for products that provide a good balance between price and performance.
This is especially important for furniture fittings used in furniture that receives heavy daily use.
13. Buy From a Reliable Supplier
Finally, choose a supplier that provides clear product information. A reliable supplier should make it easy to understand product size, material, use, and installation.
Clear information helps you compare different options. It also reduces the chance of ordering the wrong item.
If you are buying furniture accessories online, check product descriptions carefully. Look at measurements and application details before placing an order.
When possible, buy products that clearly state what they are designed to do. This makes the selection process much easier.
Common Furniture Fittings and Their Uses
Different fittings have different jobs. Here are some common examples:
Corner Protectors
These help protect exposed furniture corners. They can also improve safety by reducing sharp edges.
Furniture Fittings
This is a broad category that includes parts used to join, support, protect, or improve furniture.
Furniture Hardware
This includes many practical components used during furniture assembly and repair.
Plastic Corner Protector
These are useful for covering and protecting furniture corners. They can be a simple choice for many indoor applications.
Furniture Corner Protector
These products are designed to protect furniture corners from knocks and everyday contact.
Corner Guards
These provide added protection around exposed corners and edges.
Modesty Block
This type of fitting can help join furniture panels and improve structural support.
Modesty Blocks
These are useful for many cabinet, desk, and panel furniture projects.
Mod Blocks
This is another common term used for modesty blocks. Always check the product specifications before buying.
A Simple Buying Checklist
Before ordering any fitting, take a moment to check the following:
- Measure the furniture.
- Check the panel thickness.
- Identify the main purpose.
- Choose a suitable material.
- Check the fitting size.
- Consider safety.
- Check the installation method.
- Think about daily use.
- Compare quality and price.
- Buy from a reliable supplier.
This simple process can make furniture projects much easier.
FAQs About Choosing Furniture Fittings
1. What are furniture fittings used for?
Furniture fittings are used to join, support, protect, or improve furniture. They can help cabinets, desks, shelves, and other furniture stay stable and useful.
2. What are the most useful furniture accessories?
Useful options depend on the project. Corner protectors, joining parts, support blocks, and other protective fittings can be helpful for many furniture types.
3. Are plastic corner protectors suitable for furniture?
Yes. A plastic corner protector can be suitable for many indoor furniture applications. However, you should choose one that matches the corner size and shape.
4. What are corner guards used for?
Corner guards help protect exposed furniture corners. They can also reduce the risk of injury from sharp edges.
5. What is a modesty block?
A modesty block is a furniture fitting used to help join or support panels. It is often useful in cabinets, desks, and other panel-based furniture.
Final Thoughts
Choosing the right furniture fittings does not have to be difficult. Start by understanding what your furniture needs. Then measure the space, check the material, consider safety, and think about long-term use.
From corner protectors and corner guards to modesty blocks and other furniture hardware, each part has a specific purpose. The right choice can make furniture safer, stronger, and easier to maintain.
Most importantly, do not rush the buying process. Check the size and product details before ordering. When selected carefully, furniture accessories can provide practical support and protection for many types of furniture.
By following these simple steps, you can choose fittings with more confidence and make your furniture work better for years to come.
Can Furniture Accessories Improve the Life of a Cabinet?
Introduction
Cabinets store clothes, dishes, tools, and other items. They also support daily routines in homes, offices, shops, and work areas. However, daily use can place stress on doors, corners, joints, shelves, and panels. Over time, small problems can cause loose fittings, damaged edges, or weak connections.
This is where furniture accessories can help. The right parts can protect cabinet surfaces, support joints, reduce movement, and make everyday use easier. They may look small, but they can help keep a cabinet strong.
What Are Furniture Accessories?
Furniture accessories are small parts used to build, protect, support, or improve furniture. They include corner protectors, brackets, blocks, screws, caps, hinges, handles, and other support items. Some parts are visible, while others sit inside the cabinet and stay out of sight.
For example, a modesty block can help join two panels. A corner protector can help shield an exposed edge from knocks. These simple parts can reduce wear and help a cabinet stay in better condition.
Therefore, choosing the right accessory is not only about appearance. It is also about strength, safety, and long-term use.
How Can Accessories Extend Cabinet Life?
A cabinet faces many small stresses each day. Doors open and close. Shelves carry weight. Drawers move in and out. People may bump into corners or lean against panels. As a result, weak points can slowly develop.
Well-chosen furniture accessories can help manage these stresses. They can support joints, protect exposed areas, and keep parts in the right position. In turn, this can reduce damage caused by repeated use.
However, accessories cannot fix every problem. A badly damaged cabinet may need repair or replacement. Still, good accessories can help prevent many common issues before they become serious.
Protecting Cabinet Corners
Cabinet corners often take a lot of impact. A chair, box, toy, tool, or other object can hit an exposed corner. Over time, repeated knocks can chip paint, damage laminate, or weaken the edge.
This is why corner protectors can be useful. They add a protective layer around vulnerable areas. In homes with children, they can also make sharp furniture edges safer.
A plastic corner protector is one simple option. Plastic is light, easy to fit, and suitable for many furniture projects. Depending on the design, it can protect an edge from everyday bumps and scratches.
A furniture corner protector can also help keep the cabinet looking neat. Instead of allowing an exposed edge to take repeated hits, the protector absorbs some of the impact.
Corner guards can provide extra coverage in busy spaces where furniture receives frequent contact.
Supporting Cabinet Joints
Cabinet joints are another important area. Panels need strong connections to stay stable. If a joint moves too much, the cabinet may become loose or uneven.
Furniture fittings can help create secure connections between panels. They are available in many shapes and sizes, so the right choice depends on the cabinet design and material.
For example, a modesty block can join two panels and add support. It is often placed inside furniture, so it can provide strength without changing the outside appearance.
Modesty blocks are especially useful when a clean finish matters. They can help reinforce a joint while keeping the connection simple.
In addition, mod blocks can be useful during furniture assembly and repair. They can help hold panels together and reduce unwanted movement when fitted correctly.
Reducing Wear on Furniture Panels
Cabinet panels can suffer from repeated pressure. A loose joint may cause one panel to rub against another. Likewise, a poorly supported shelf can place extra stress on side panels.
Furniture hardware can help reduce these problems. Strong hinges, brackets, screws, supports, and connectors can keep parts aligned. When parts stay in the correct position, they are less likely to rub, bend, or move too much.
This can be especially helpful for cabinets that are opened and closed many times each day. Kitchen cabinets, office storage units, and workshop cupboards often face this level of use.
Still, hardware must match the job. A small connector may not be suitable for a heavy panel. Therefore, check the size, material, load, and fitting method before installation.
Improving Cabinet Stability
A stable cabinet is less likely to suffer from stress caused by movement. If a cabinet rocks or shifts, its joints may loosen over time. Accessories can help create a more stable structure.
For example, support blocks can strengthen internal connections. Brackets can help secure parts. Corner protectors can protect vulnerable edges. Together, these small improvements can make a cabinet feel stronger.
Moreover, stable furniture is easier to use. Doors can align better, shelves can stay level, and drawers can move with less strain.
Choosing the Right Material
Material matters when selecting an accessory. Plastic, metal, wood, and other materials can suit different cabinet needs.
Plastic parts are often useful for light protection and simple support. A plastic corner protector can be a good choice for exposed furniture edges. Metal fittings may suit areas that need higher strength.
However, the best material depends on the application. Consider where the part will go, how much pressure it will face, and how often the cabinet will be used.
Also, think about moisture. Kitchen and utility cabinets may need parts that handle moisture well.
Simple Maintenance Can Make Accessories Work Better
Installing an accessory is only the first step. Regular checks can help keep the cabinet in good condition.
First, inspect screws and joints from time to time. Tighten loose connections when needed. Next, check protectors for cracks or movement. If a part becomes damaged, replace it before the problem grows.
Also, keep cabinet surfaces clean. Dirt can collect around hinges, blocks, and other fittings. This can affect movement and create extra wear.
Therefore, basic care combined with suitable furniture accessories can provide better long-term results.
Are Accessories Useful for Old Cabinets?
Yes, they can be useful for older cabinets. A cabinet does not always need complete replacement when a small part becomes weak or damaged.
For example, a damaged corner may need a protector. A loose joint may need a new block or fitting. A worn hinge may need replacement. These small repairs can restore useful function.
However, inspect the cabinet first. If the main panels have serious water damage, deep cracks, or major structural weakness, accessories may not be enough.
Using Accessories During Cabinet Assembly
It is often easier to protect a cabinet during assembly than to repair it later. Adding the right parts at the start can help reduce future wear.
During assembly, check every joint. Make sure panels sit correctly before tightening screws. Use suitable fittings and avoid forcing parts into place.
Protect exposed corners when the design allows it, especially on cabinets that move often.
Careful assembly can give accessories a better foundation and help the cabinet remain stable.
Do Furniture Accessories Improve Cabinet Appearance?
They can. Some accessories are designed to be hidden, while others add a neat finishing touch.
A well-fitted corner protector can create a clean edge. Suitable furniture fittings can keep visible connections tidy. Small blocks can sit inside the cabinet and remain almost invisible.
Replacing worn or broken parts can also make an older cabinet look cared for.
Furthermore, simple improvements can help a cabinet look more complete while also supporting its function.
What Should You Check Before Buying?
Before buying an accessory, check the cabinet and the job it needs to do.
Consider the following points:
- Measure the area where the part will fit.
- Check the thickness of the cabinet panels.
- Consider the expected load or pressure.
- Choose a material suited to the environment.
- Check whether the part is for indoor or outdoor use.
- Make sure screws or fixings match the material.
- Look for clear fitting instructions.
- Choose a trusted supplier where possible.
These checks can prevent poor fits.
Can Accessories Replace Proper Cabinet Care?
No. Accessories support good furniture care, but they do not replace it.
Avoid putting too much weight on shelves. Open and close doors gently. Clean spills quickly, especially around wooden or laminated panels. Also, fix loose joints as soon as you notice them.
When you combine careful use with suitable furniture accessories, you can reduce common causes of cabinet wear.
Final Thoughts
So, can furniture accessories improve the life of a cabinet? In many cases, yes. Small furniture accessories can protect corners, support joints, improve stability, and reduce daily wear.
Corner protectors can shield exposed edges. Furniture fittings can support connections. Furniture hardware can help keep moving and fixed parts secure. A plastic corner protector or furniture corner protector can reduce damage from everyday knocks. Corner guards can offer extra protection in busy areas. A modesty block, modesty blocks, or mod blocks can help strengthen cabinet joints.
Most importantly, choose the right part for the job. Check the size, material, load, and fitting method before use. Then, combine good accessories with regular maintenance and careful use.
A cabinet may be a large piece of furniture, but its long-term strength often depends on small details. With the right protection and support, you can help your cabinet stay useful, stable, and attractive for many more years.
When Should I Use a 22mm Pipe Insert in Plumbing?
Introduction
Plastic fittings needs the right parts. Each part has a clear job. Therefore, choosing the right size matters.
A 22mm pipe insert can support a suitable plastic pipe at a joint. It sits inside the pipe. As a result, it helps the pipe keep its shape during fitting.
This guide explains when you should use a 22mm pipe insert. It also covers how pipe inserts work, what they do, what they are made from, and how to fit them.
You will also learn about the difference between a 22mm pipe stiffener insert and a 15mm pipe stiffener insert.
If you are looking for plastic fittings, this guide can help you choose the right parts for your plumbing job.
What Is a 22mm Pipe Insert?
A 22mm pipe insert is a small support part. It fits inside a compatible 22mm pipe.
Its main job is simple. It supports the pipe from the inside.
Plastic pipe insert can bend or flex. This can happen when you connect the pipe to a fitting. A fitting may also place pressure around the pipe.
The insert gives the pipe extra support. Therefore, the pipe can keep its shape during the connection.
Think of the insert as a small sleeve. It sits inside the pipe. Meanwhile, the fitting sits around the pipe.
Together, they help create a stable connection.
A pipe insert does not join two pipes by itself. Instead, it works with a suitable fitting.
For that reason, always check the pipe and fitting instructions before use.
When Should I Use a 22mm Pipe Insert?
You should use a 22mm pipe insert when the pipe and fitting system calls for internal support.
There are several common situations where an insert can help.
1. When Joining 22mm Plastic Pipe
A 22mm plastic pipe fittings may need extra support at a joint. This is especially true with some mechanical fittings.
The insert sits inside the pipe. As a result, it helps the pipe keep its round shape.
This support can make the connection more stable.
However, not every 22mm pipe needs an insert. So, check the manufacturer’s instructions first.
2. When Using a Compression Fitting
Compression fittings use pressure to hold a pipe in place.
Some plastic pipes can flex under this pressure. Therefore, the pipe may need support from inside.
A suitable insert gives the pipe a firm inner surface. Then, the fitting can grip the pipe as intended.
Always follow the fitting instructions. In addition, avoid using too much force when tightening the fitting.
3. When the Pipe Needs Extra Support
Some plastic pipes are flexible. This makes them easy to move and install.
However, flexibility can also affect a joint. For example, the pipe may change shape when you tighten a fitting.
A pipe insert can help in this situation.
It supports the pipe wall from inside. Therefore, it can help reduce unwanted movement.
4. When the Manufacturer Requires One
This is the most important rule.
Always check the pipe manufacturer’s instructions. Also, check the fitting manufacturer’s guidance.
Some systems need an insert for certain connections. Other systems may use a different method.
Therefore, never assume that every 22mm pipe needs a stiffener.
How Does a 22mm Pipe Insert Work?
The idea is simple.
First, you prepare the pipe. Next, you place the correct insert inside it. Then, you connect the pipe to the correct fitting.
The insert supports the pipe from inside. At the same time, the fitting supports it from outside.
This gives the pipe support on both sides.
For example, imagine a soft tube. If you squeeze the tube, it may change shape. Now place a firm sleeve inside it. The sleeve helps the tube keep its shape.
A pipe insert works in a similar way.
It does not replace the fitting. Instead, it helps the fitting work with the pipe.
Therefore, the insert acts as a support part rather than a joining part.
What Are Pipe Inserts Made Of?
Manufacturers make pipe inserts from strong materials.
Many inserts use rigid plastic or other suitable materials. The exact material can vary by product.
Material choice matters. Plumbing fittings systems can face heat, water pressure, and movement.
Therefore, the insert must suit the pipe and fitting system.
Do not choose an insert only because it looks right. Instead, check its product details.
Look at the size. Then, check the material and compatibility. Finally, check the intended use.
This simple check can help you avoid the wrong product.
Why Do Plastic Pipes Need Internal Support?
Plastic pipes have many benefits.
They are light. They are also easy to cut and handle. In addition, they can make plumbing work quicker.
However, some plastic pipes can flex more than metal pipes.
That flexibility can affect some connections. For example, a fitting may press against the pipe and change its shape.
An insert can support the pipe at this point.
It sits inside the pipe. Therefore, it can help the pipe resist pressure from the fitting.
As a result, suitable plastic fittings can work more effectively with the correct support parts.
Still, you should always check the pipe system first.
What Is the Difference Between a 22mm and 15mm Pipe Insert?
The main difference is size.
A 22mm pipe stiffener insert suits a compatible 22mm pipe. On the other hand, a 15mm pipe stiffener insert suits a compatible 15mm pipe.
Both products provide internal support. However, they have different dimensions.
22mm Pipe Stiffener Insert
A 22mm pipe stiffener insert supports a suitable 22mm pipe.
You may find 22mm pipe in larger domestic plumbing runs. It can also appear in other plumbing systems.
The exact use depends on the pipe system.
Therefore, check the pipe details before buying the insert.
15mm Pipe Stiffener Insert
A 15mm pipe stiffener insert supports a suitable 15mm pipe.
Many domestic plumbing systems use 15mm pipe. Therefore, you may need this size for smaller pipe runs.
Again, check the pipe and fitting instructions first.
Can You Swap Them?
No.
A 15mm insert does not replace a 22mm insert. Likewise, a 22mm insert does not replace a 15mm insert.
The size must match the pipe system.
Can I Use a 22mm Pipe Insert With Any 22mm Pipe?
Not always.
The term “22mm” tells you the pipe size. However, it does not tell you every detail about the pipe.
Different pipes can have different wall thicknesses. They can also have different internal sizes and materials.
For example, two 22mm pipes may use different designs.
The fittings may also have different requirements.
Therefore, check these details before you choose an insert:
- Size
- Material
- Pipe construction
- Internal diameter
- Wall thickness
- Fitting type
- Connection method
- Manufacturer instructions
- Temperature limits
- Pressure limits
These checks take only a little time. However, they can prevent a poor product choice.
How Do I Fit a 22mm Pipe Insert?
Always follow the instructions for your specific product.
However, the basic process is easy to understand.
Step 1: Check the Pipe
First, check the pipe size.
Make sure it matches the insert. Also, look for cracks, cuts, or damage.
Step 2: Cut the Pipe
Use a suitable pipe cutter.
Make a clean and straight cut. A poor cut can make the joint harder to install.
Step 3: Clean the Pipe
Remove dirt from the pipe end.
Then, check the end for damage. If you find a damaged section, follow the pipe manufacturer’s guidance.
Step 4: Insert the Stiffener
Place the correct insert inside the pipe.
Push it into the correct position. Do not force it if it does not fit.
Instead, stop and check the size and product details.
Step 5: Fit the Connector
Place the pipe into the correct fitting.
Then, secure the fitting as the manufacturer advises.
Avoid over-tightening. Too much force can damage the pipe or fitting.
Step 6: Check the Joint
Finally, inspect the connection.
Check the alignment. Also, make sure the pipe sits correctly in the fitting.
If the system needs a pressure test, follow the correct testing procedure.
What Are the Benefits of Pipe Inserts?
Pipe inserts have several useful benefits.
They Support the Pipe
The insert supports the pipe from inside.
Therefore, it can help the pipe keep its shape at the joint.
They Can Reduce Deformation
A fitting can put pressure on a flexible pipe.
An insert can help the pipe resist this pressure. As a result, it can help reduce unwanted deformation.
They Suit Some Plastic Pipe Systems
Modern plumbing often uses plastic pipe.
Suitable inserts can provide extra support for some connection types.
They Are Small and Easy to Handle
Pipe inserts are small parts.
You can store them easily. You can also carry them without much effort.
They Can Help During Repairs
A suitable insert may help during repair work.
However, always check whether the pipe system allows its use.
They Support Stable Connections
The insert gives the pipe internal support.
Therefore, it can help create a more stable connection when you use the correct fitting and installation method.
For these reasons, pipe inserts often appear with plastic fittings and other plumbing parts.
What Mistakes Should I Avoid?
Small plumbing parts still need careful handling.
Using the Wrong Size
Do not use a 15mm insert in a 22mm pipe.
Likewise, do not use a 22mm insert in a 15mm pipe.
The wrong size may not provide the right support.
Ignoring Compatibility
Do not assume that every insert works with every pipe.
Instead, check the product information and manufacturer’s instructions.
Using a Damaged Pipe
An insert cannot repair a badly damaged pipe.
Replace or repair the affected section according to the system guidance.
Forcing the Insert
A correct insert should fit the intended pipe.
If it does not fit, stop. Then, check the size and product details.
Overtightening the Fitting
More pressure does not always mean a better joint.
Instead, follow the fitting manufacturer’s instructions.
Skipping the Instructions
Every plumbing system can differ.
Therefore, take a few minutes to read the product guidance before installation.
How Can I Choose the Right Plumbing Fittings?
Start with the pipe.
First, identify the pipe size. Next, check the pipe material. Then, confirm the pipe construction.
After that, choose a suitable fitting.
If you have compatible 22mm plastic pipe, look for a fitting designed for that pipe. Also, check whether the system needs a 22mm pipe insert.
For 15mm pipe, choose the matching 15mm components.
When shopping for plastic fittings, check the product information carefully.
Look for:
- Pipe size
- Material
- Compatibility
- Fitting type
- Connection method
- Intended use
- Manufacturer guidance
As a result, you can make a more informed choice.
Where Can I Find 22mm and 15mm Pipe Stiffener Inserts?
If you need pipe support for a suitable plumbing project, you can explore the relevant plastic fittings category at TradeBoxDirect.
The category includes products such as:
- 22mm pipe stiffener insert
- 15mm pipe stiffener insert
These products can help provide internal support for compatible pipe systems.
Before you order, compare the product details with your pipe.
If you need a 22mm pipe stiffener insert, check that the product suits your 22mm pipe system. Similarly, choose a 15mm pipe stiffener insert for a compatible 15mm system.
When you are unsure, check the pipe manufacturer’s technical guide.
Are Pipe Inserts the Same as Plastic Pipe Fittings?
No. They have different jobs.
A fitting can join pipes. It can also change direction or create a branch.
Examples include:
- Elbows
- Tees
- Couplers
- Adapters
- Connectors
A pipe insert has another role.
It supports the inside of the pipe.
Therefore, an insert normally works with a suitable fitting rather than replacing it.
Understanding this difference can make shopping easier. It can also help you avoid ordering the wrong part.
Why Does the Correct Pipe Insert Matter?
A pipe insert may look small. However, it can play an important role in a plumbing joint.
The wrong insert may not fit correctly. It may also fail to give the pipe enough support.
Therefore, start with accurate pipe information.
Check the pipe size first. Then, check the pipe construction and fitting requirements.
Finally, compare those details with the insert specifications.
This process can help you choose the right component.
Frequently Asked Questions
Can I use a 22mm pipe insert in a 15mm pipe?
No. A 22mm insert suits a compatible 22mm pipe system. For a 15mm pipe, use a suitable 15mm insert when the system requires one.
What does a plastic pipe insert do?
A plastic pipe insert supports the inside of a compatible pipe. It helps the pipe keep its shape when a suitable fitting applies pressure.
Does every plastic pipe need an insert?
No. The need depends on the pipe, fitting, and connection system. Therefore, always follow the manufacturer’s instructions.
Can I use a 15mm pipe insert with 22mm pipe?
No. The sizes differ. Therefore, choose an insert that matches the pipe system.
Does a 22mm insert connect two pipes?
No. An insert normally supports the inside of a pipe. A suitable coupler or connector joins the pipes.
Are pipe inserts hard to install?
Most inserts have a simple installation process. However, you still need to prepare the pipe correctly and follow the product instructions.
Conclusion
A 22mm pipe insert is a small but useful plumbing component. It supports the inside of a compatible 22mm pipe at a suitable connection.
The insert helps the pipe keep its shape. It can also help reduce deformation when a fitting applies pressure.
However, you should always choose the correct size. A 22mm pipe stiffener insert suits a compatible 22mm system. A 15mm pipe stiffener insert suits a compatible 15mm system.
Do not swap these sizes.
Before buying plastic fittings, check your pipe size and type. Then, check the fitting requirements. Finally, confirm whether you need a pipe insert.
If your system needs a 22mm insert, choose a suitable 22mm product. If it needs a 15mm insert, choose the correct 15mm option.
With the right plastic fittings, correct pipe inserts, and careful installation, you can create a strong and dependable plumbing connection.